Story by Roma Kosovichev
After reading Artemy’s blog post on color restoration, we decide to create the service.
Since finding a readily available off-the-shelf solution turns out difficult, we start looking at existing image recognition algorithms.
Google’s TensorFlow machine learning library comes out along with Caffe framework for image classification. Many scientific articles on computer vision also become freely available.
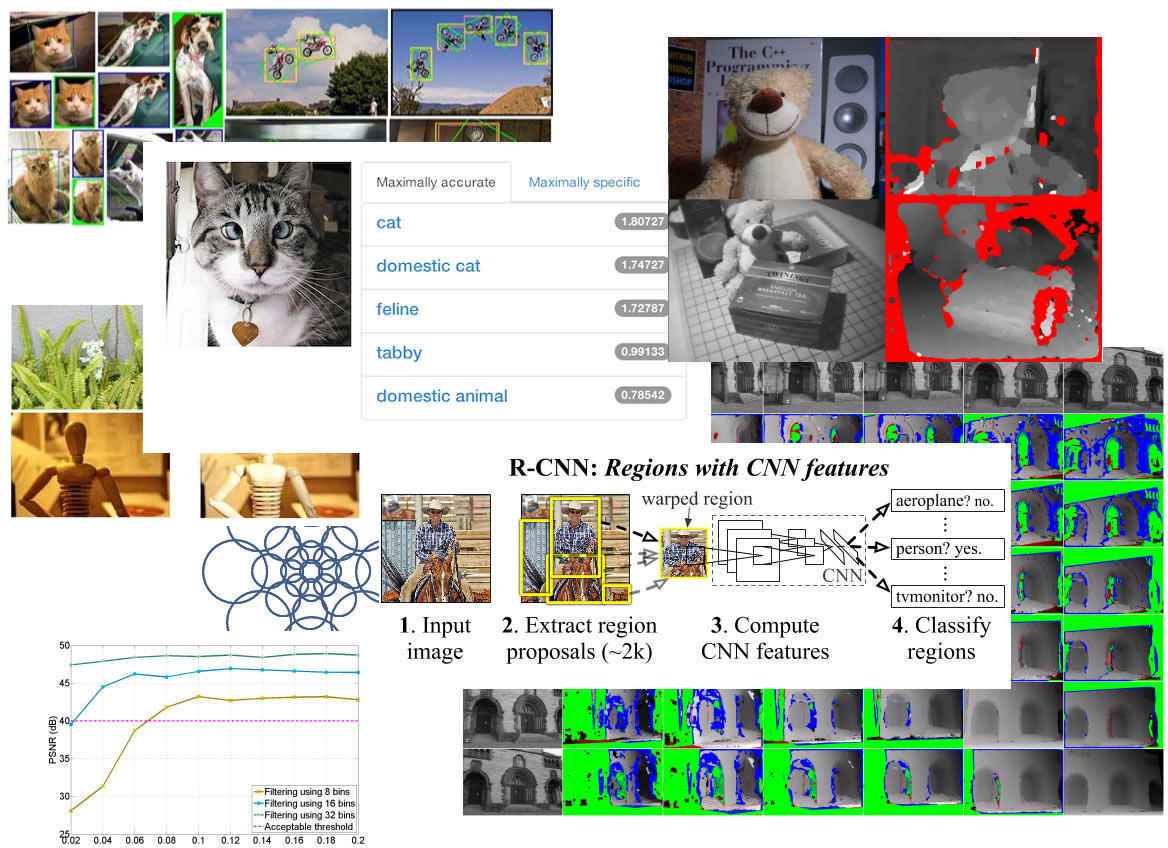
We start by examining the research performed at the City University of Hong Kong mentioned in Artemy’s post.
Creating an illustration of the steps of per-pixel analysis.
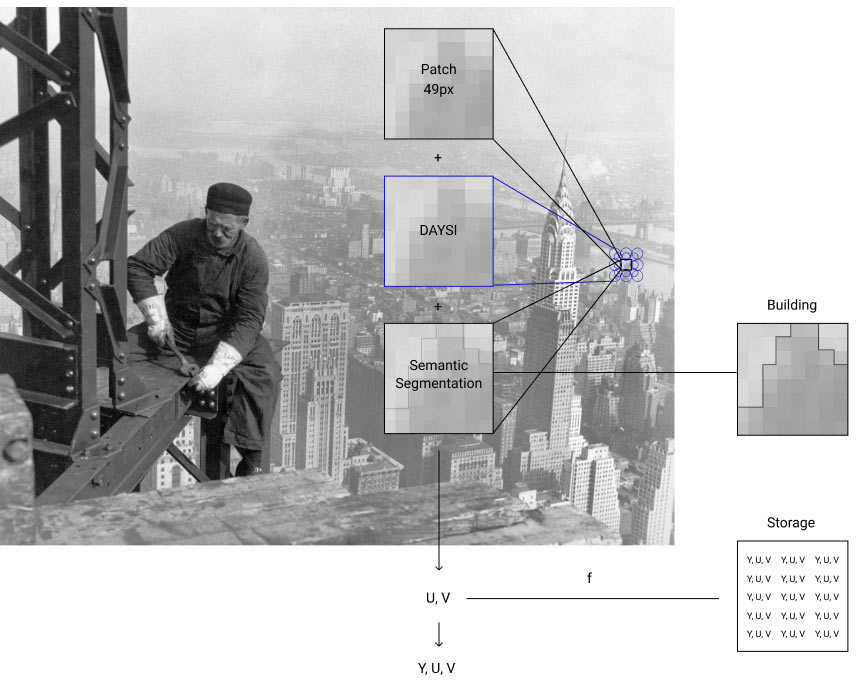
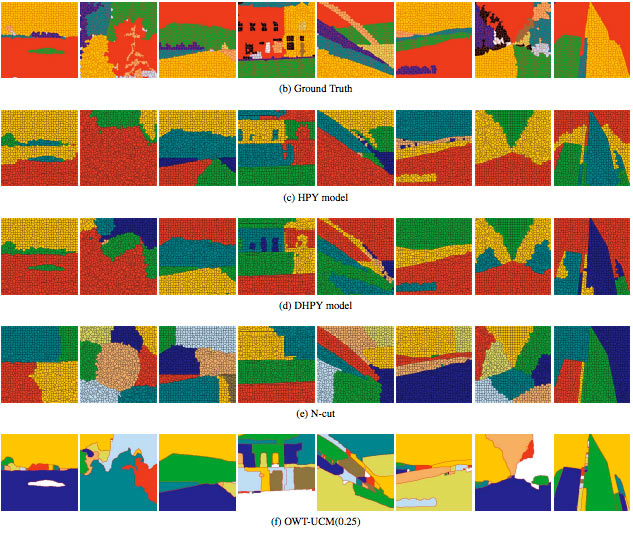
Writing a simplified program for iterating over images in Python based on image segmentation(Semantic Segmentation, Normalized Cuts and Image Segmentation).
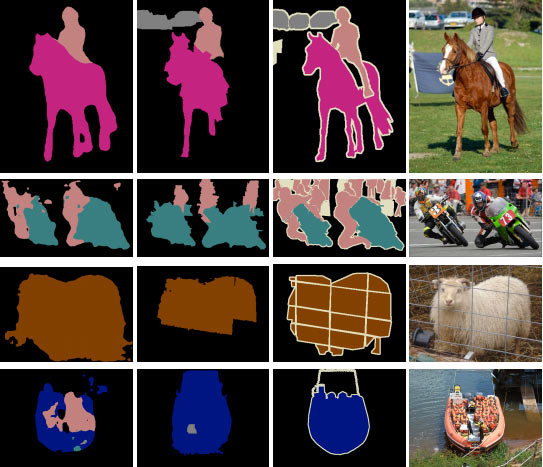
Adding a small database of pictures: small pieces of sky, grass and earth in several variations and positions.
The program analyzes the surrounding area of each pixel in the source image and tries to find a similar pattern in the database.
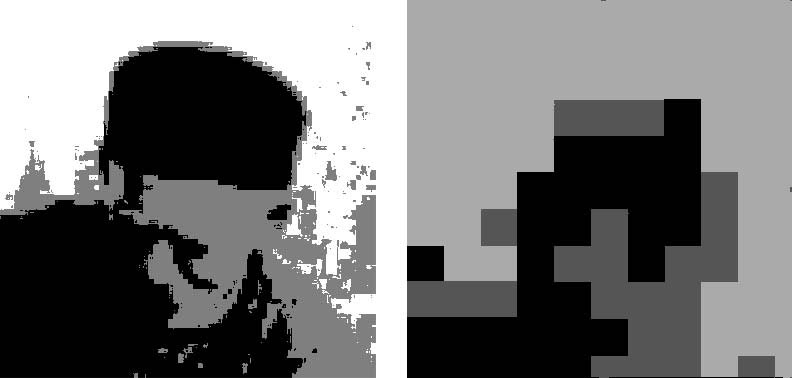
Using the Otsu’s method (binarization) to split the image into useful and background pixels.
1
2
3
4
5
import cv2
import numpy as np
# Otsu's thresholding
binary = cv2.threshold(img, 0, 255, cv2.THRESH_BINARY + cv2.THRESH_OTSU)
Next, two arrays (vectors) are compared: the source array (the area around a pixel) and the array from the database. Values of each element depend on the shade of the pixel.

Having found the nearest match using cosine similarity, we use the color of the sample to tone the selected pixel without changing its shade.
1
2
from sklearn.metrics.pairwise import cosine_similarity
cosine_similarity(vectors[pix] - self.base[i])
Even on smaller images, the program sometimes fails to produce results. The first picture was simply toned in sky color.
Adding building samples to the database and excluding very dark areas for sky segmentation, which helps separate the objects. Finding the sky turns out to be one of the simplest tasks in image recognition.
The result looks like it was selected with the Magic Wand Tool in Photoshop and colorized. The algorithm is purely academic: it doesn’t have a large pattern base or error-proof functions to locate U and V. But this result still provides sufficient understanding of per-pixel traversal. Continuing to explore open source color restoration systems.
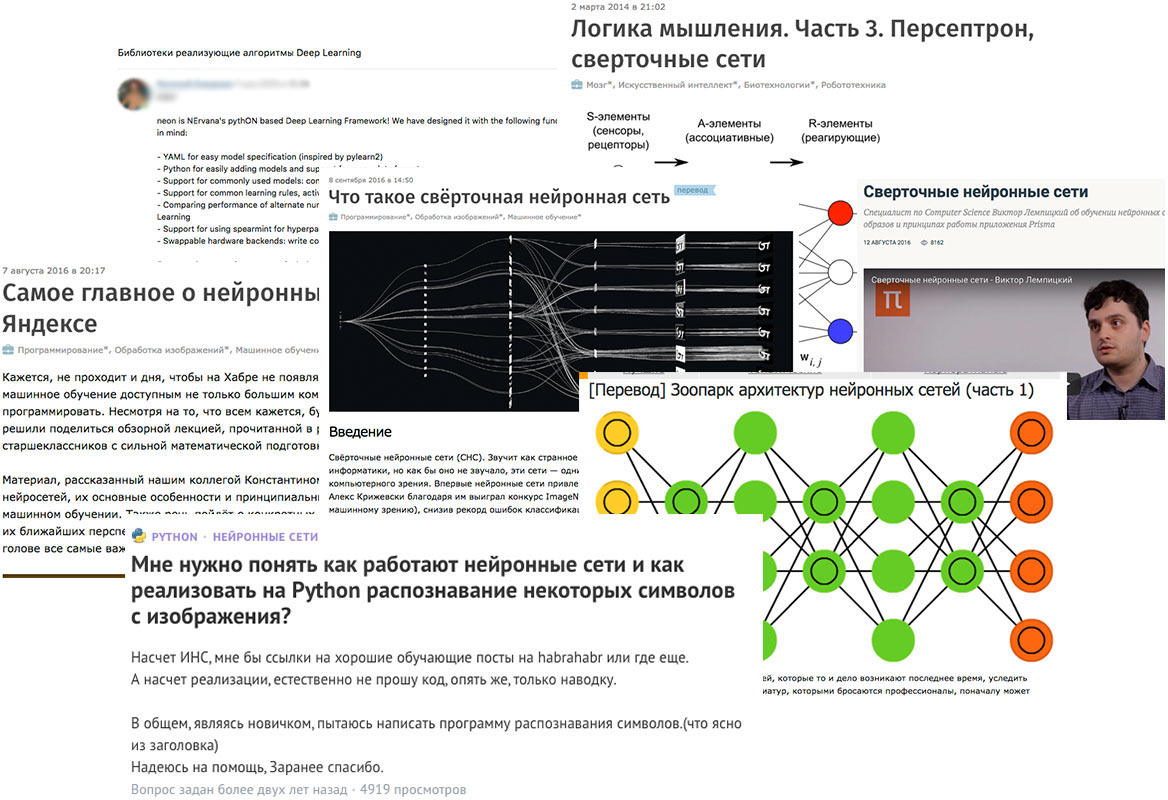
By this time, machine learning starts to be discussed more actively and the number of popular science posts in blogs grows.
After some time, we come across joint research by the University of Chicago and Toyota Technological Institute at Chicago: Learning Representations for Automatic Colorization using Caffe. Among other things, it is based on the research from Hong Kong.
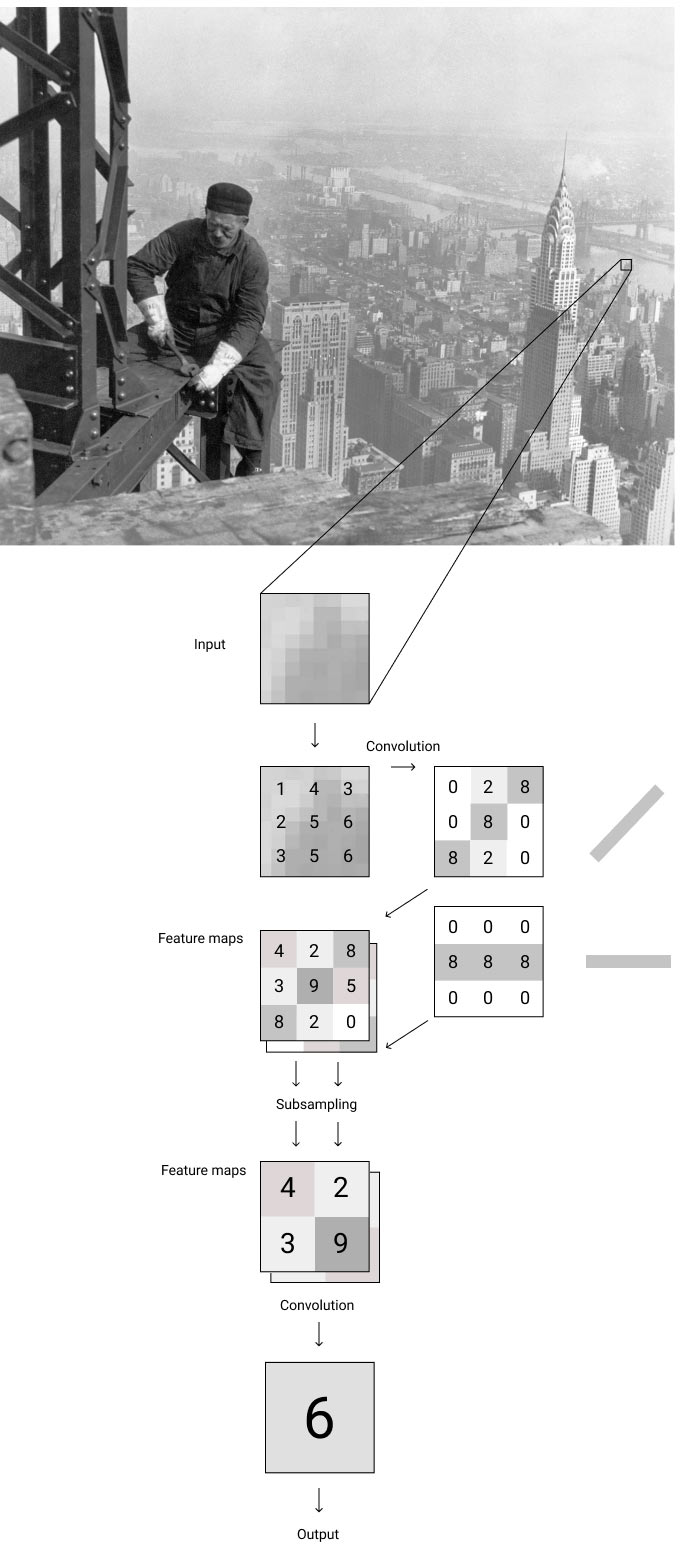
At the core of their approach is a convolutional neural network (CNN) developed by Yann LeCun.
CNN operates similarly to neurons of the visual zone of the cerebral cortex: small cell neurons respond to simple image changes and transmit signals in groups to large cell neurons for subsequent processing and transmission to nerve cells.
CNN alternates the signaling with convolution and subsampling layers, each time acquiring a feature map and decreasing its dimension.
Caffe layers with kernel size (the array for the convolutional layer) and number of filters are declared in a template.
1
2
3
4
5
6
7
8
9
10
11
12
13
14
15
layer {{
name: "conv1"
type: "Convolution"
bottom: "data"
top: "conv1"
convolution_param {{
num_output: 20
kernel_size: 4
weight_filler {{
type: "xavier"
}}
bias_filler {{
type: "constant"
}}
}}
The template and weights (a trained model) are passed on to the Caffe classifier.
1
classifier = load_classifier(f.name, weights=weights_fn)
After superimposing all layers we get a multilayered section for each layer, a hypercolumn which can be used to predict tone and color.
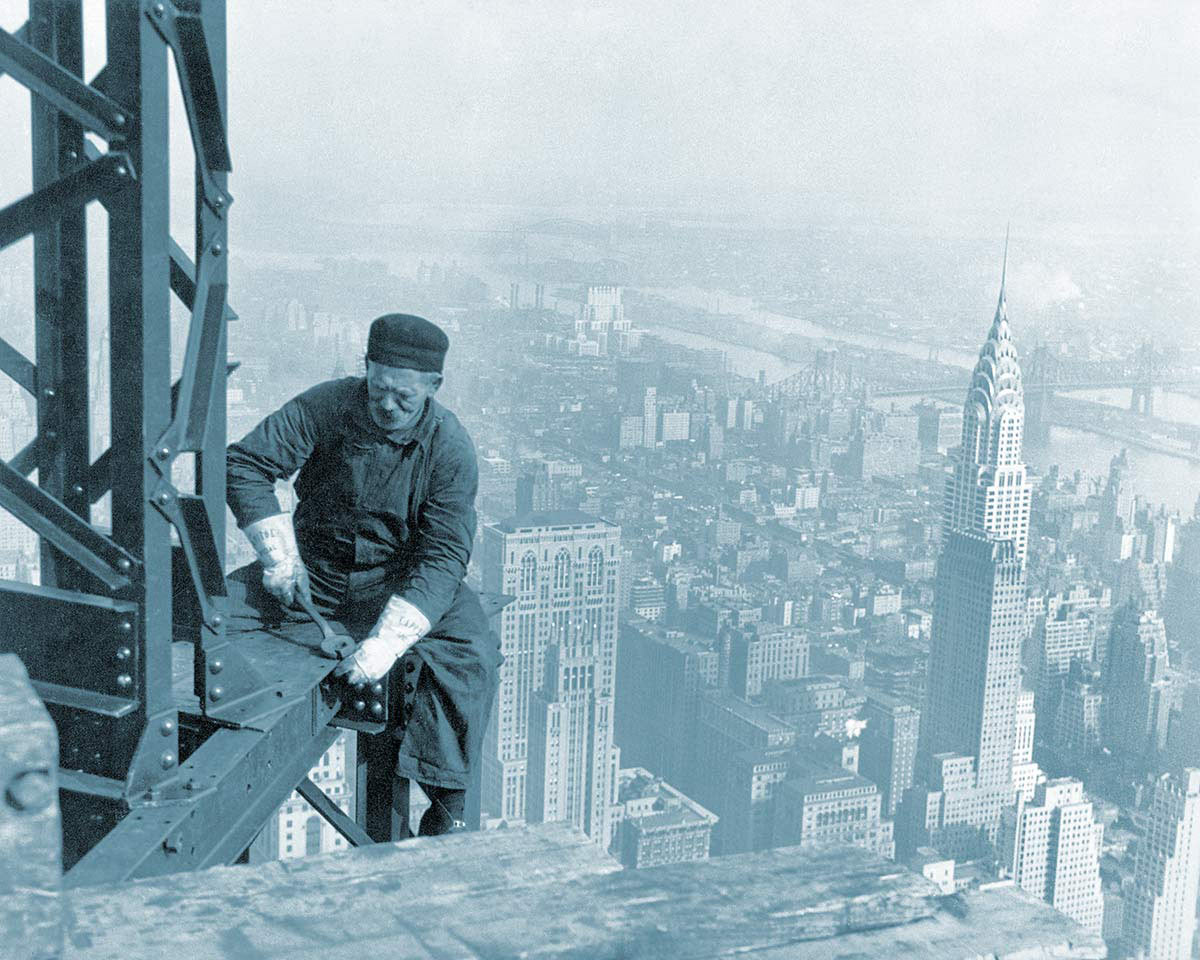
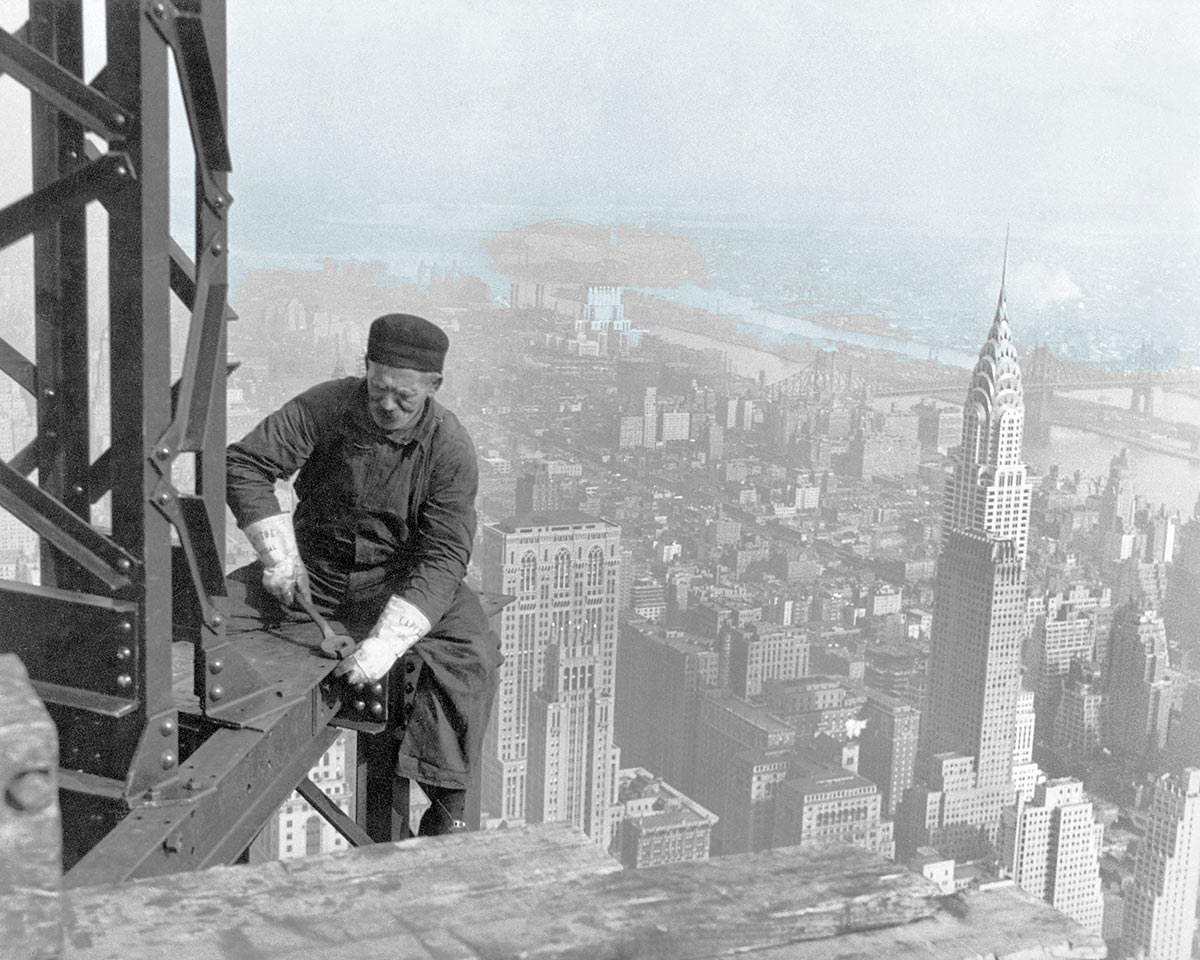
Adjusting the algorithm in a virtual machine and adding a module that automatically sets contrast and white balance and runs after the main calculations. Testing.
On average, it takes the algorithm around 30 seconds to process a single image. Trying to create a glitch-inspired preloader.
The animation is slightly annoying, changing the effect to pixelization.
Before announcing the project, moving part of the calculations into the cloud to better handle the load.
