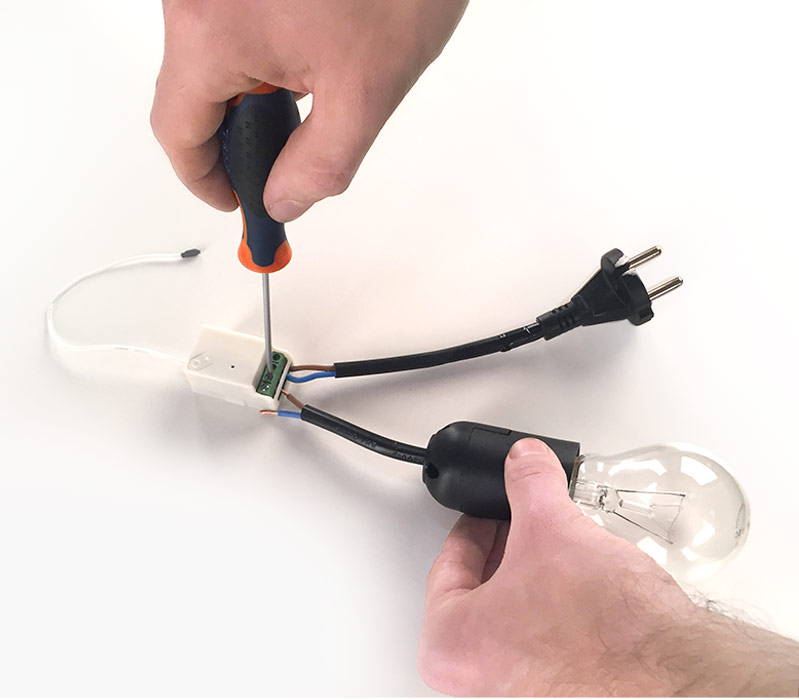
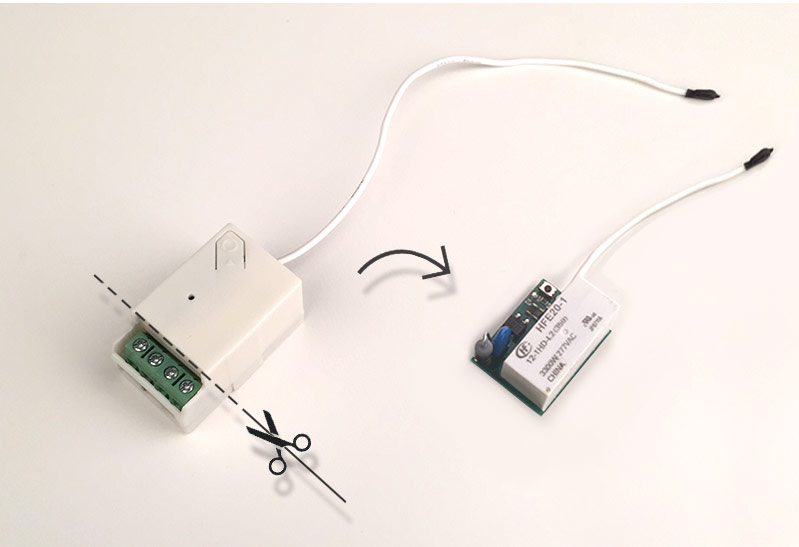
Receiving a working sample from the client. Understanding how it works.
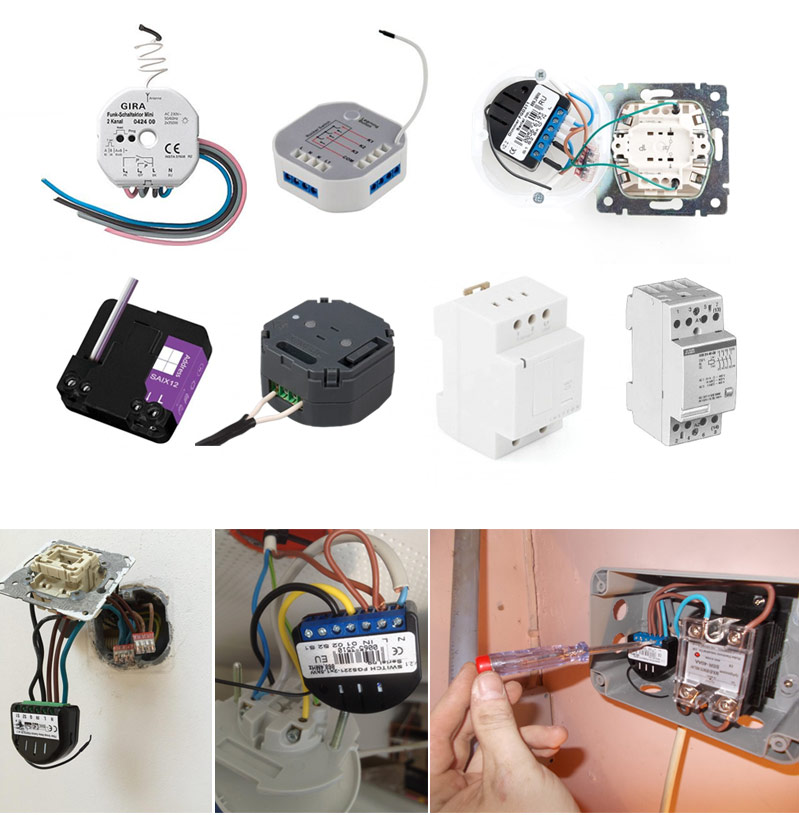
Looking at other relays on the market. All of them appear very complex, only a professional would be able to install them properly.
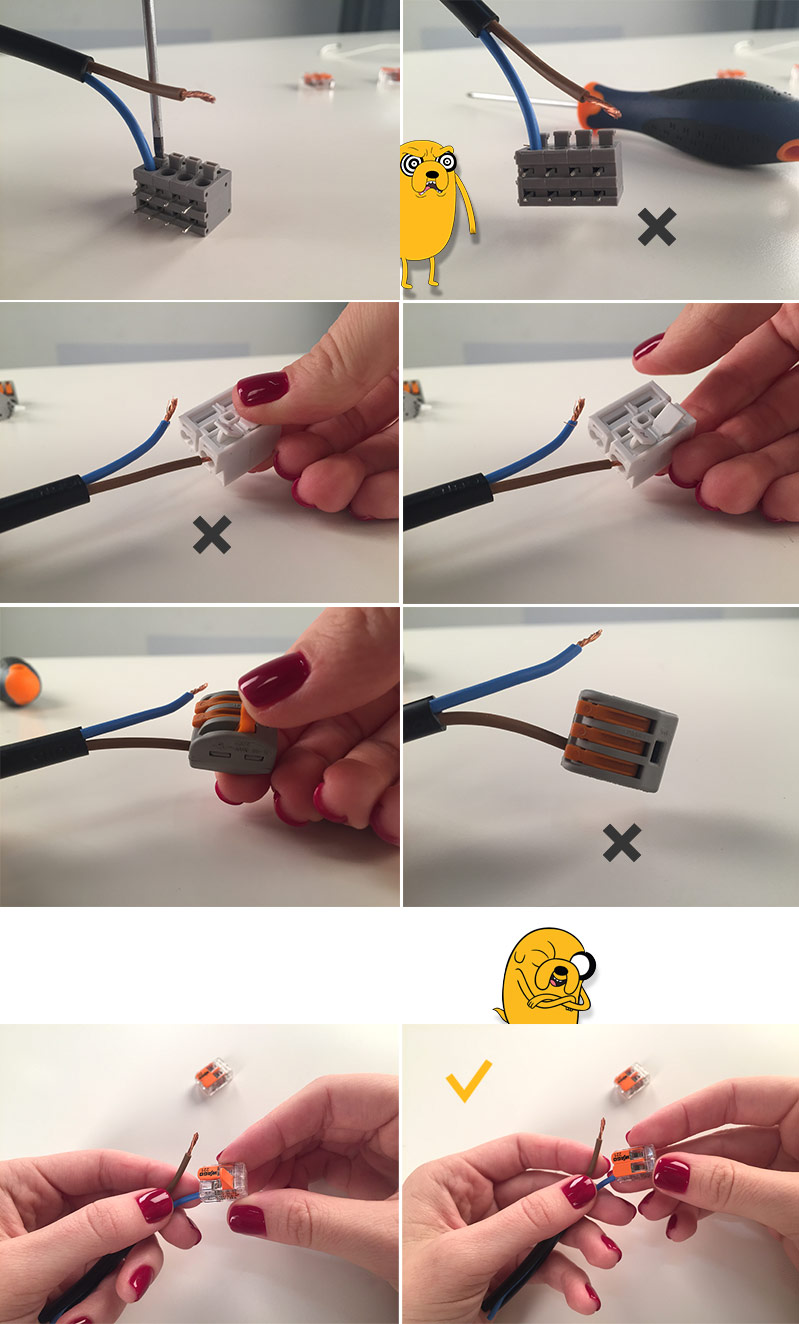
Deciding to do away with screwdriver wire terminals, moving them out of the case on to the wires. Choosing the best solution.
This gives us a chance to make the relay smaller.
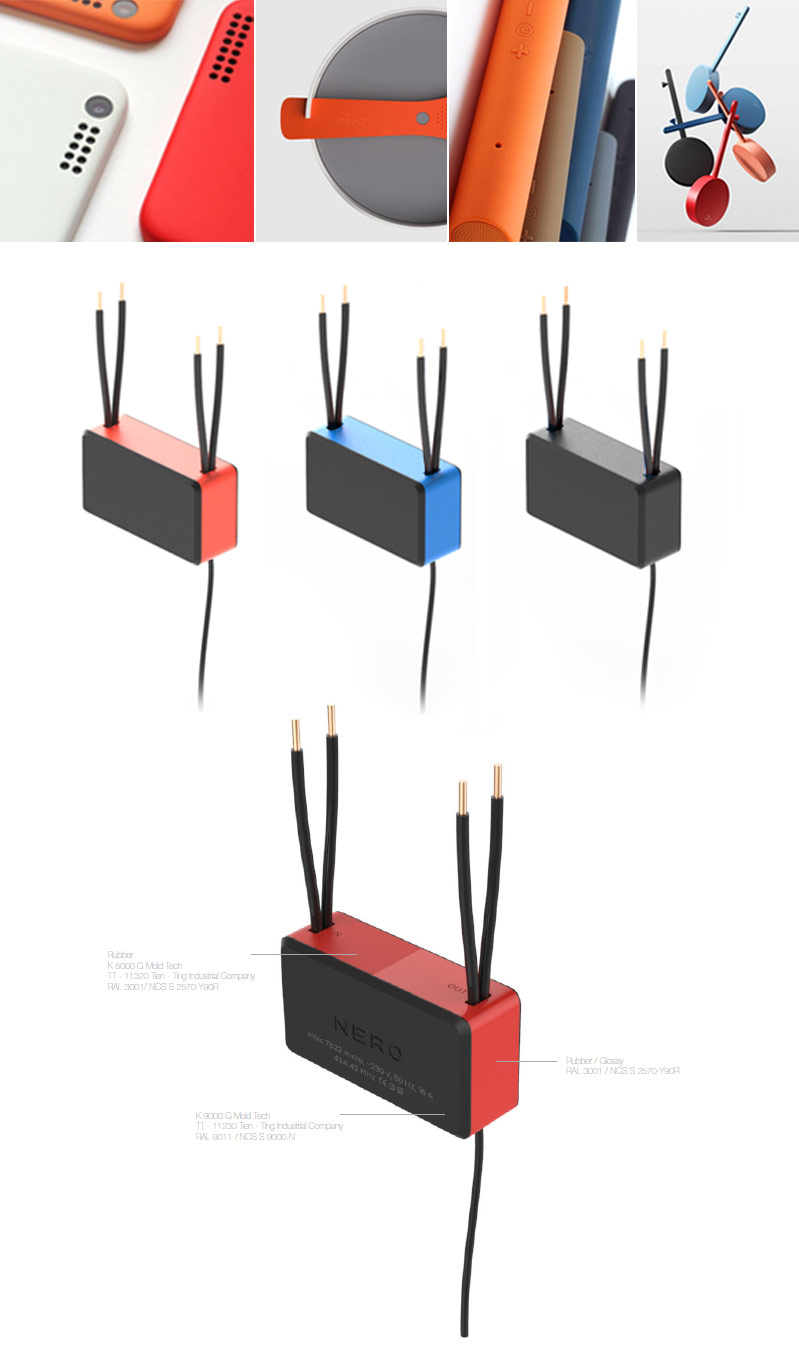
Suggesting different layout variants to the client and immediately coming up with related case designs.
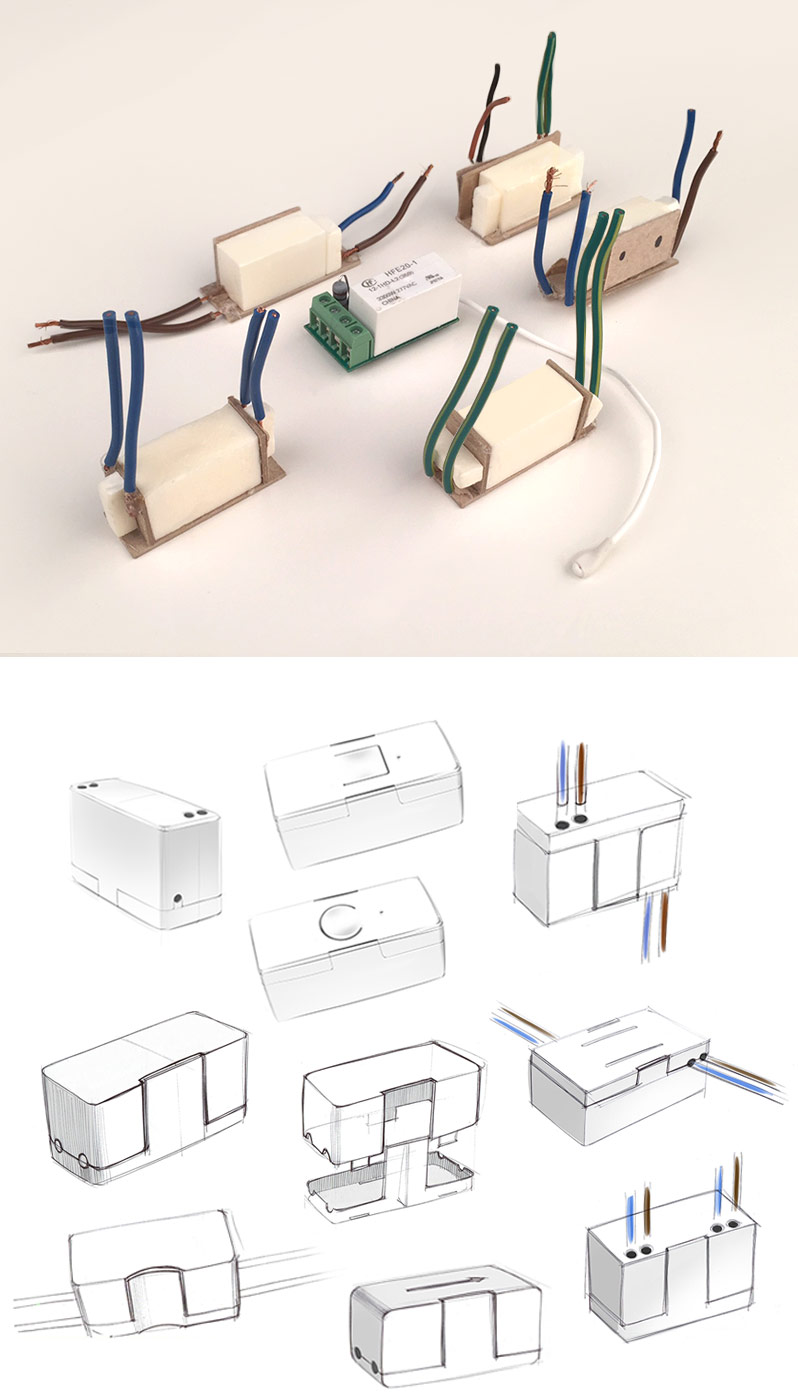
Getting the client’s approval for the layout and starting to work on the case. The case is made of two identical parts, inventing a clever lock to hold them together. Covering the connections with a silicon band.

Printing a mock-up in real size. Molding the silicon piece and putting everything together. Comparing to the original version.
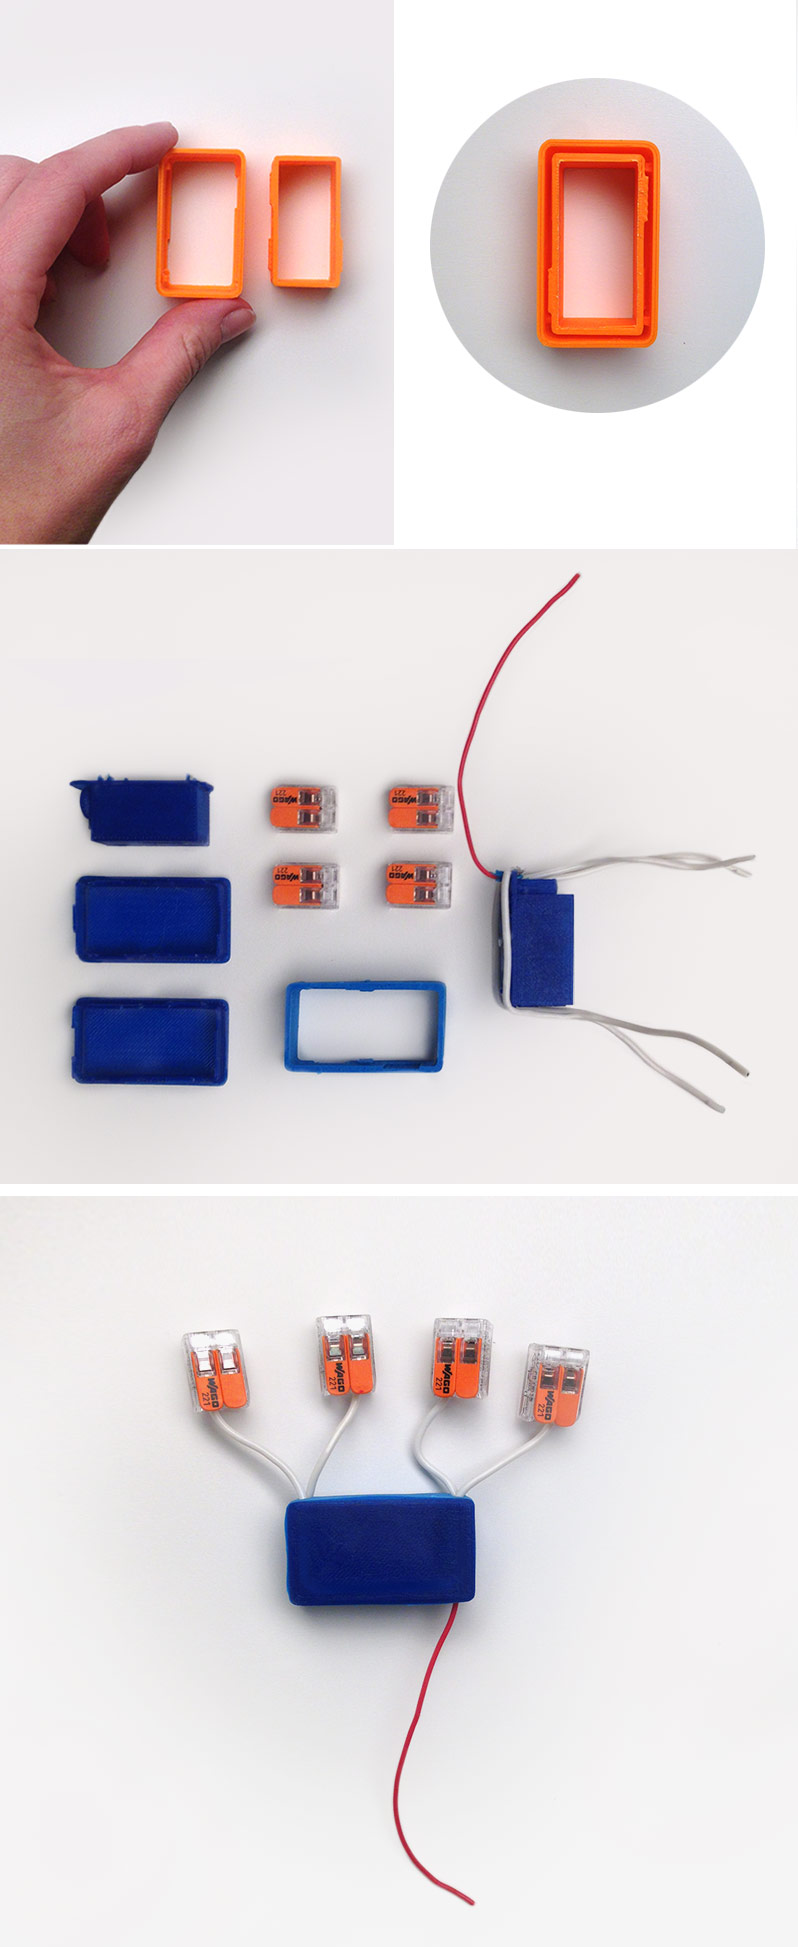
Choosing the color solution. Printing graphics.