The making of the bus shelter design for Sabidom
Overview Process
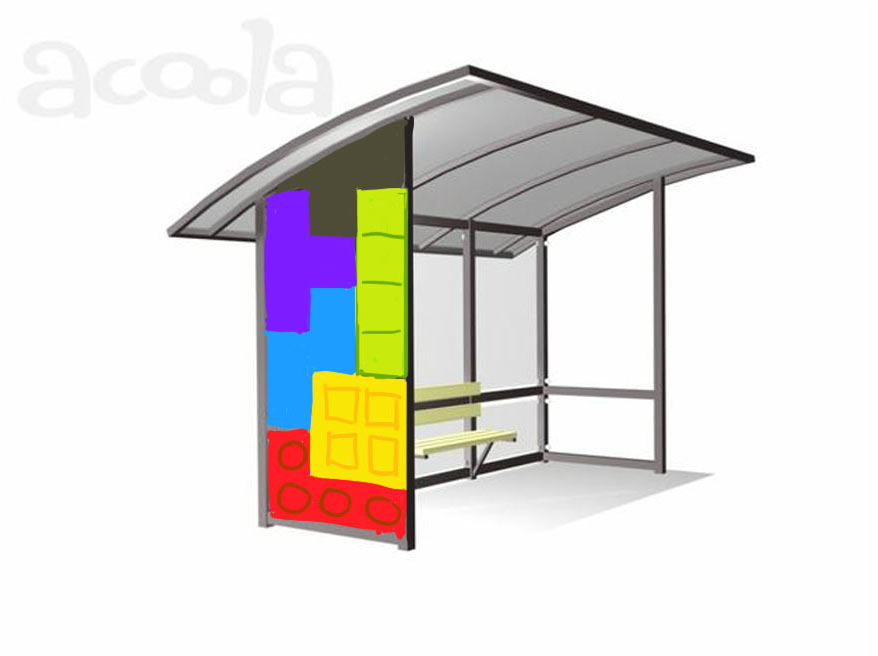
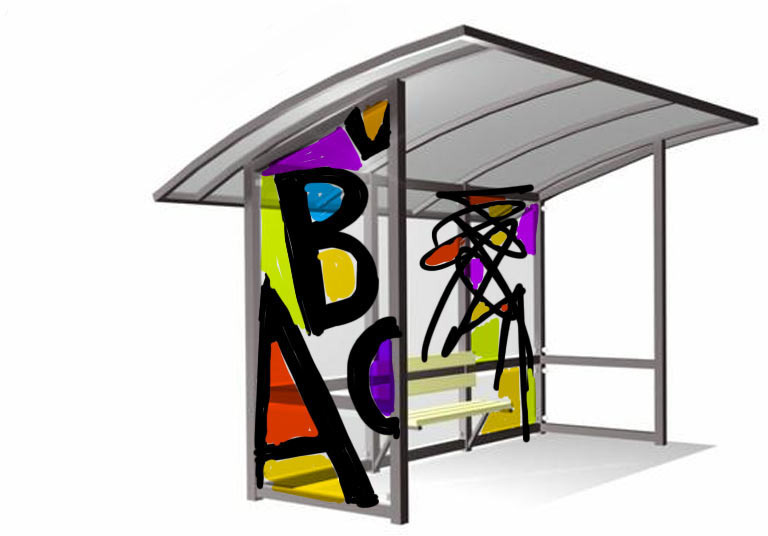
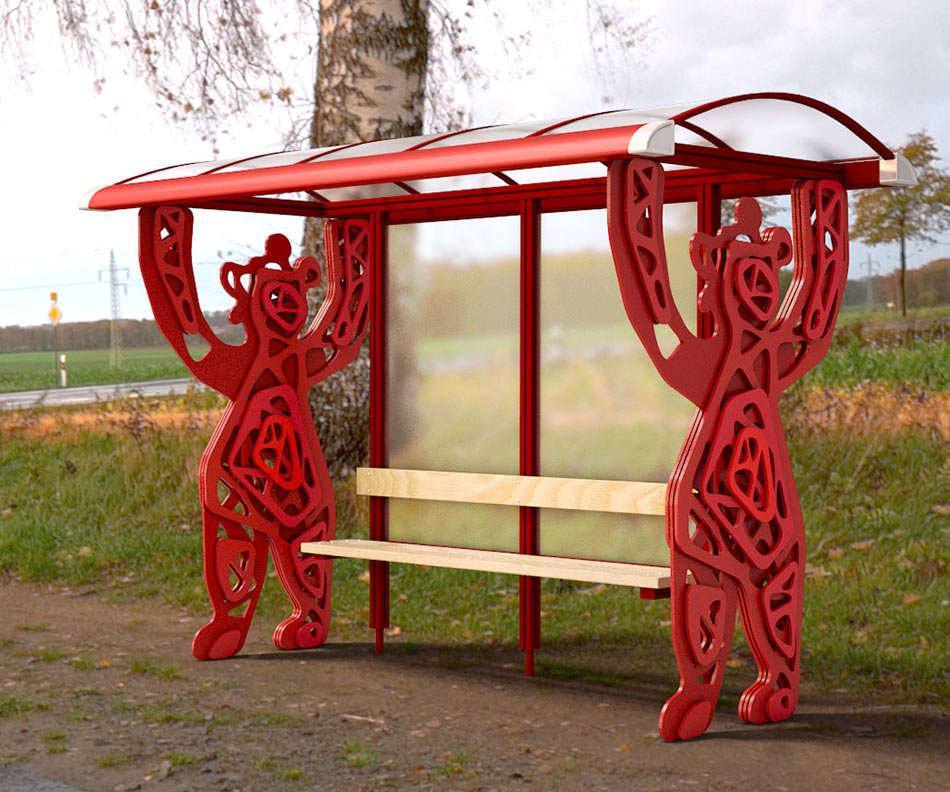
Making the first approach, just to warm up.
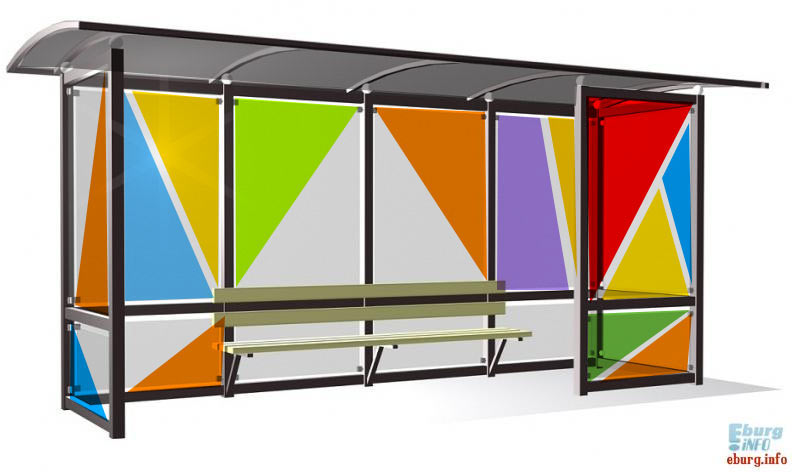
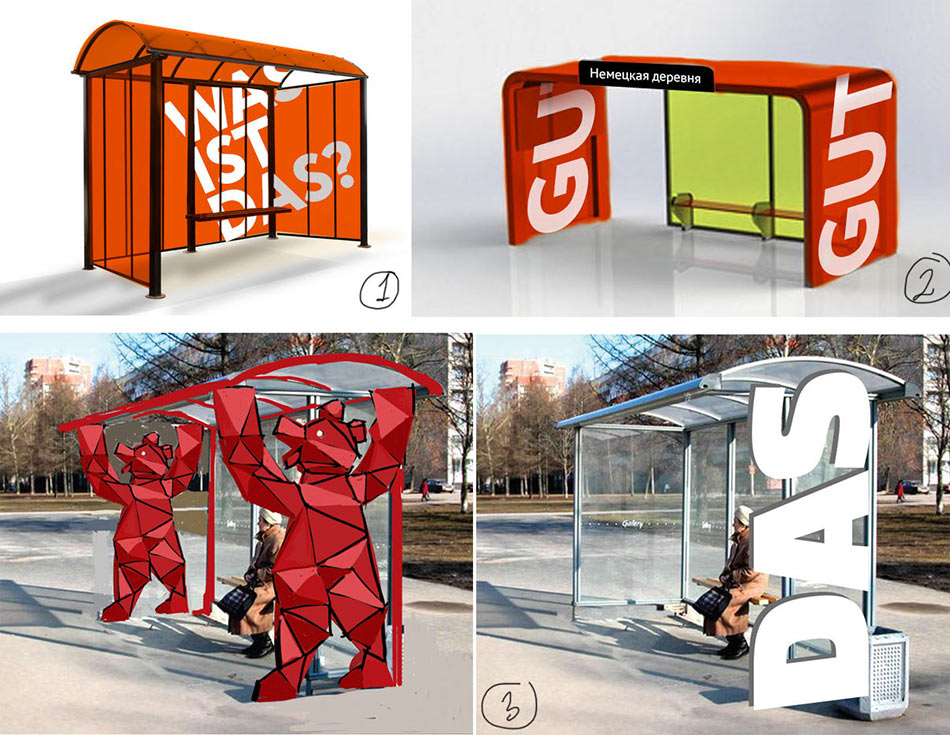
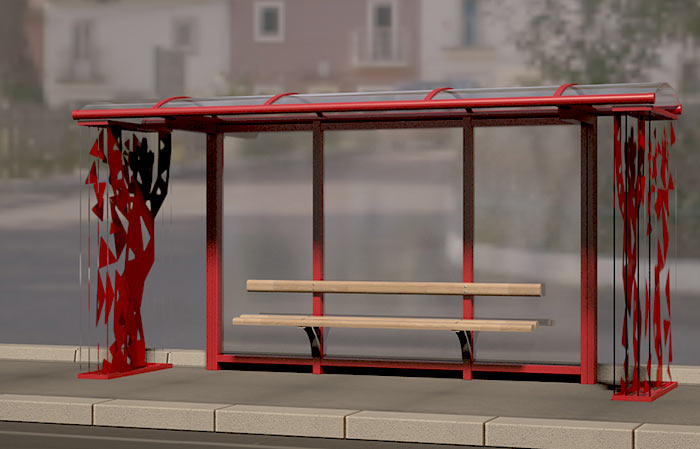
Art director: At the very least, I like the one with large letters (high-tech, the second picture) and with the bear. We need to find a matching pair for White City.
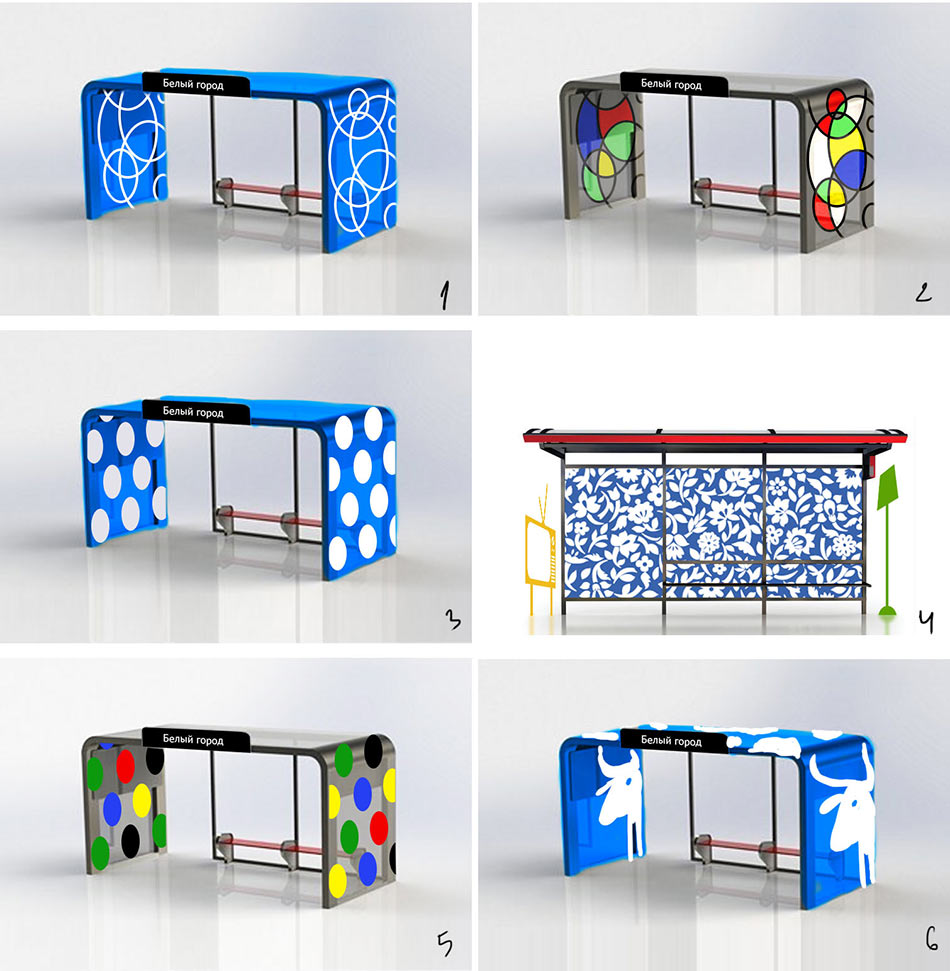
Designer: I’m not sure these are exactly matching but that’s what I have. I personally like the high-tech ones with colored circles.

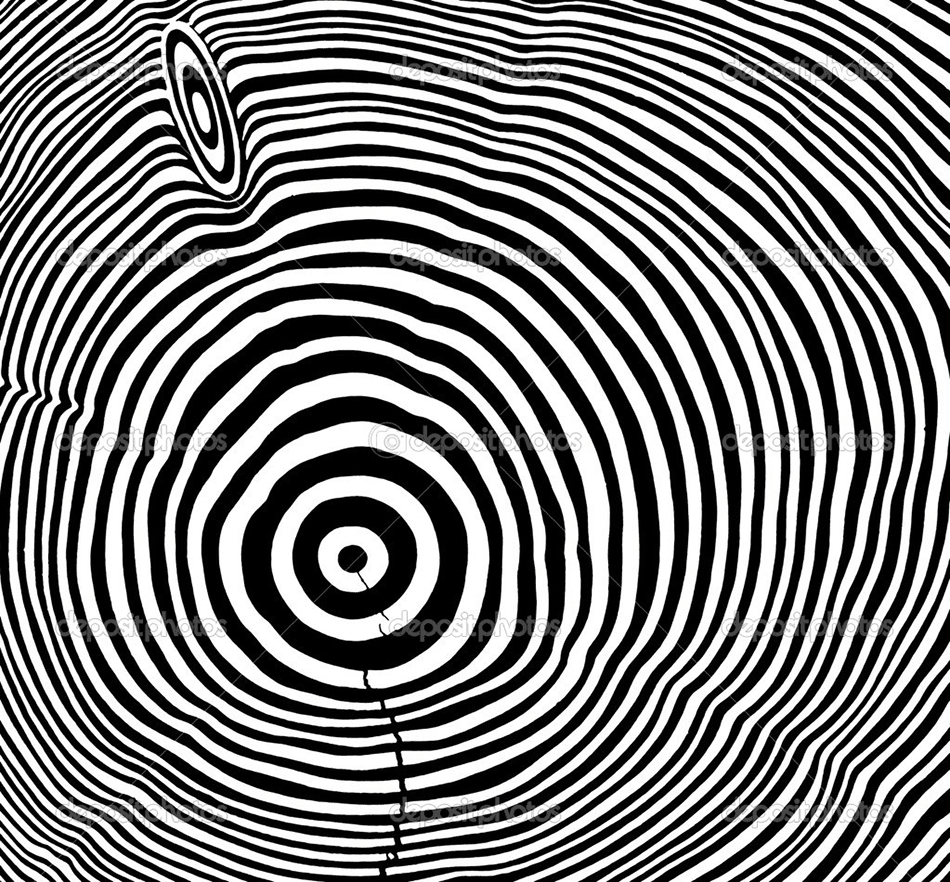
Designer: Maybe we should try using the moire effect here? There is this fun visual effect, it works even when stripes are on perpendicular walls. Here, I made a video with shadows in Saint Petersburg.
Art director: All right, we can give it a try. Although we need to make the lines and spacing between them thicker, so it’s more noticeable from the distance.
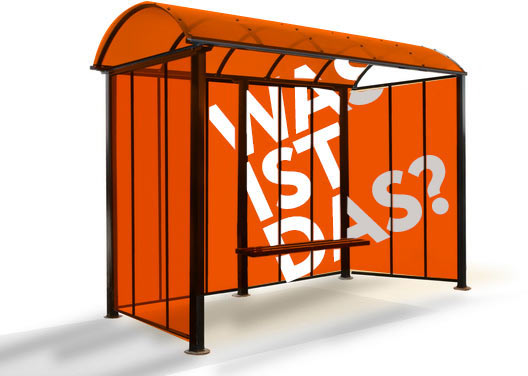
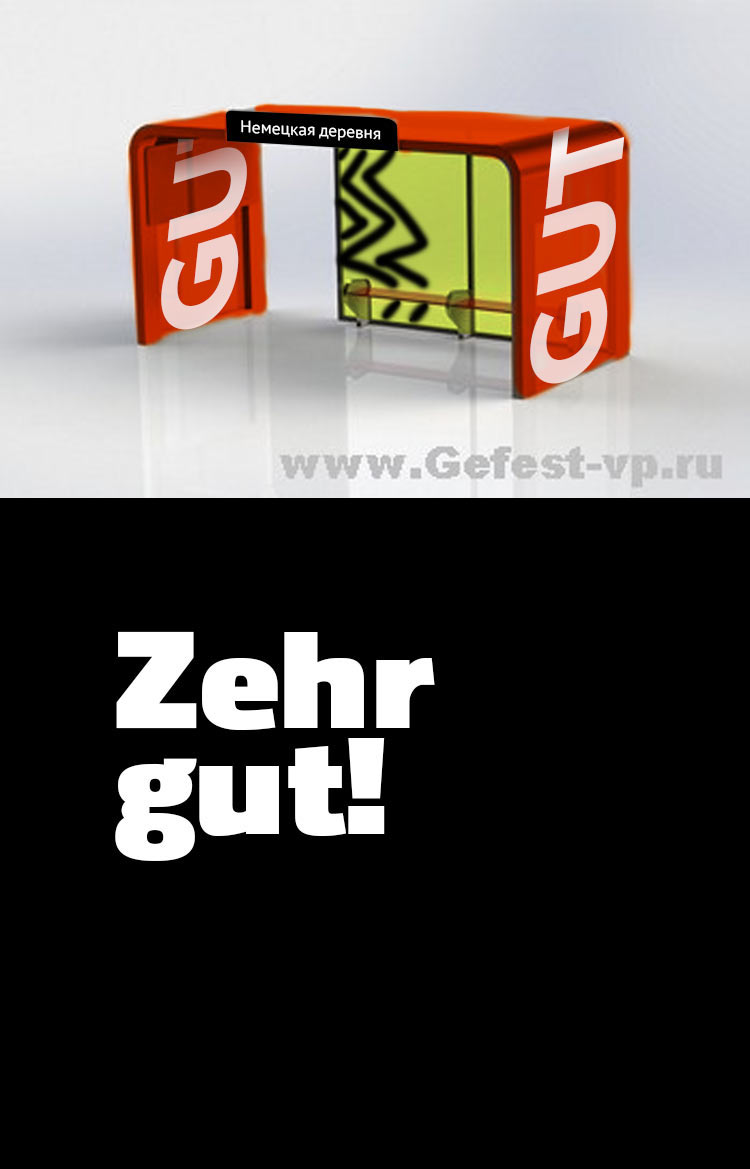
Designer: We can also do this employing typography. Natural materials in White City and high-tech in German Village.
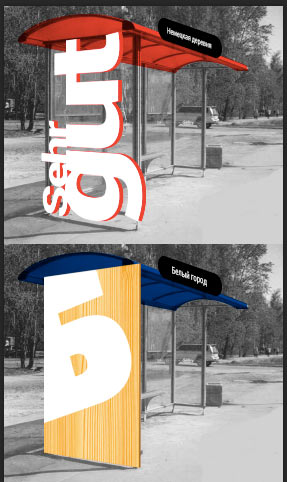
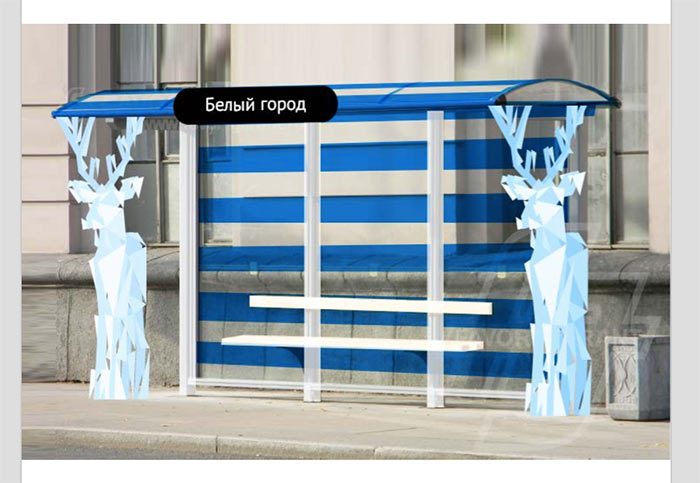
Art director: Thanks, but I think we should put this idea away for now. It’s not quite on the same level as the first one and is pretty confusing. Instead of typography, I would make one with a large tree slice image and the other with the moire effect (like high-tech opposite nature).
Designer: I’ve been thinking, what image can we use for stripes in the moire effect? Then I thought, how about just stripes? They already form a pattern and can be the main object themselves.
Art director: Good, but I would suggest something like that:
Make them white against a transparent background.
Designer: Sure, but inside the glass the color has to be different, otherwise it will all blend together. I toned them down somewhat.
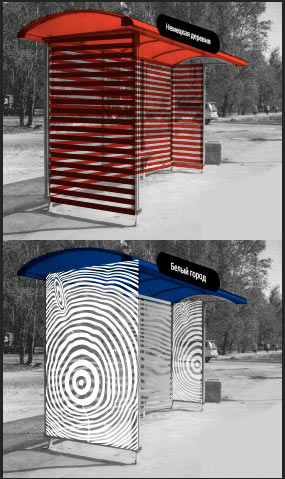
Art director: OK, thanks! Looks great.
Preparing a presentation.
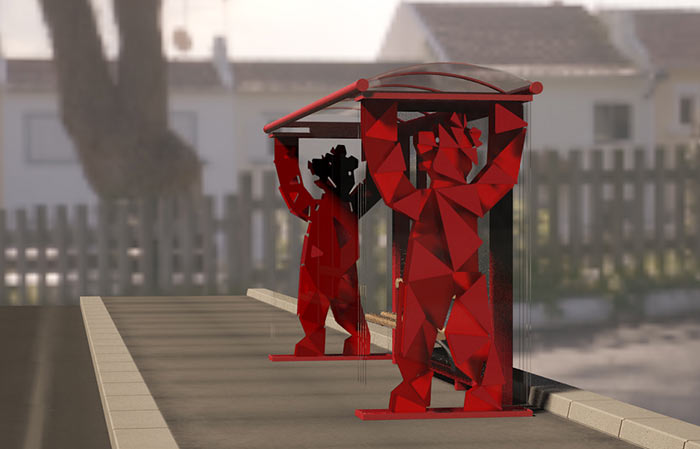
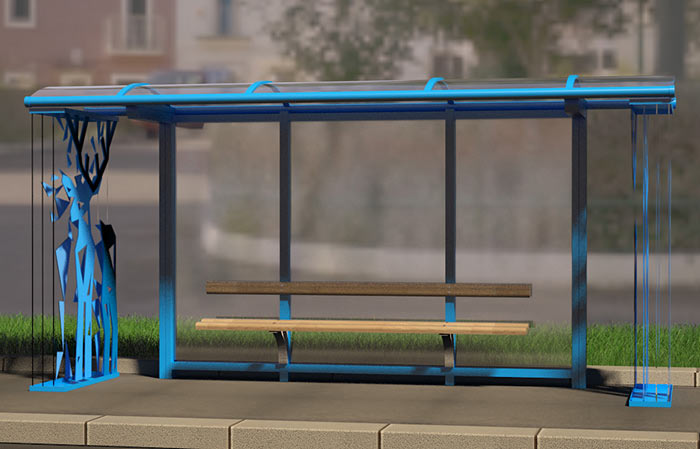
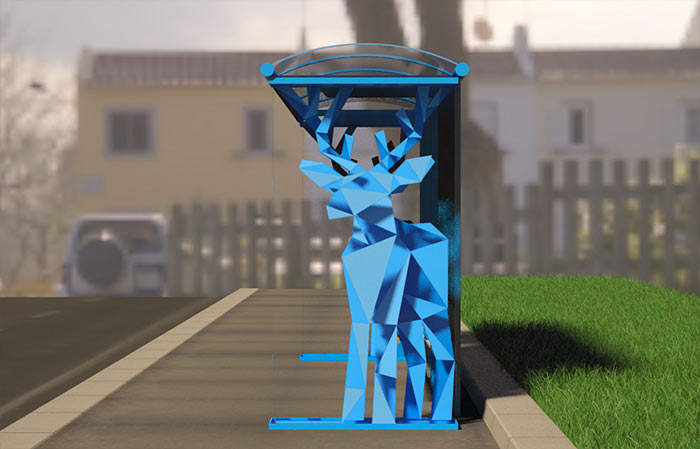
The client likes the triangulation design, but with the bear. Moving on to preparing a deer for White City and describing the technology we used so that the client can calculate the cost of production.
Art director: Maybe we should also mention the color of the stands and the blue film on the roof so they don’t forget about it. Or we can provide all this information in a separate document and also include the description and the color of the bench and all the other stuff. It will also need to have more detailed information about the technology. Later, when we elaborate it, we can turn the deer sideways a bit, it lacks weight somewhat (but we’ll discuss it later).
Manager: Wouldn’t people put trash in between all those triangles? Also, rounded corners lead to a twofold increase in production costs.
Art director: Rounded corners won’t cost extra if cut with a laser or using a CNC machine. Trash can be removed, I don’t think it’s much of a problem anyway.
Designer: I added the stripes. Although now I have a feeling there’s a bit too many graphic effects here. The one for German Village is much cleaner.
Also creating a video with the approximate layout of the bear.
The client likes it all, starting to prepare final versions.
Designer: I’ve given it some thought: why do images only come apart? How about they also transform into something new? We can rotate the triangles in such a way that they would form different images when viewed from different angles.
Look, it’s an interesting technology, the result can be really cool.

Art director: I think that’s exactly what we have, only with more layers. Our design is cheaper.
Designer: But it doesn’t have the cool interactive effect our design has.
Receiving the dimensions of the future shelter. The second designer joins in.
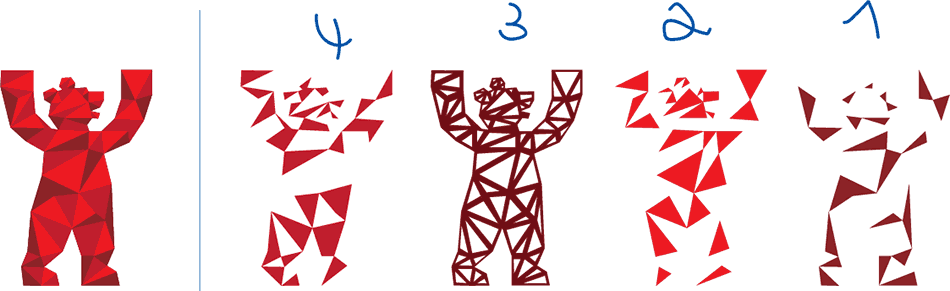
Designer-2: I’ve rendered the bear shelters in 3D and have a question: the approved design with rounded triangles in my opinion can be dangerous for pedestrians and is too difficult to manufacture. Each of the two bears is made of 148 triangles, each on an individual metal stem. I’ve created variants with four different bears. This one is with rounded edges (I tried to maintain the shape as much as I could). This one is similar to the original but with only 16 pieces per bear. And these ones are angular and laced. The question is: now that the four bears are ready, we need to choose which one to go with so I can do the same with the deer.
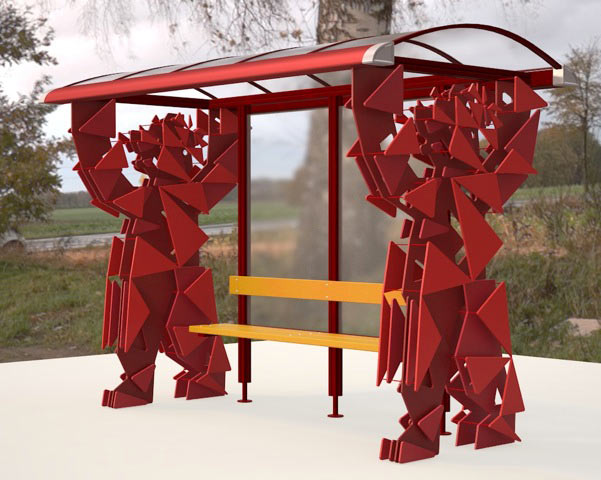
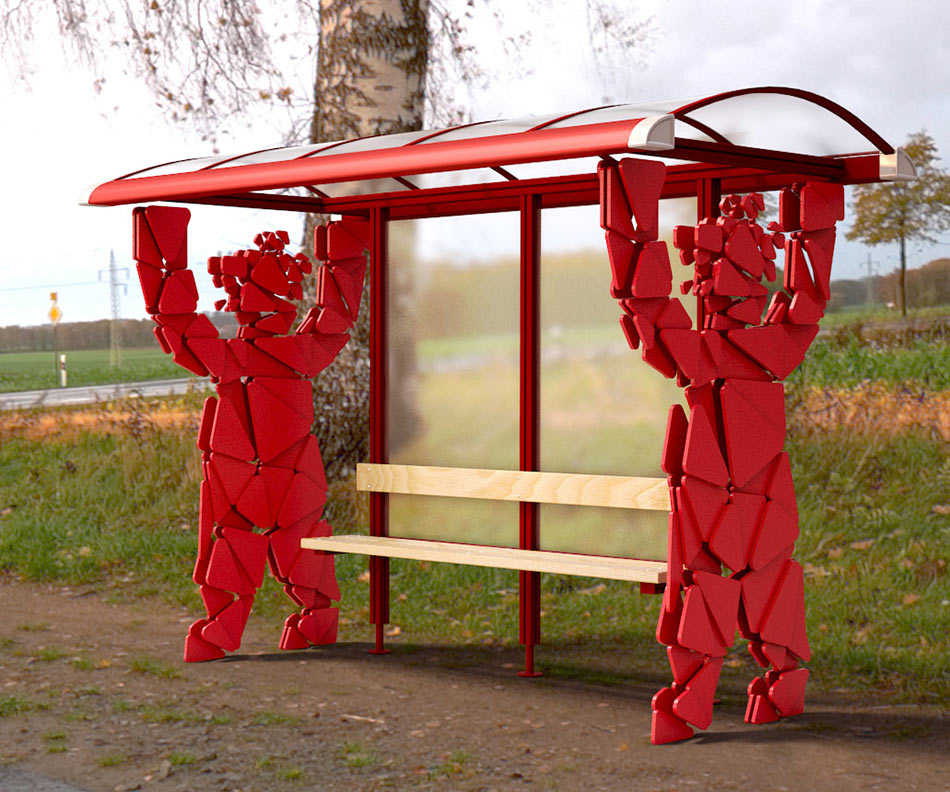
Art director: On the one hand I’m very happy you created all these designs (the angular and laced are better), on the other hand the design we conceived is not here. It featured a load-carrying member (three, actually) and the roundings were not as strong. So we can either produce the first one (which is not here) and make a decision later, or send only the two new ones (the angular and the laced ones) to the client and suggest to approve them. We need to decide what to do.
Talking to the artistic director, showing him all three variants and the video.
The client chooses the design with rounded corners.
Going to the industrial design department to get their opinion. After some consultation and discussion with the art director deciding to try an even more simplified design with several layers of shatterproof glass with attached triangle elements. This decreases the danger but maintains the gist of the idea.
Art director: Can we leave edges open without a frame? Will it look better with a frame? If it does, I would prefer it was made of metal. I suggest we show it to the industrial design department again. Will it be easy to clean?
Designer-2: Guys from the industrial design department suggested sealing the edges with transparent glass, they say it’s possible. Indeed, using opaque edges almost entirely undermines the idea, which means we have to use transparent glass. There are openings where the casing is red which prevent it from being airtight since: a) in hot weather temperature inside will rise and ORACAL will bubble; b) there will be condensation. Which is why there are ventilation openings on the top and at the bottom of the casing, though it’s impossible to stuff a cigarette there.
Showing the result to the artistic director. Everything is OK, although the graphic elements should be done in paint instead of ORACAL.
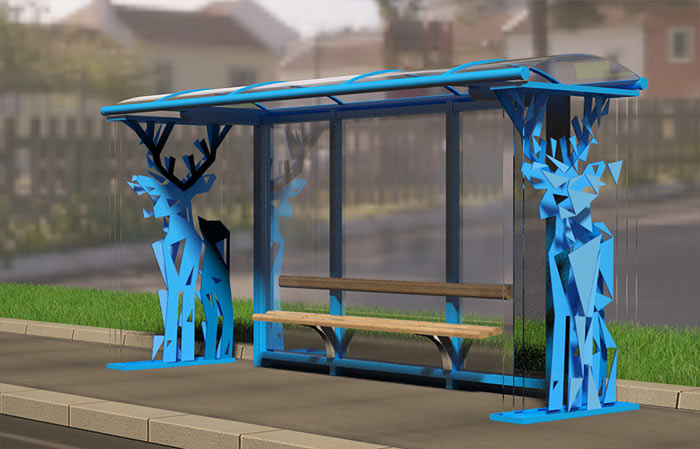
Sending the design to the client for approval and preparing variants with the deer for White City. The final structure looks like this: four layers of shatterproof glass on each side, separate elements attached to each layer which come together to form a single image, the edges are sealed with transparent glass. The most “loaded” layer is the glass on the passenger side, the lightest layer is outside.
The client likes the solution, calculates the cost of production and gives the approval.
Preparing final mock-ups. Starting with the bears.
Art director: I thought we had five layers, yet you only have three here?
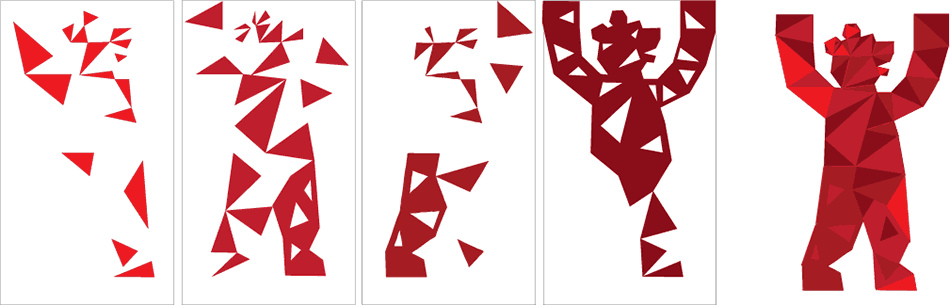
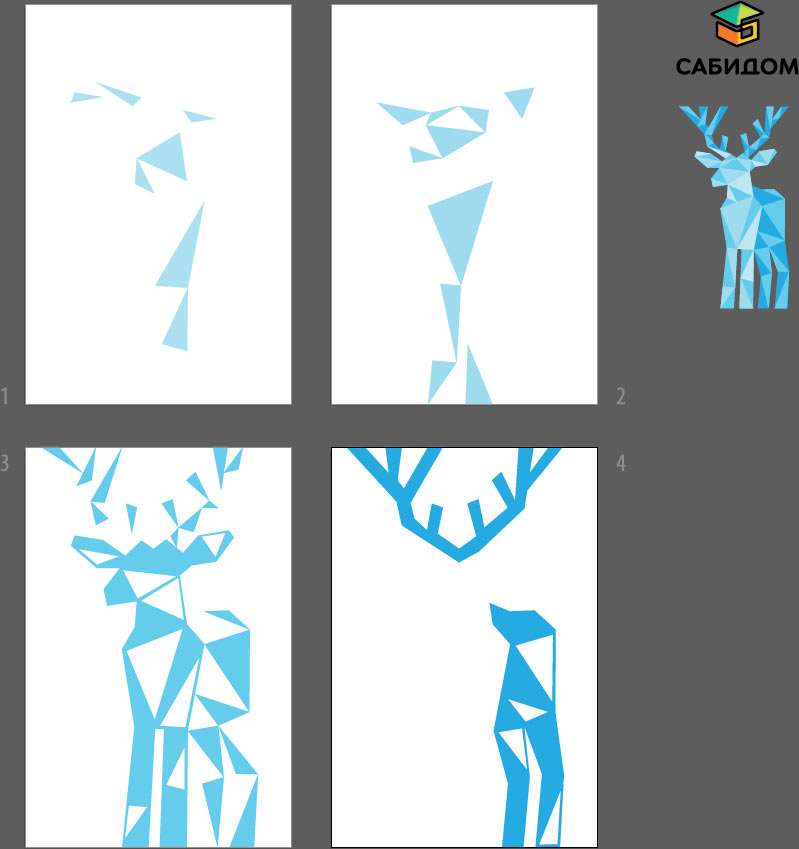
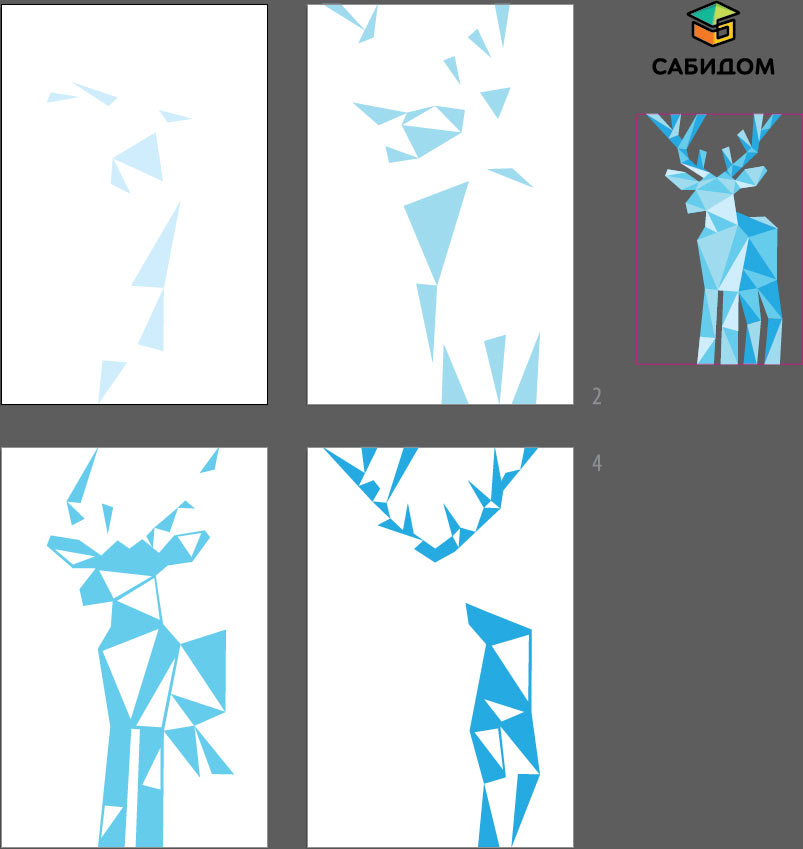
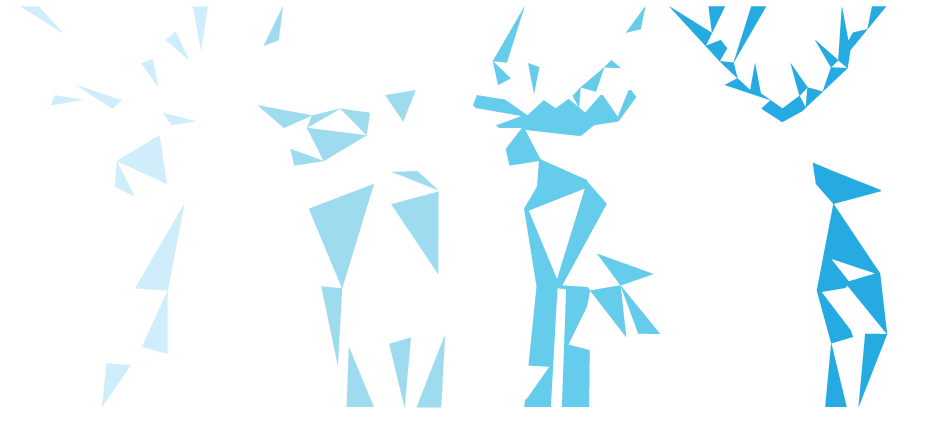
Designer-2: There are four, actually. The mock-up also had four, have a closer look, there are four layers of glass on each side. We can use seven levels, so that the layers are arranged like this: 1-2-3-4-3-2-1.
Art director: We also had the smallest details on the outside, now the internal (passenger) side has no small details at all. It doesn’t look good.
Designer-2: Here is what we had: six layers, four of them unique, the number of large details grows, then decreases. That’s how it was in the test video. The other sketches had four layers, just like mine. What should we do?
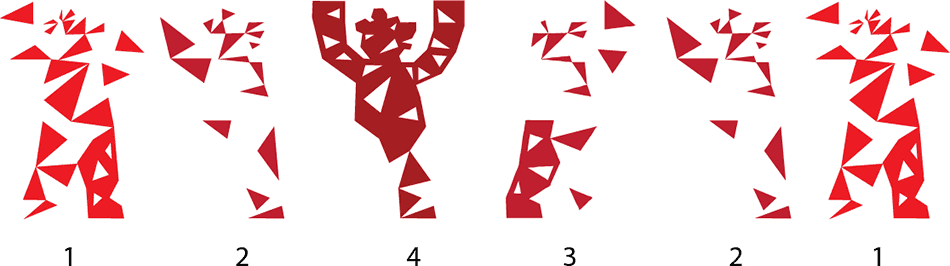
Art director: We need to start over. Your design has elements that are entirely covered by the external layer, which means the calculations are incorrect.
Designer-2: Maybe like this? We’ll use a lighter wireframe basis with only the pattern covering it and finally in the last layer some pieces of the pattern again for the back side?
Making small layered mock-ups.
The bear is done.
Starting to work on the deer.

Art director: 1. Add more antler pieces to the front layer. It wouldn’t hurt to add a couple of small pieces there, would it? 2. I would also like to add at least a couple of polygons besides hind legs to the back panel. 3. We are not drawing stripes, we are doing everything in polygons. Which is why it is incorrect to make a framed window in the back panel where a triangle from a previous layer is seen, because if we remove the stripe, the exact same thing will be visible. You can also remove such stripes from the middle layer.
Designer-2: Like this? Or move the antlers to the first layer?
Art director: Yep, it would be great to have small pieces of antlers on the first layer.
Art director: OK.
