August 2012, the first meeting. The client tells us about the project and its benefits, provides a list of associations and describes the feelings the aircraft has to evoke. Getting all the documentation we need to start our work.

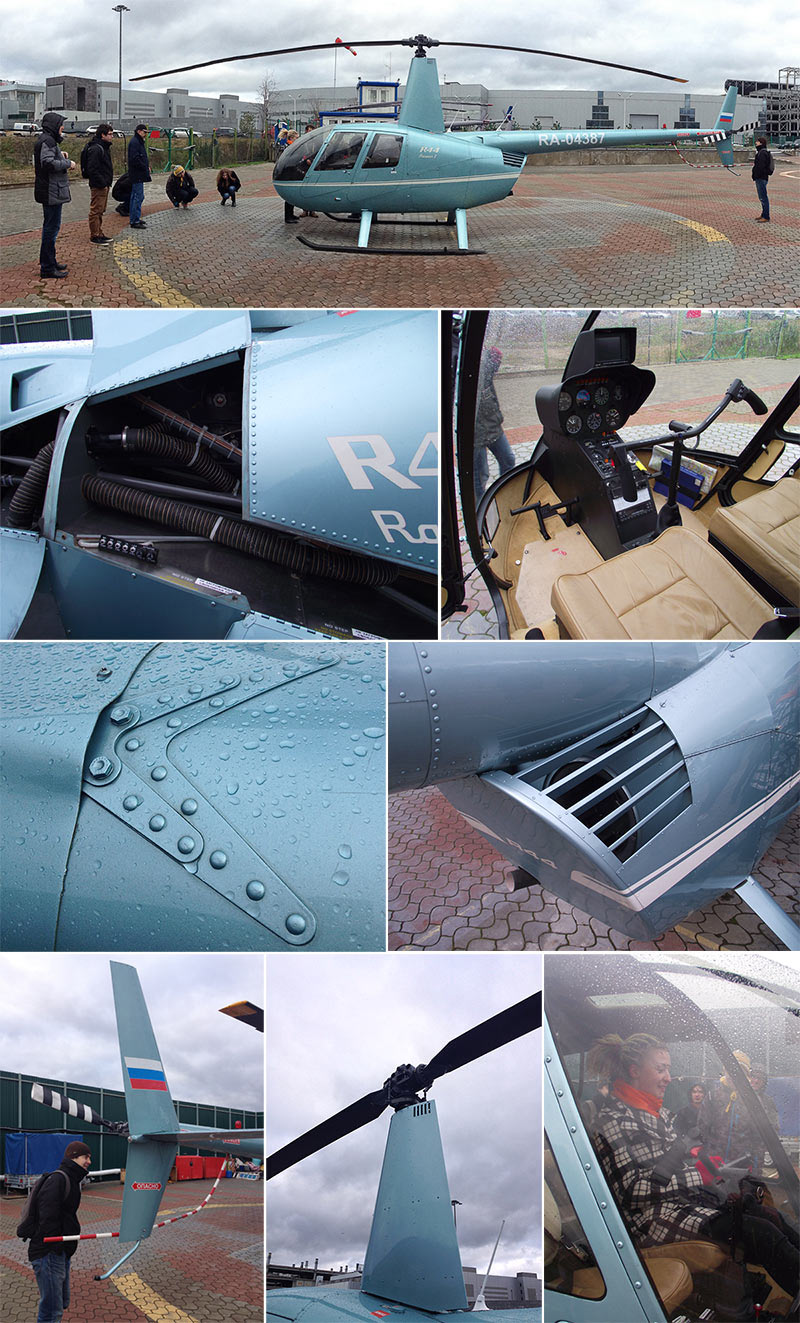
Going to see the helicopters in real life.
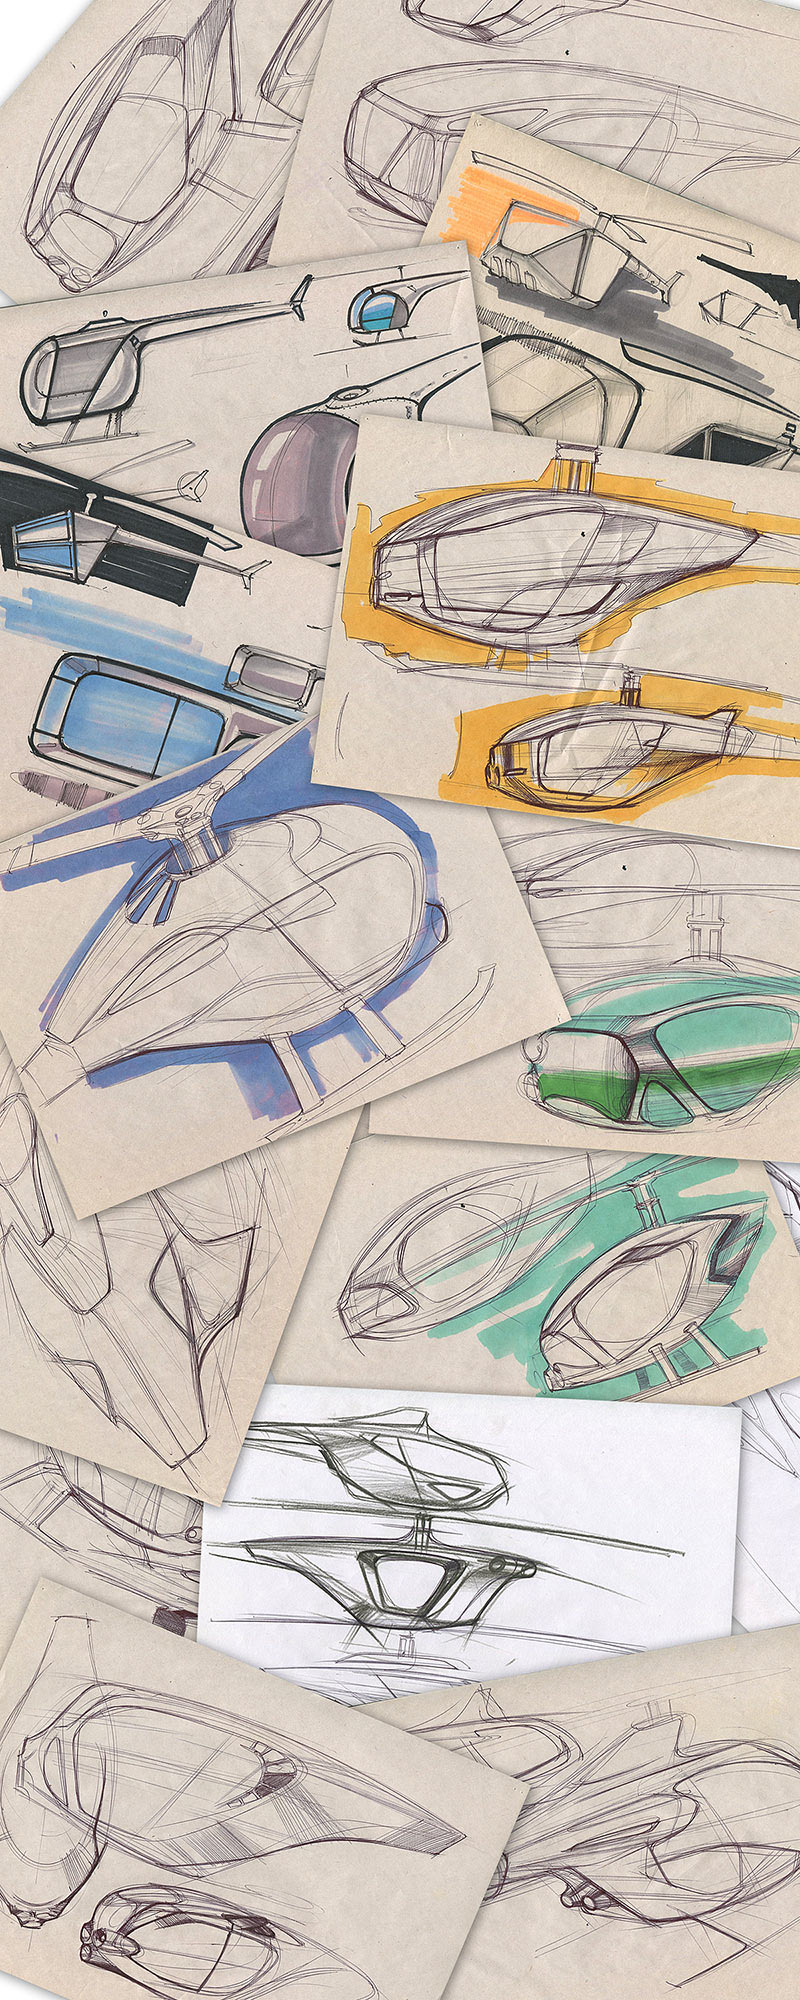
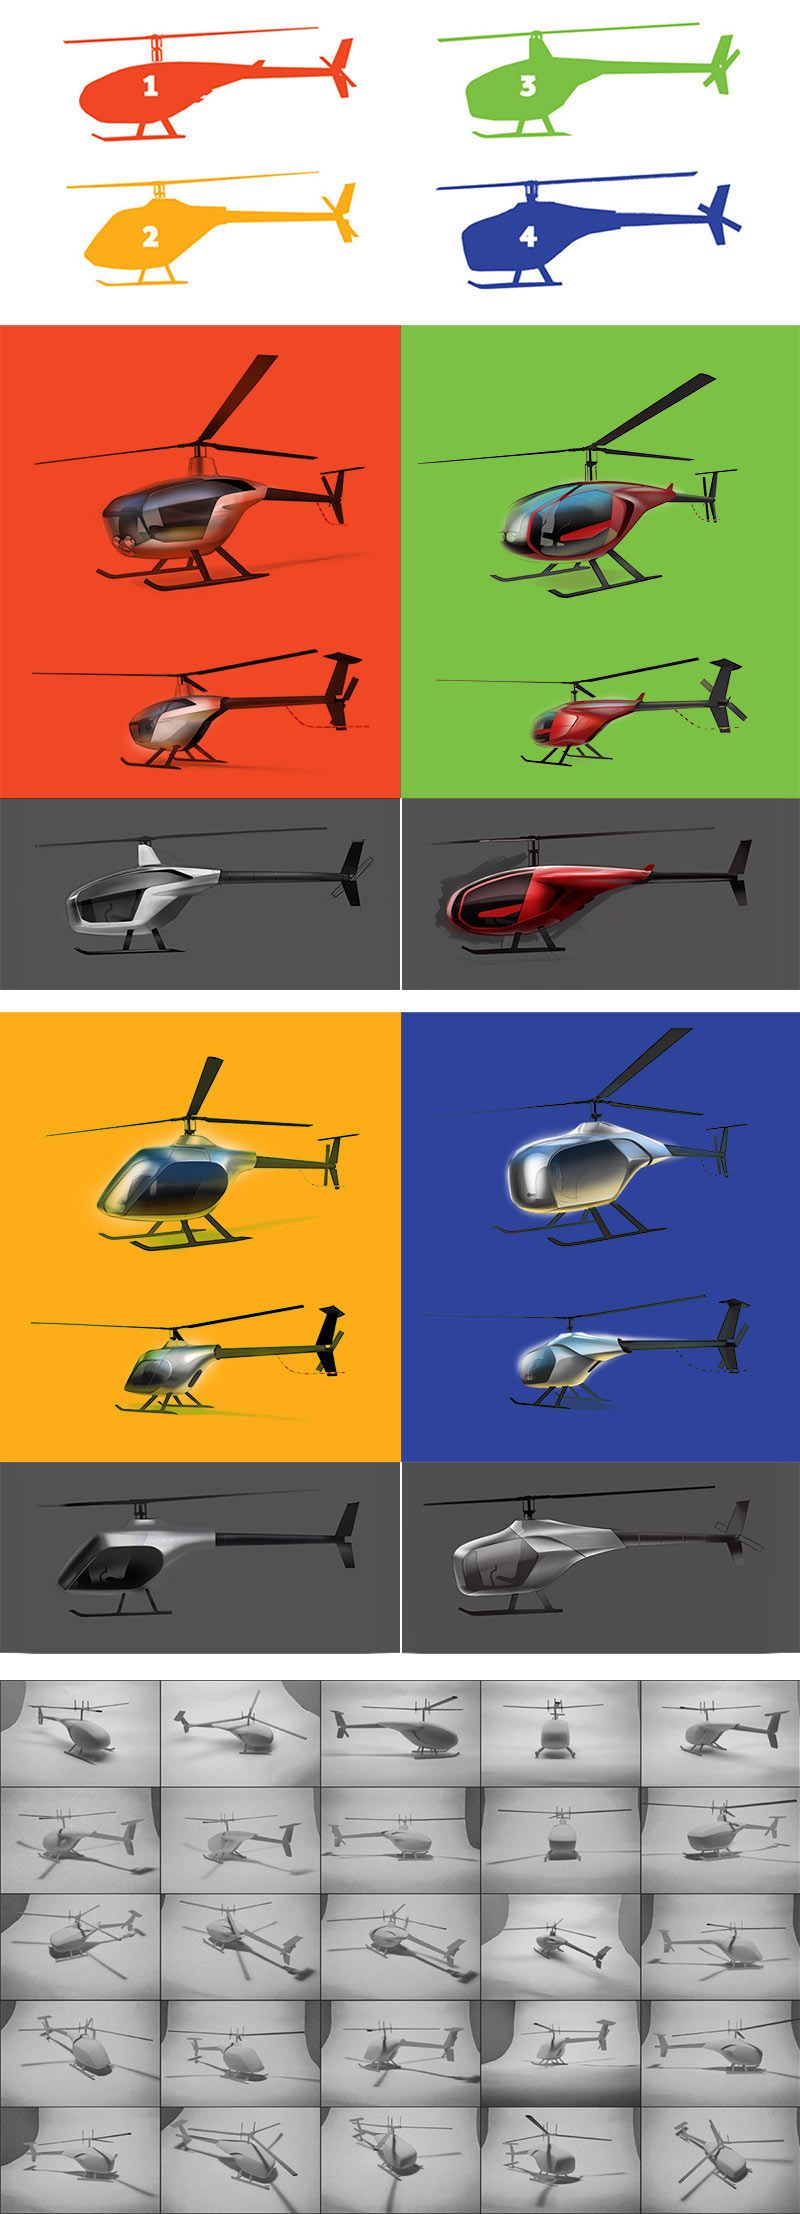
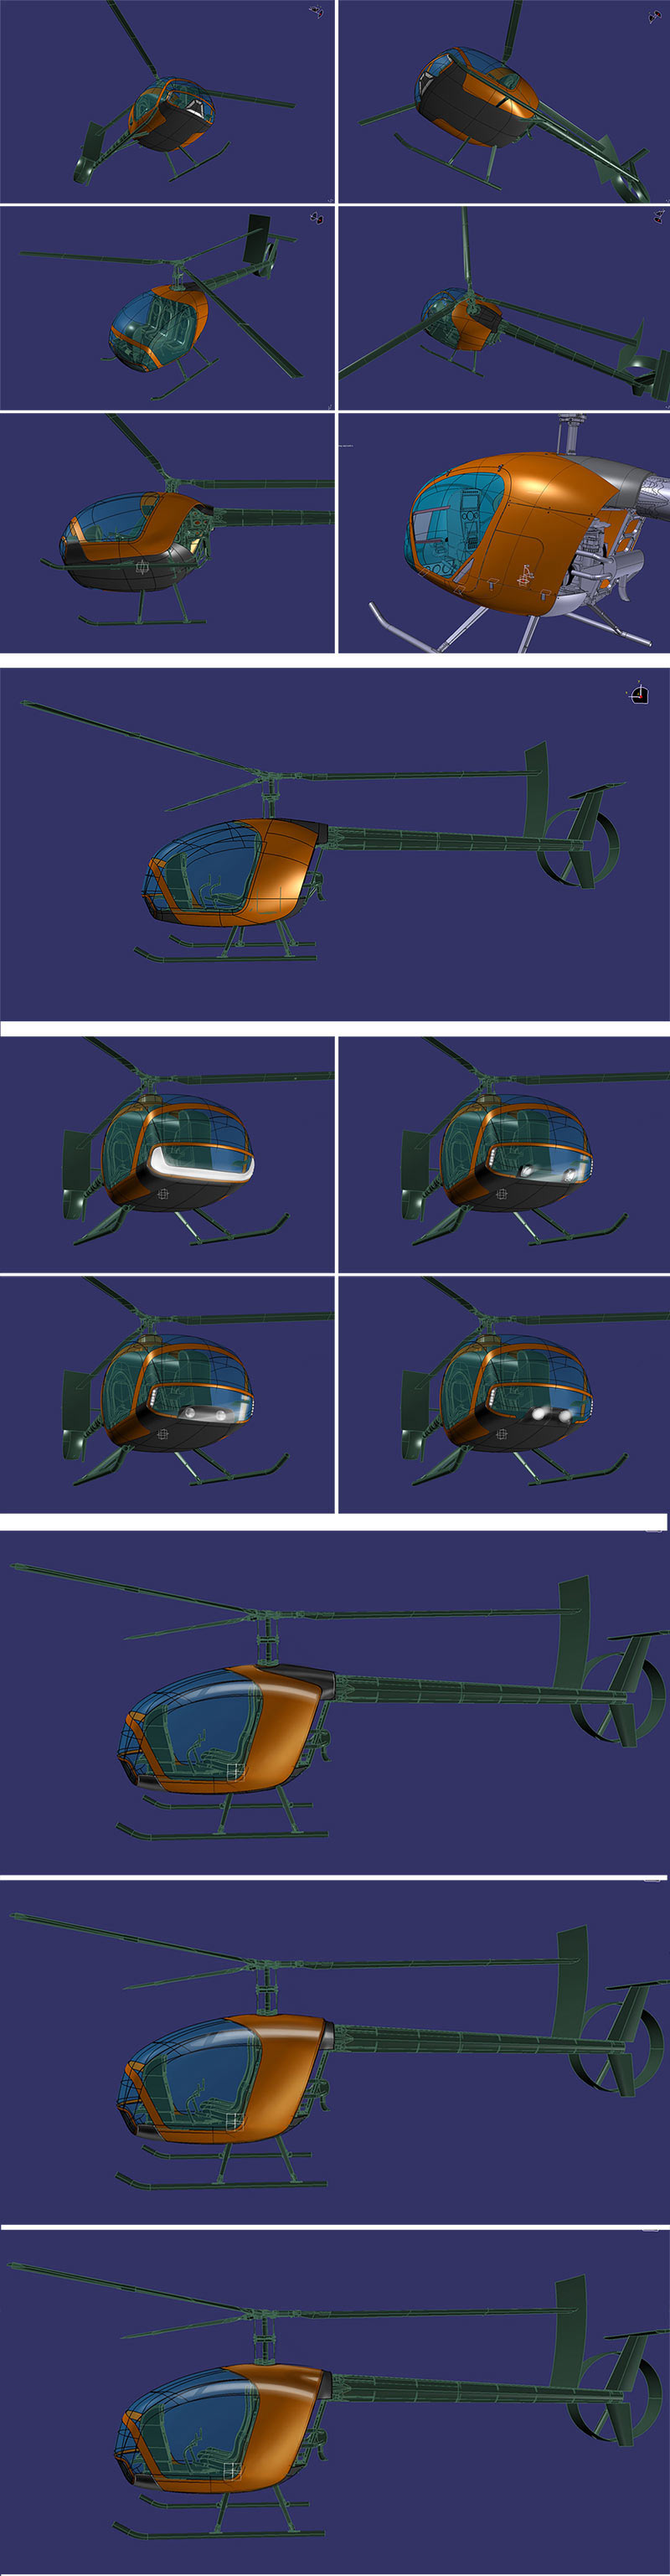
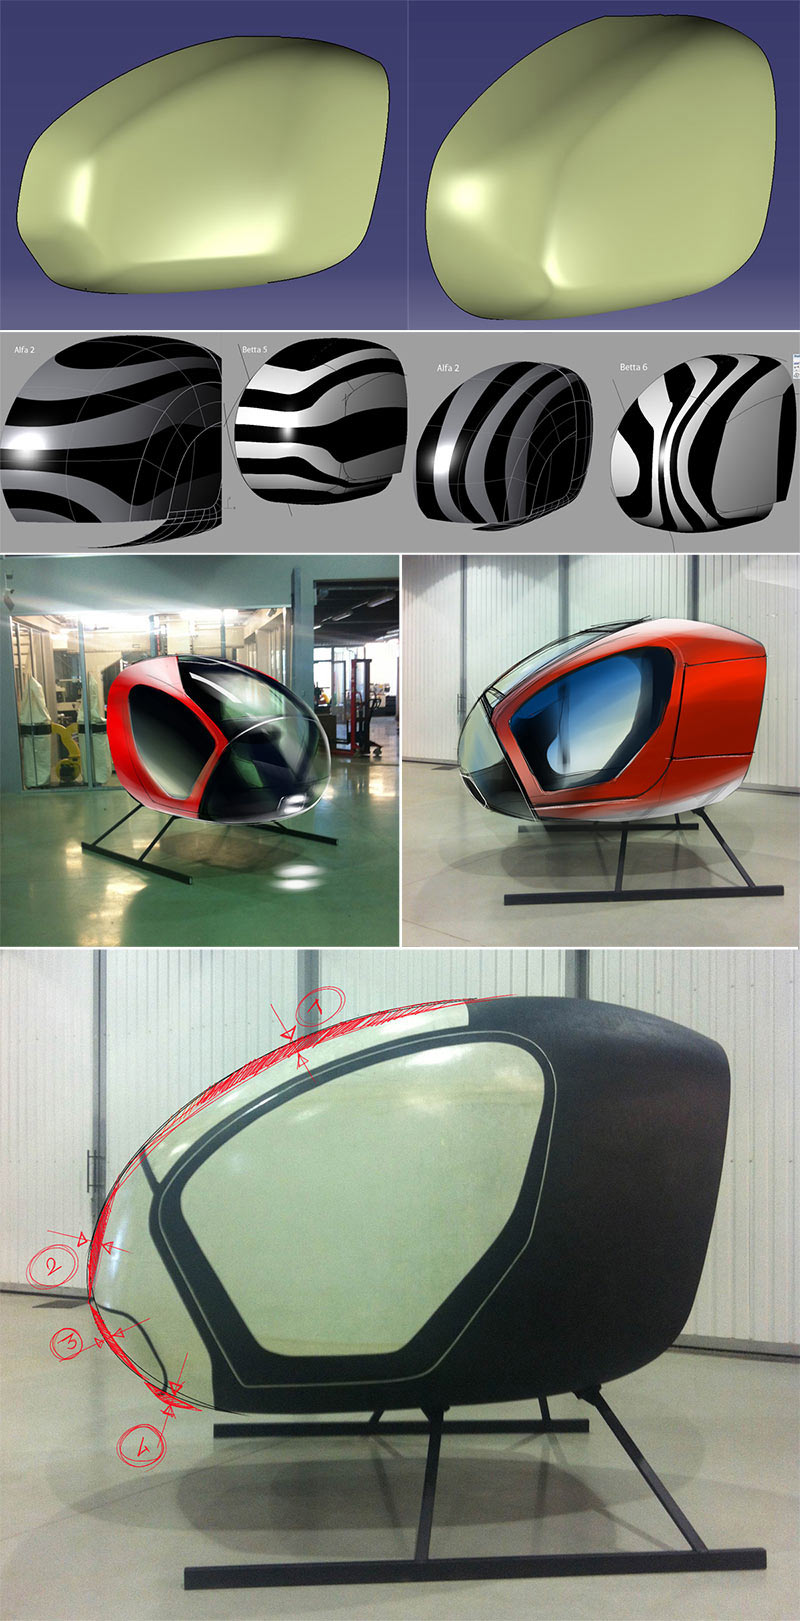
Starting to draw. The first attempt at the design.
The first presentation in Kiev.
Client: It’s all wrong. You got the task wrong, there is too much of automotive style here. It has to be about adventure, not limos.
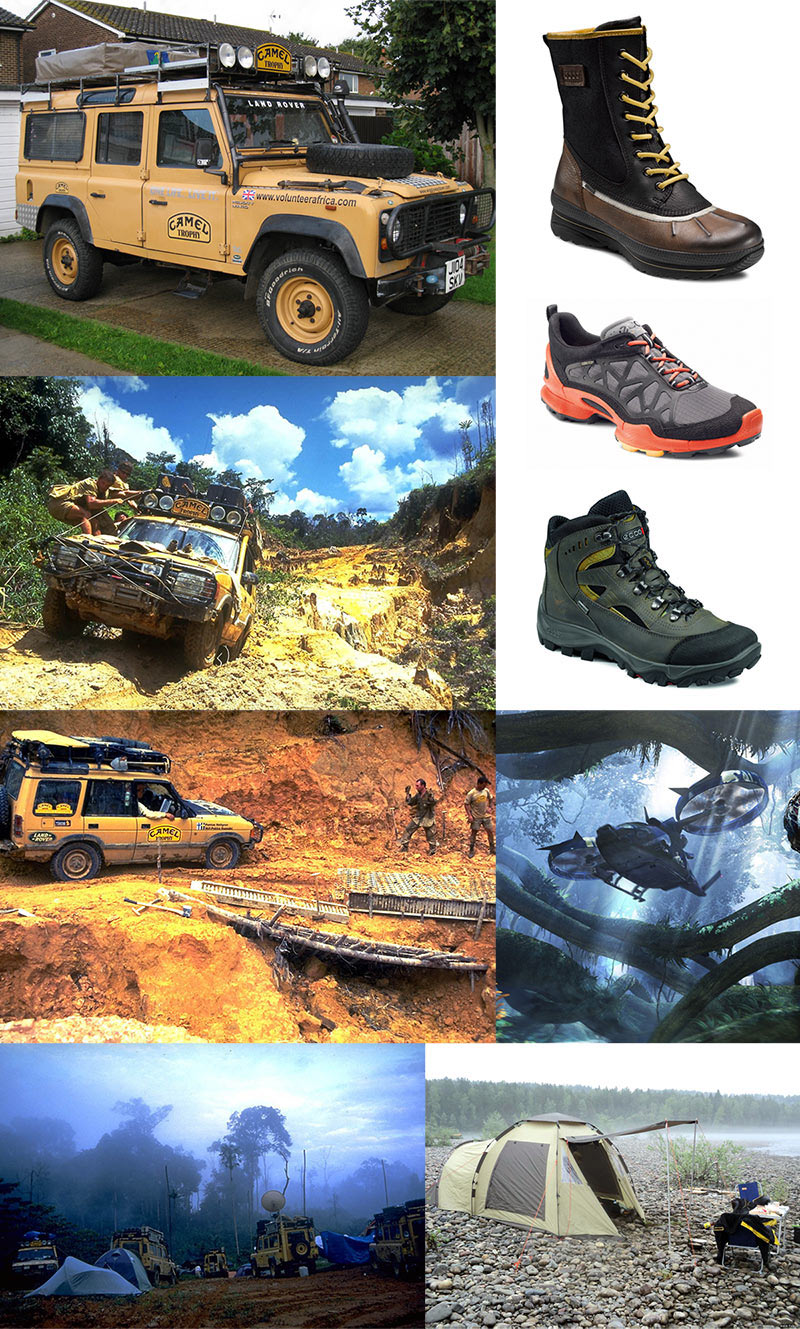
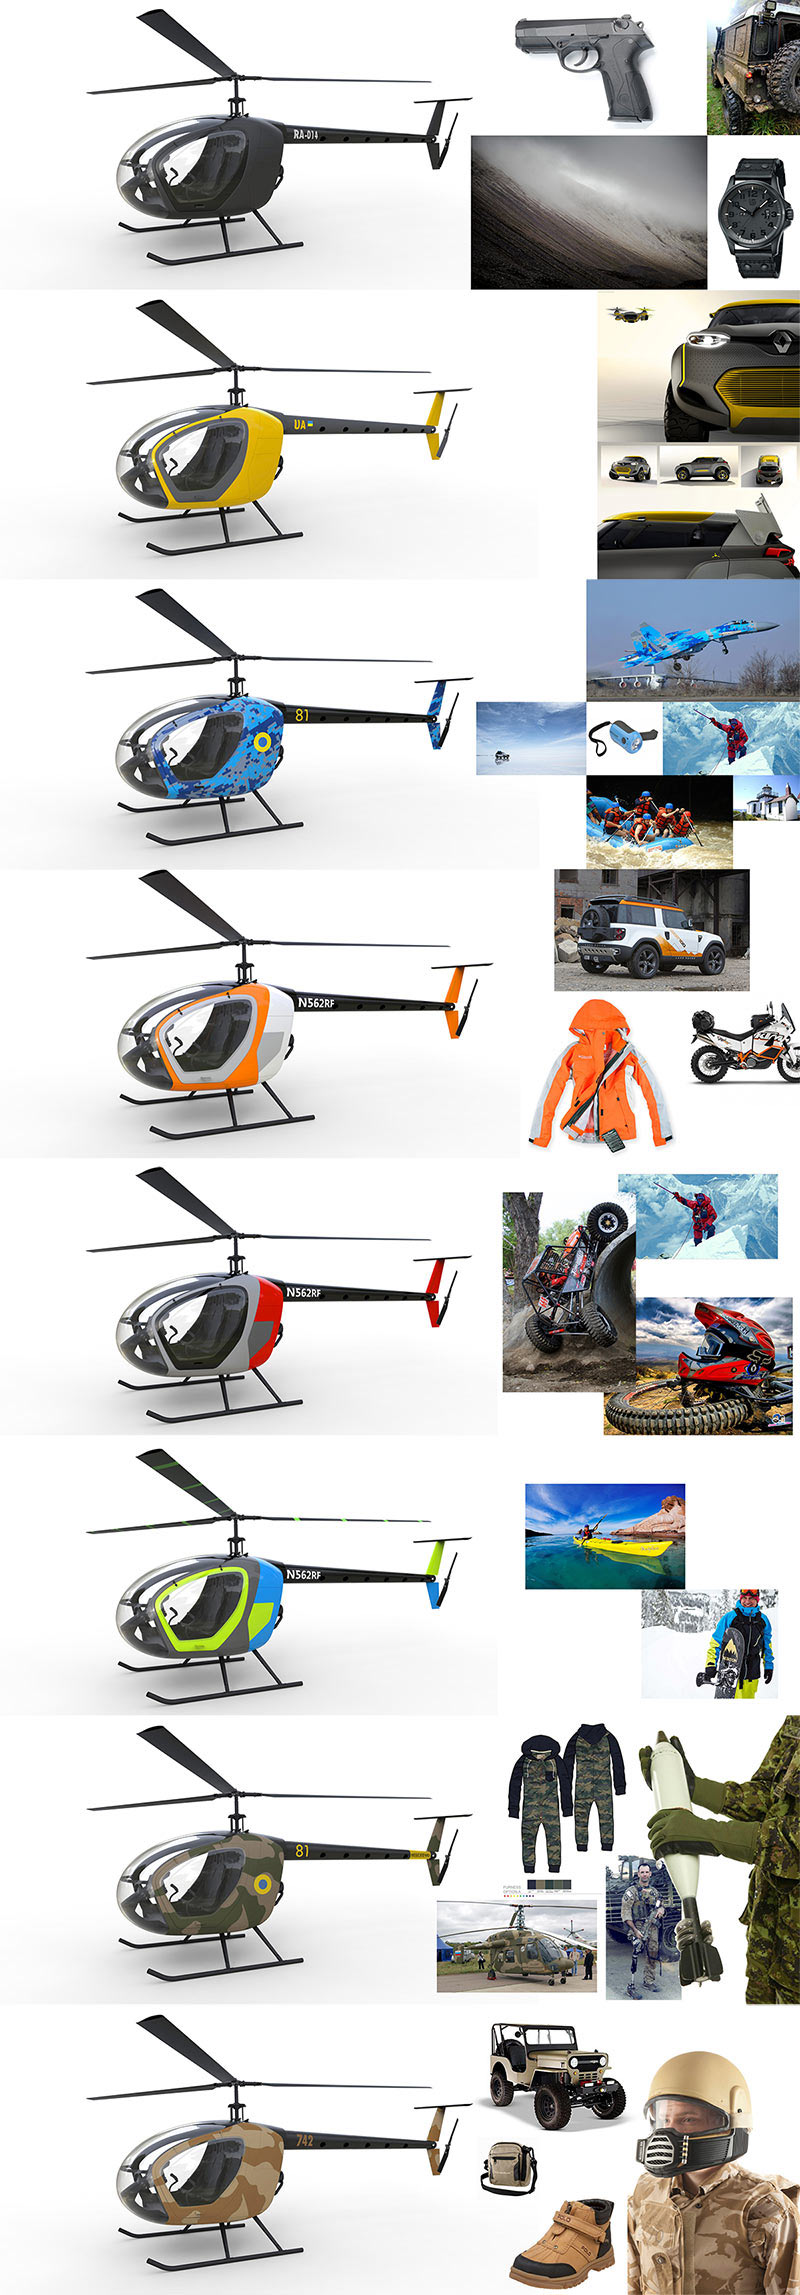
Searching for new reference points and associations.
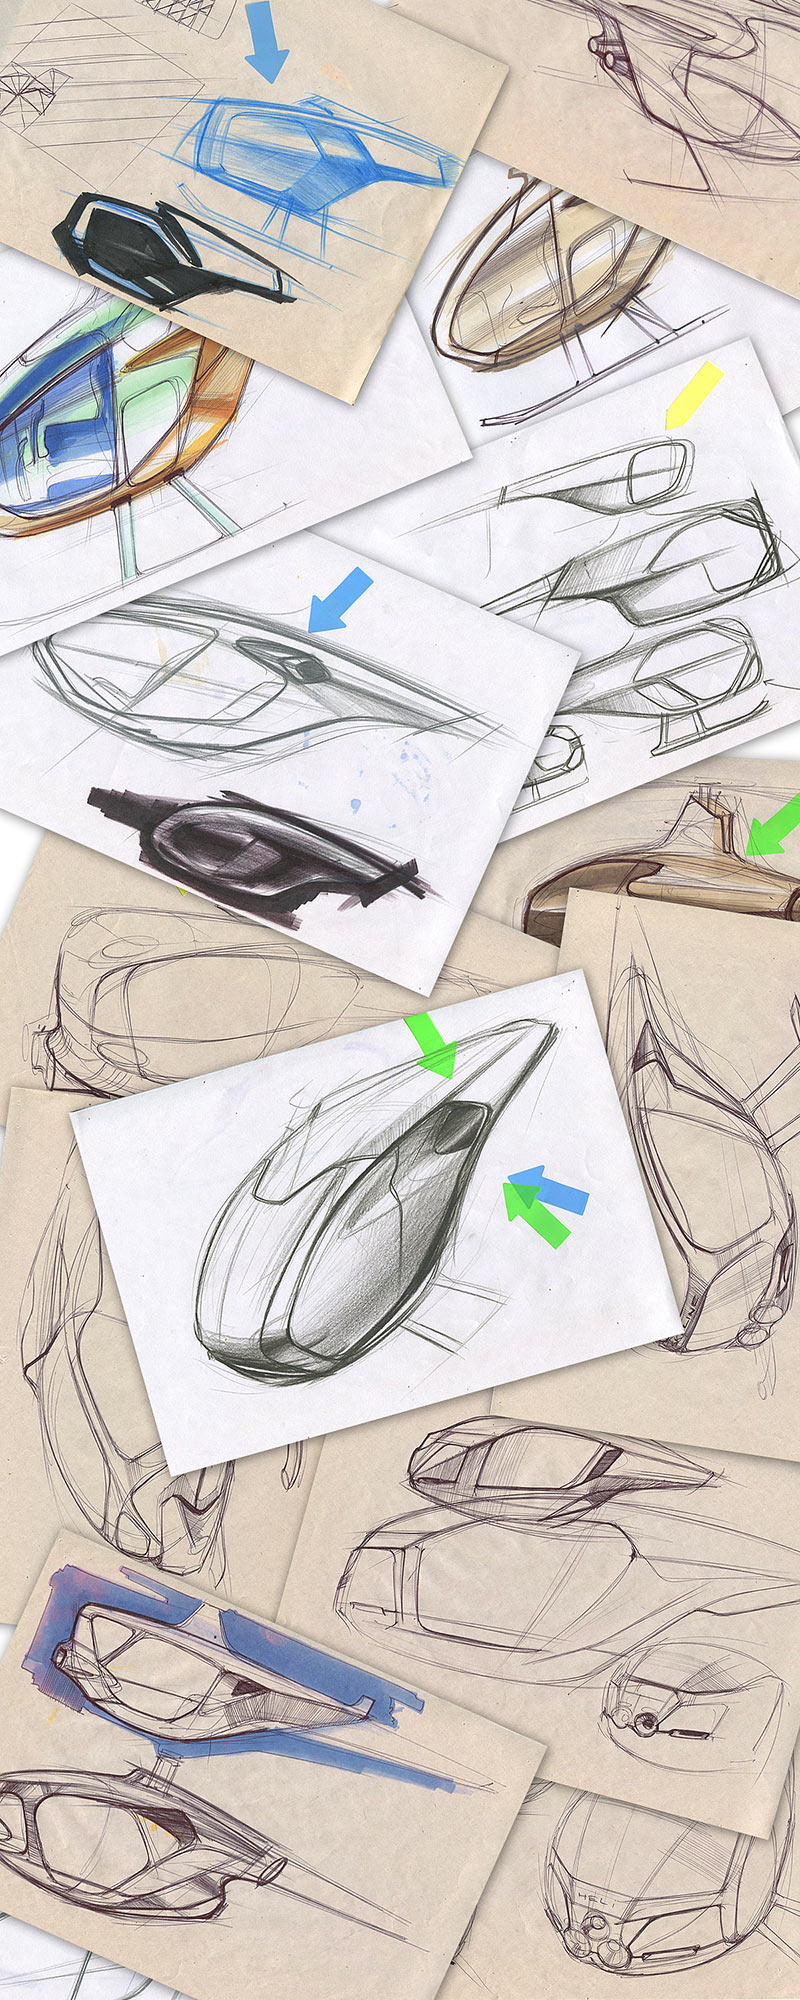
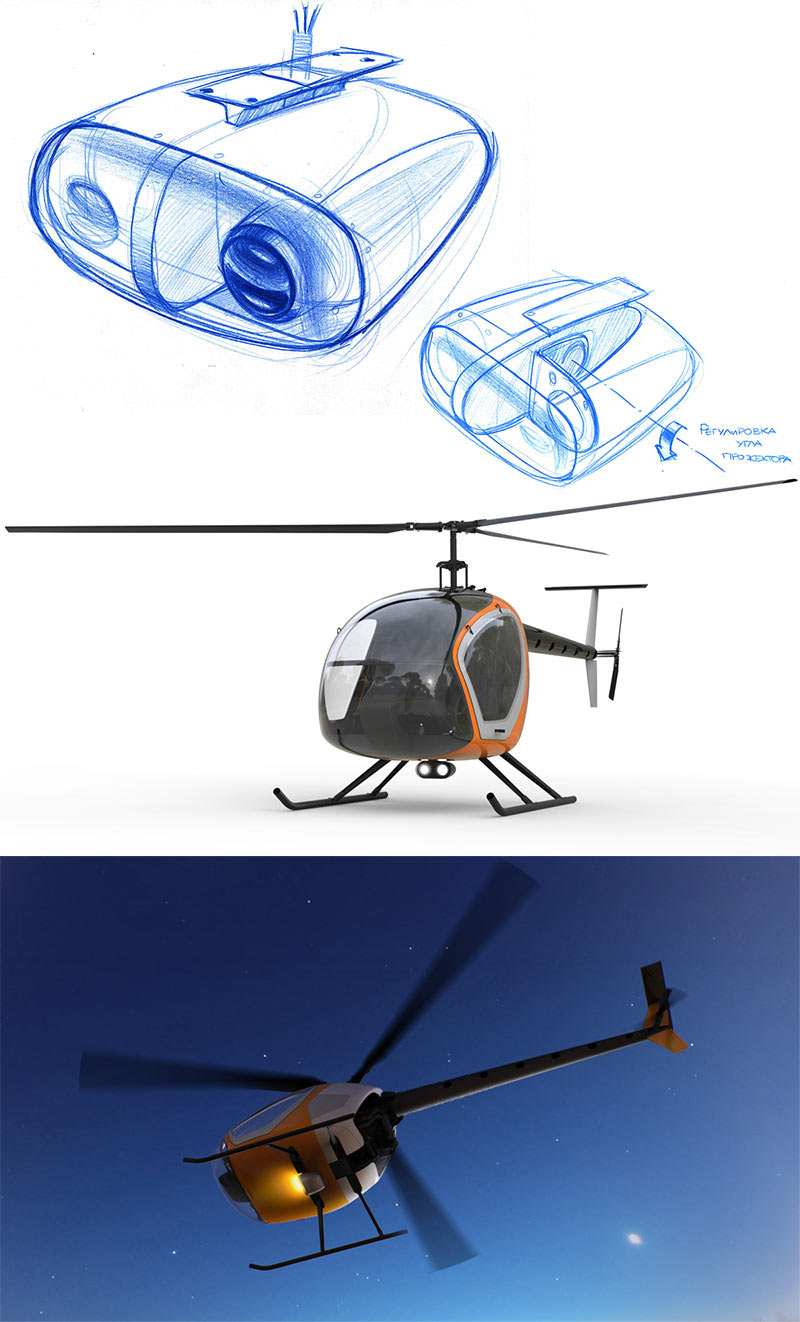
Suggesting a new plastic and graphic move with a truncated nose.
Looks like what we need. Narrowing down the chosen direction.
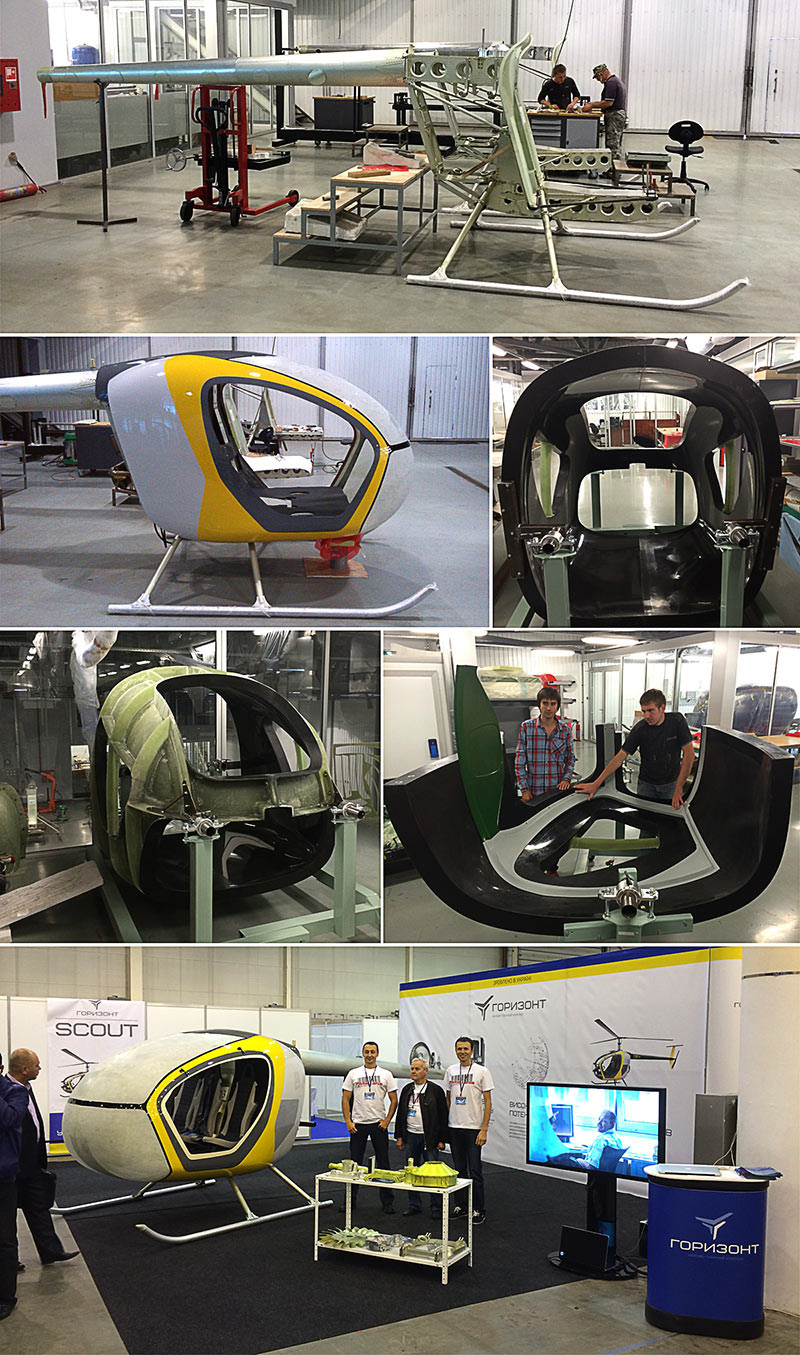
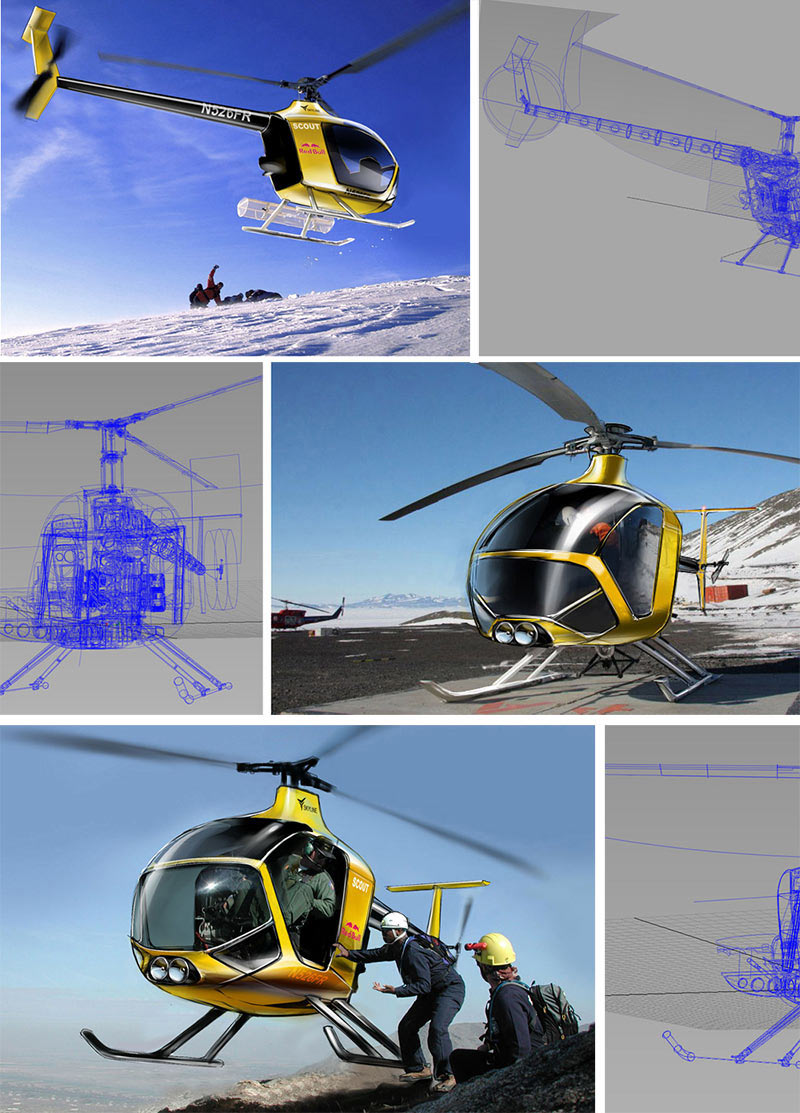
Creating a sketch model demonstrating the idea. Showing the helicopter in its natural environment.
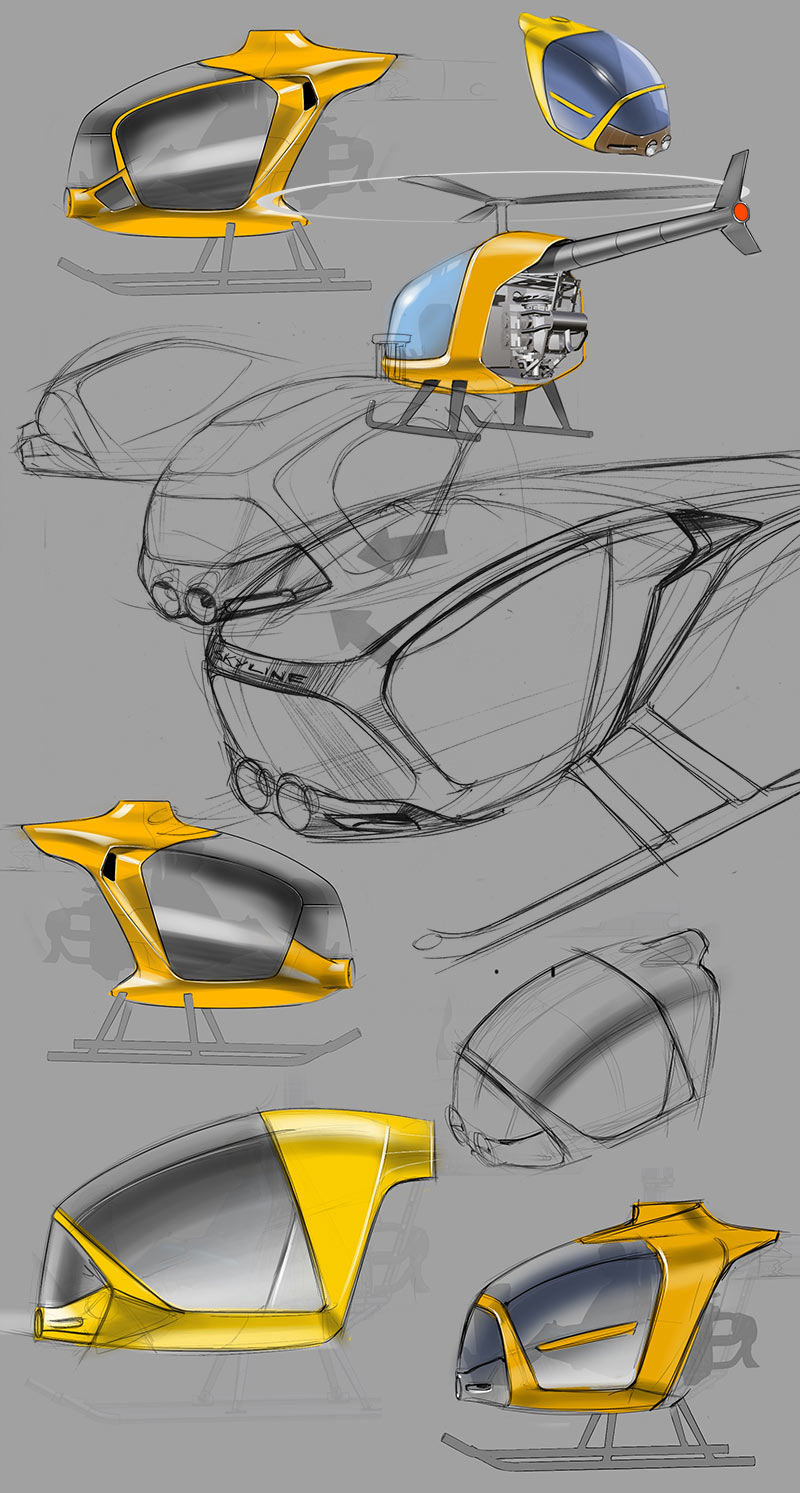
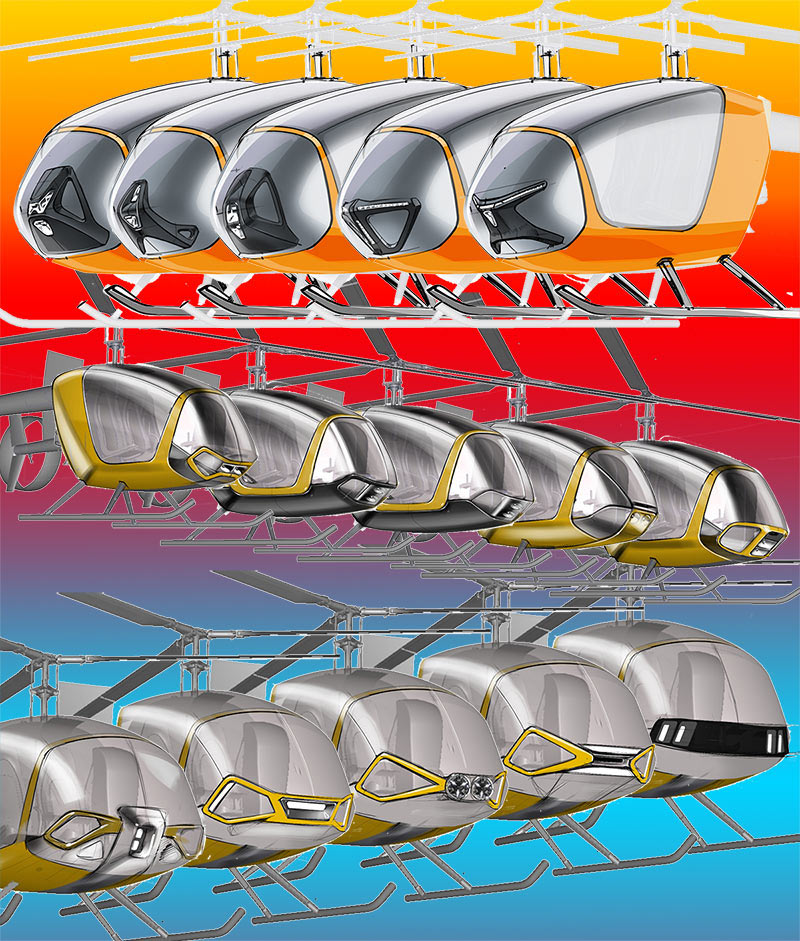
Looking for the shape of the “face.”
Preparing documents and questions for the next meeting in Kiev.
Drawing connectors, breaking up the fuselage into parts. The client asks to show an alternative with a smooth nose.
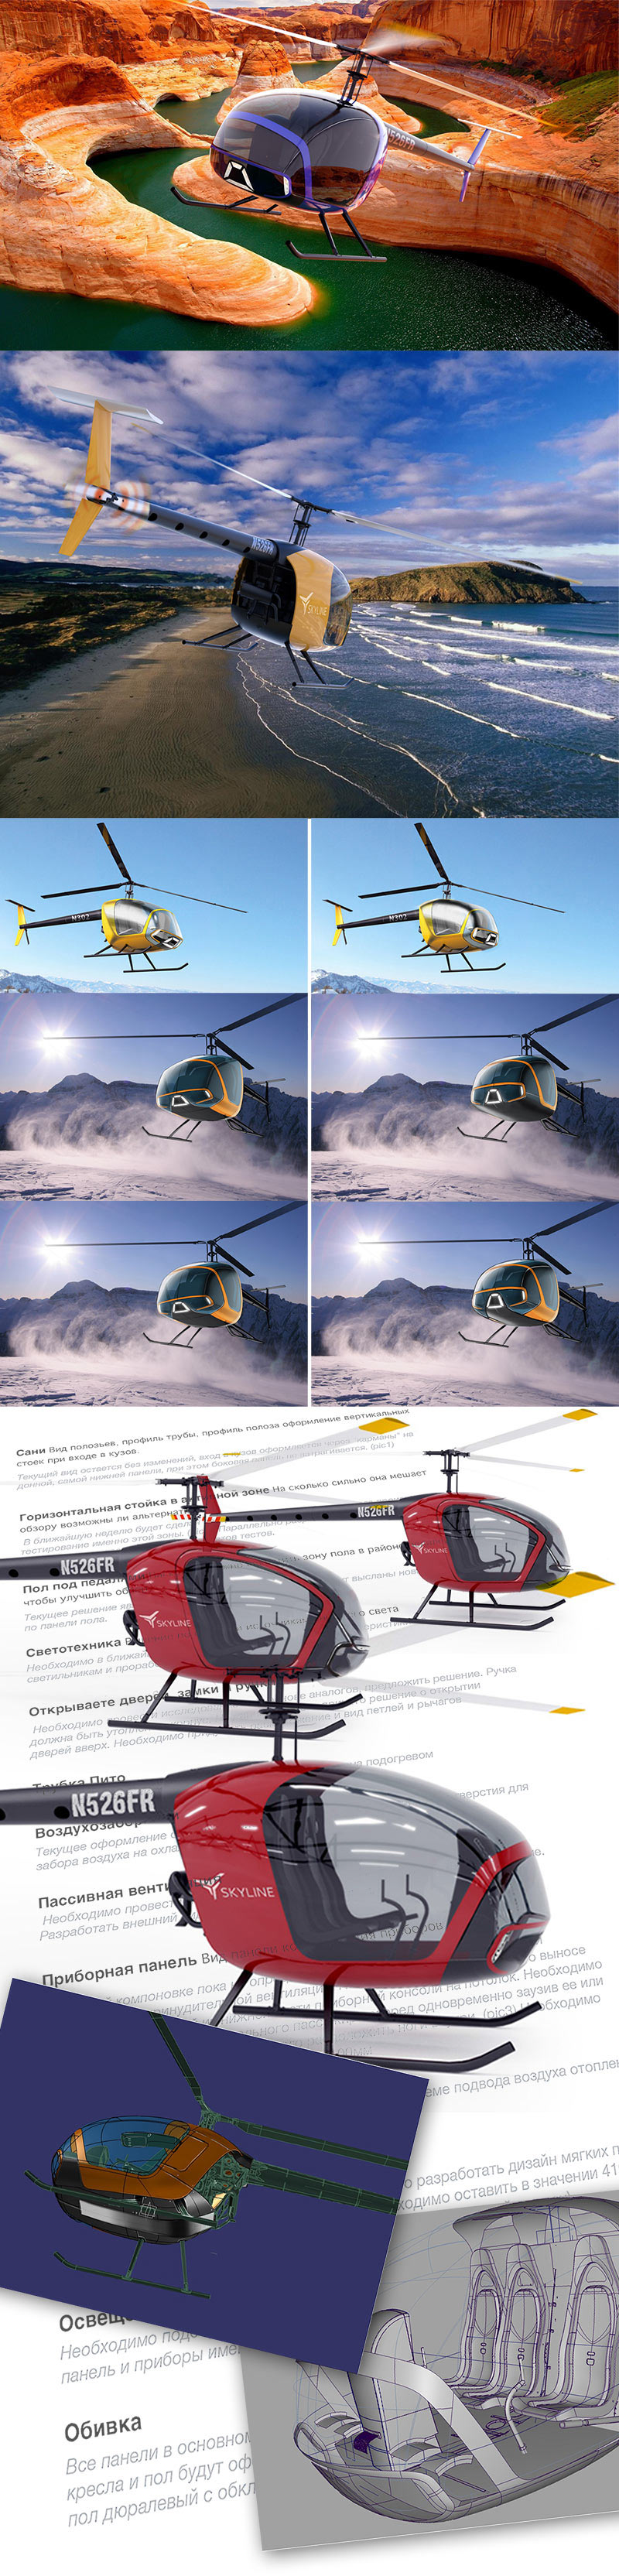
Third trip to Kiev. Making a large presentation about our work for an investor. Showing possible alternatives for the nose, the windows and the “live” illumination.
The client approves the chosen direction. Deciding to go with a truncated nose. Front lights are still a problem. Suggesting other options.
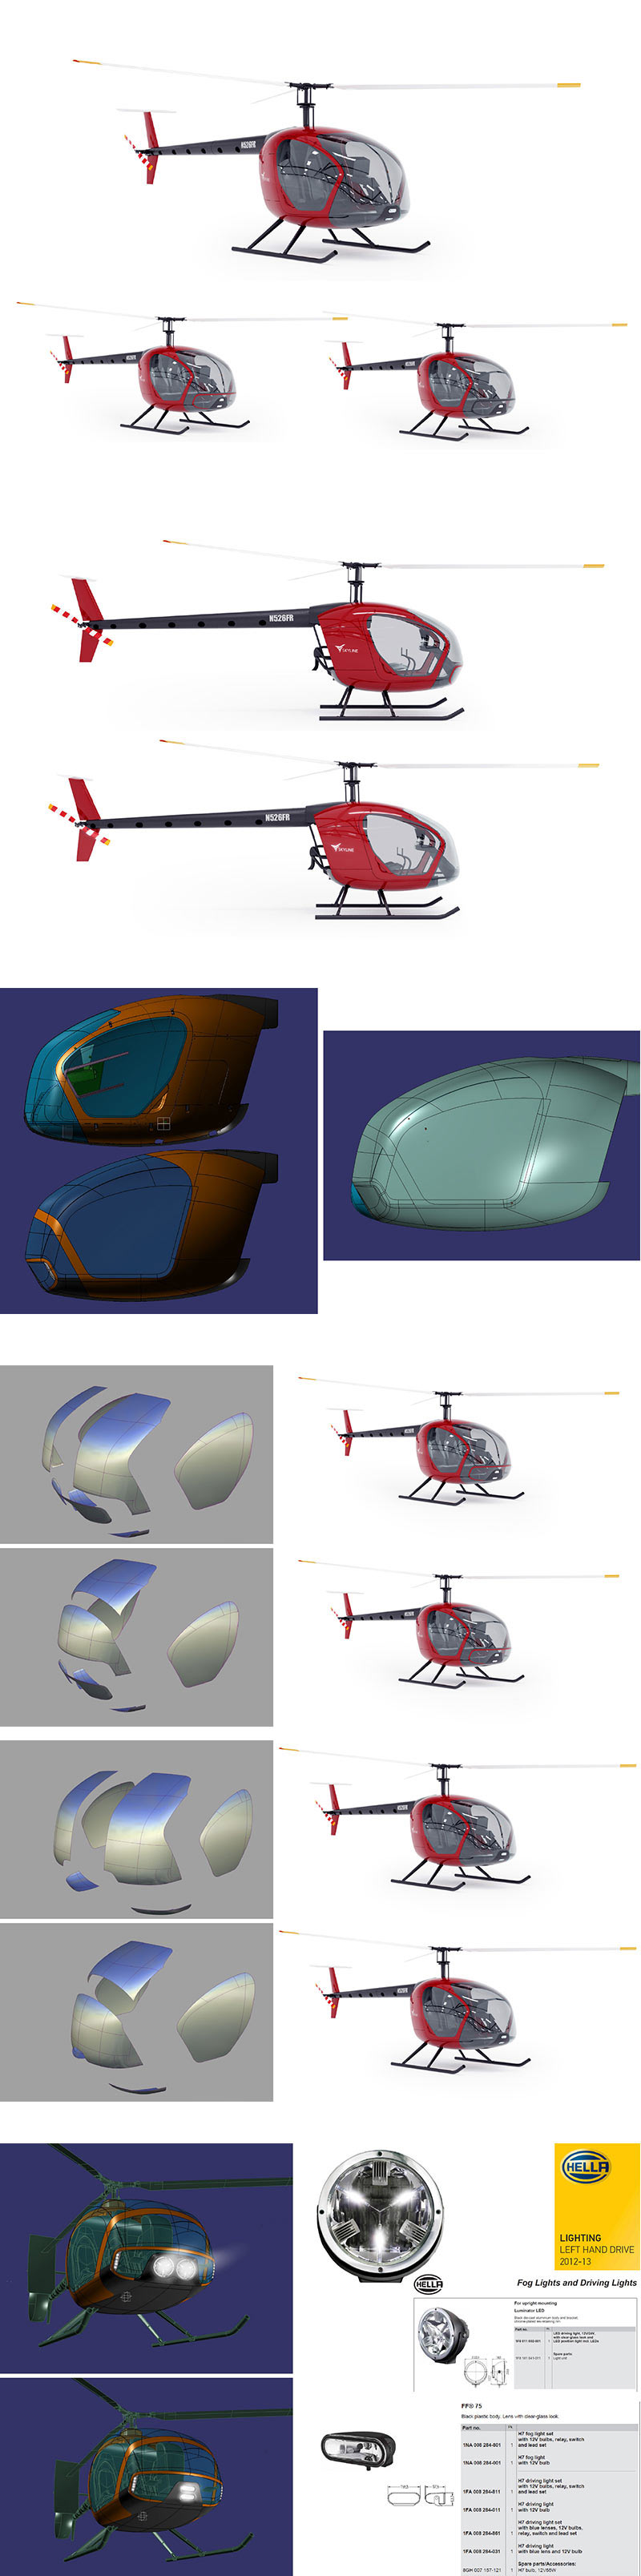
Sending a draft model of the fuselage to the client. Also demonstrating the lights and the design of the tail.
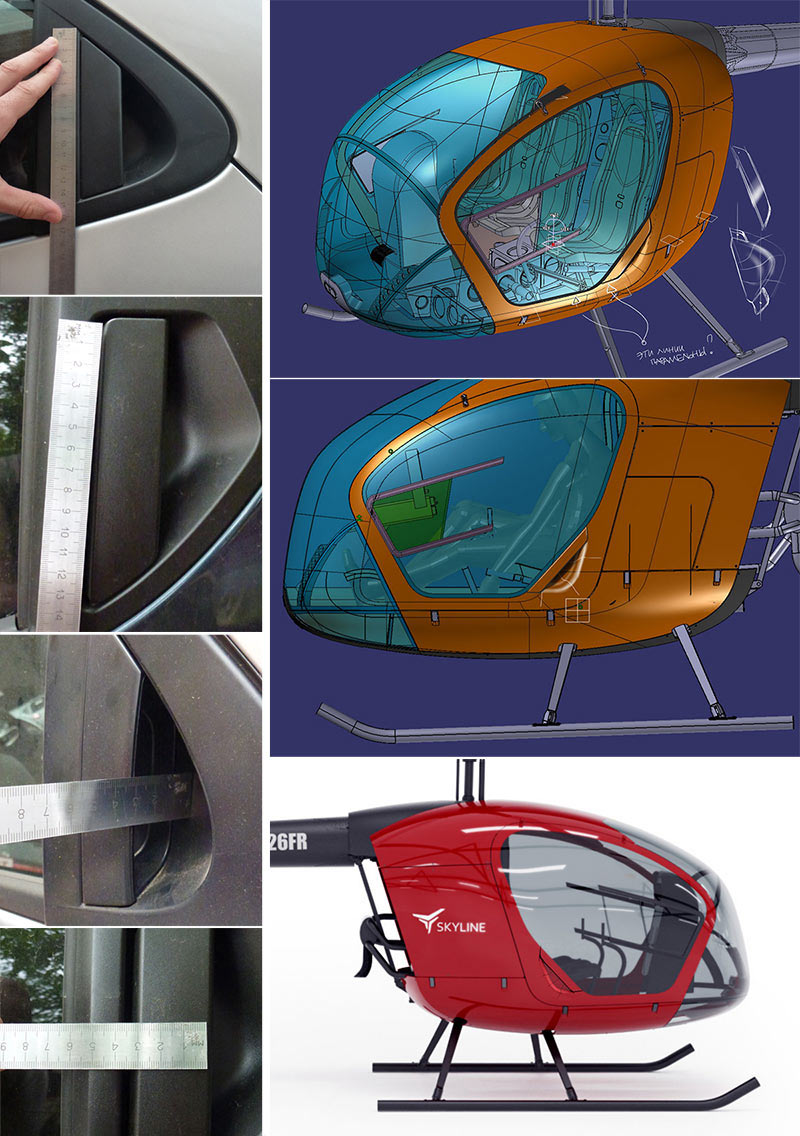
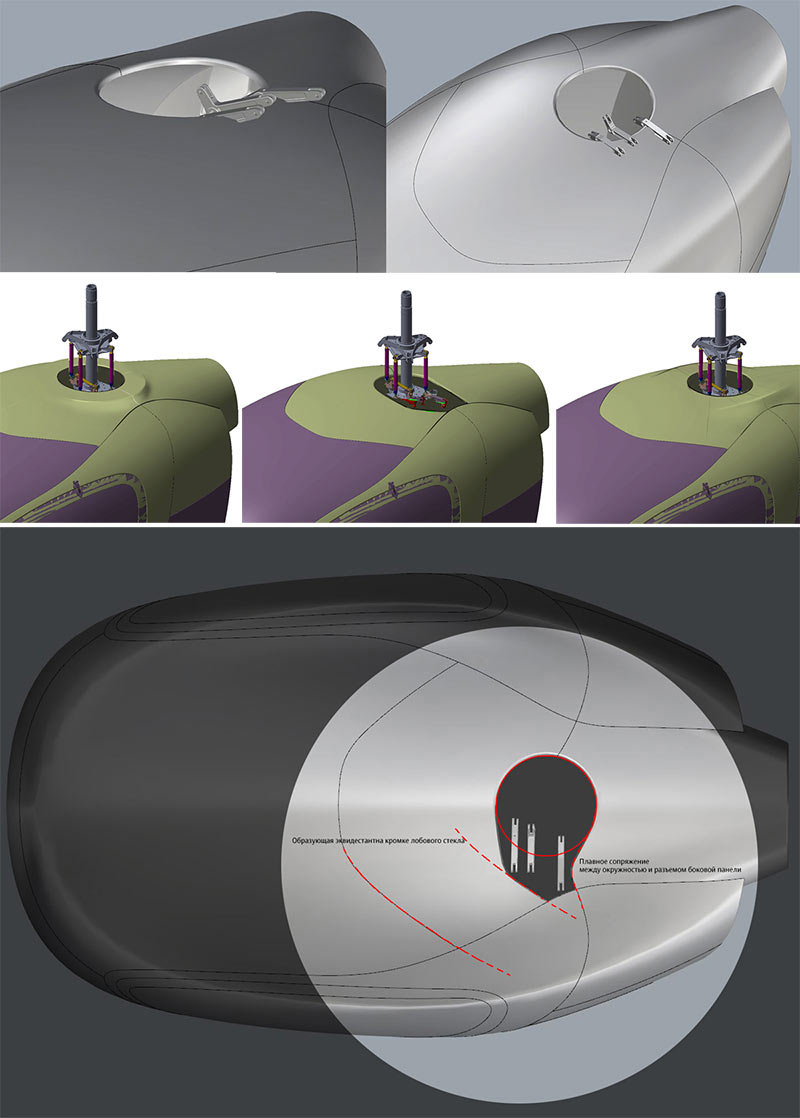
Simultaneously presenting interior to the client. While the client takes time to consider the proposed interior design, solving local exterior problems: working on possible ways of joining glass with the roof and side panels.
Suggesting to use readily available automobile door handles.
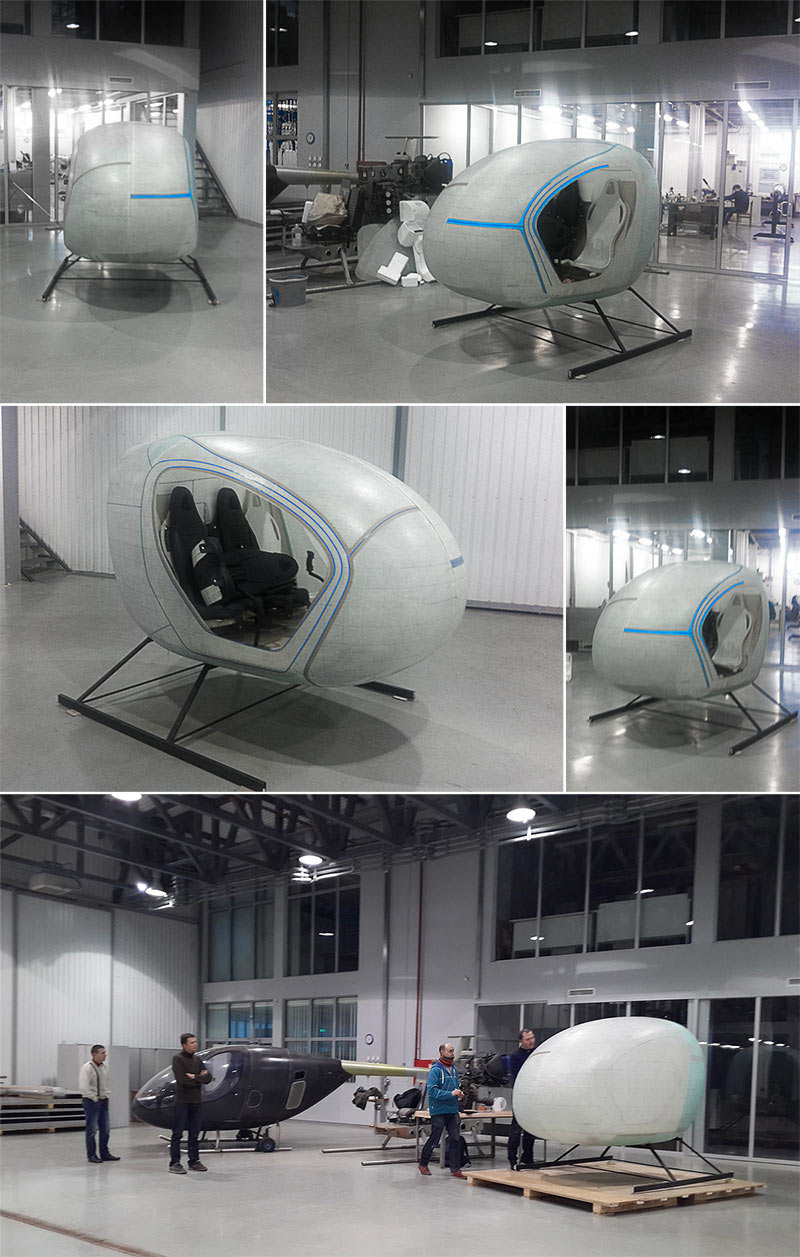
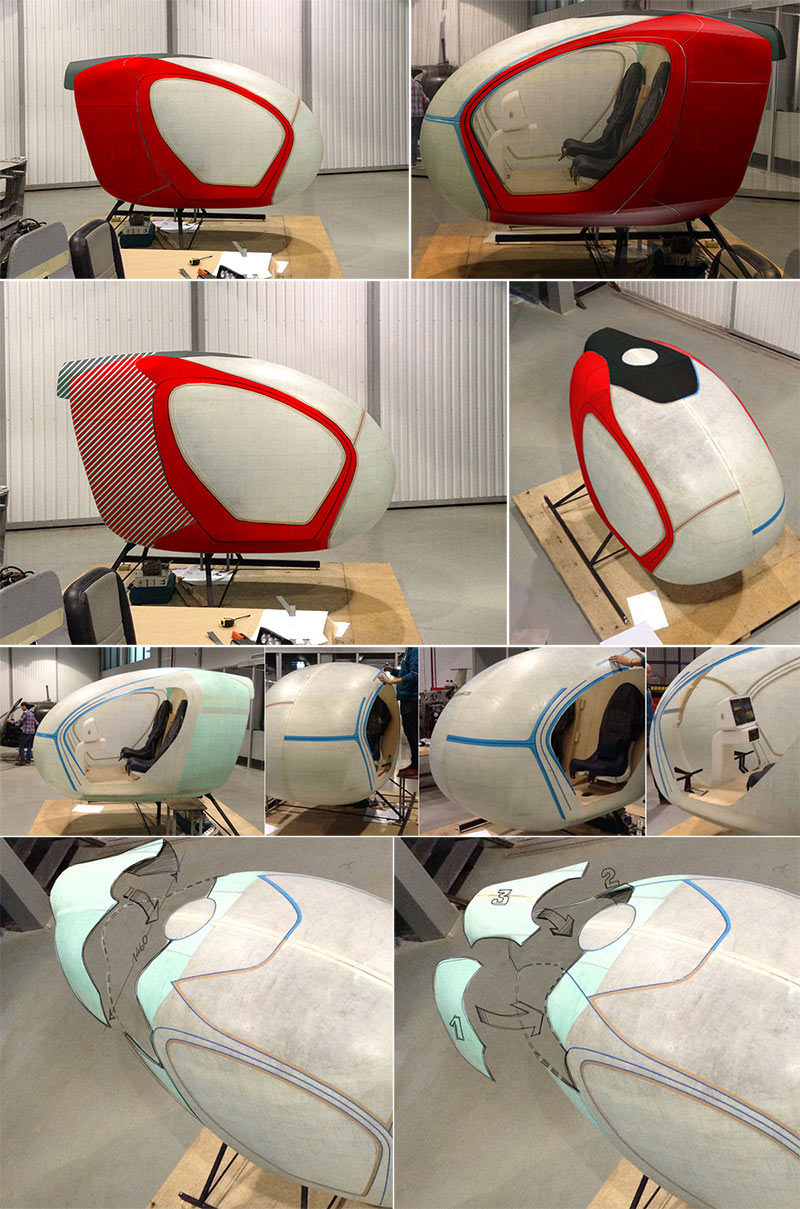
Meanwhile, a full-size mock-up of fuselage surfaces is being constructed at the factory.
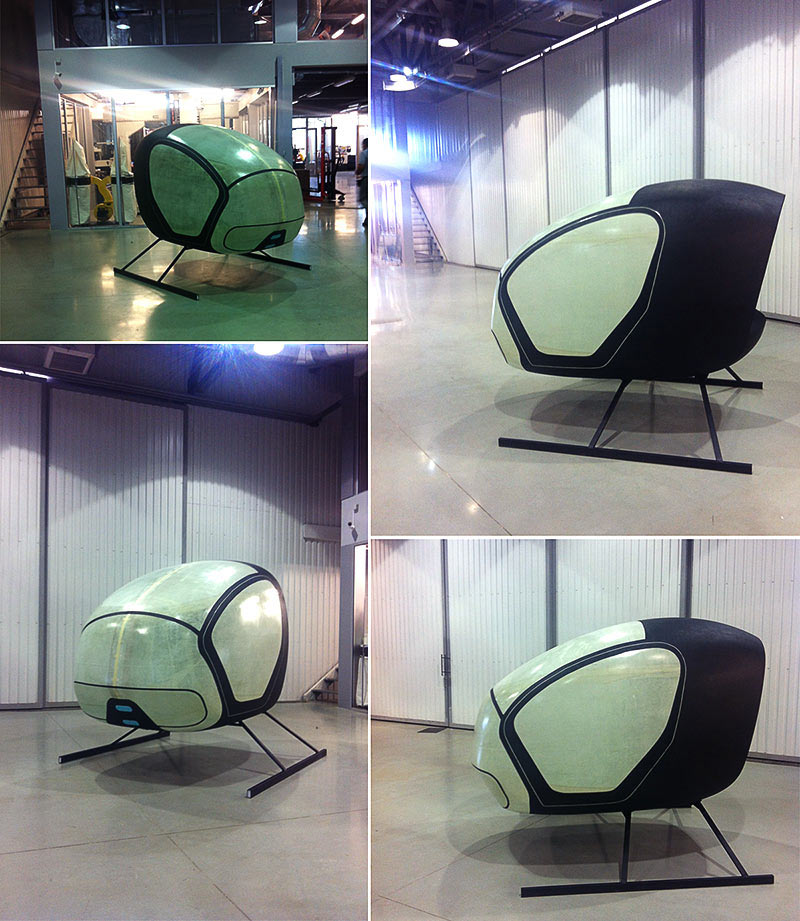
The client puts the mock-up through software aerodynamic simulation and shows it to active pilots. The results are disappointing. The truncated nose needs to be gone, it creates an aerodynamic effect that leads to unstable handling.
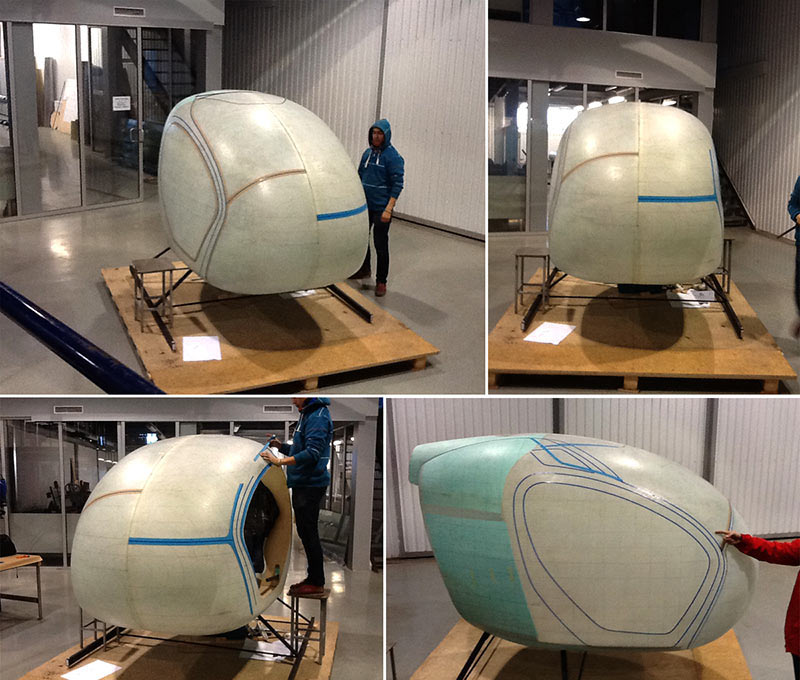
Rounding the nose.
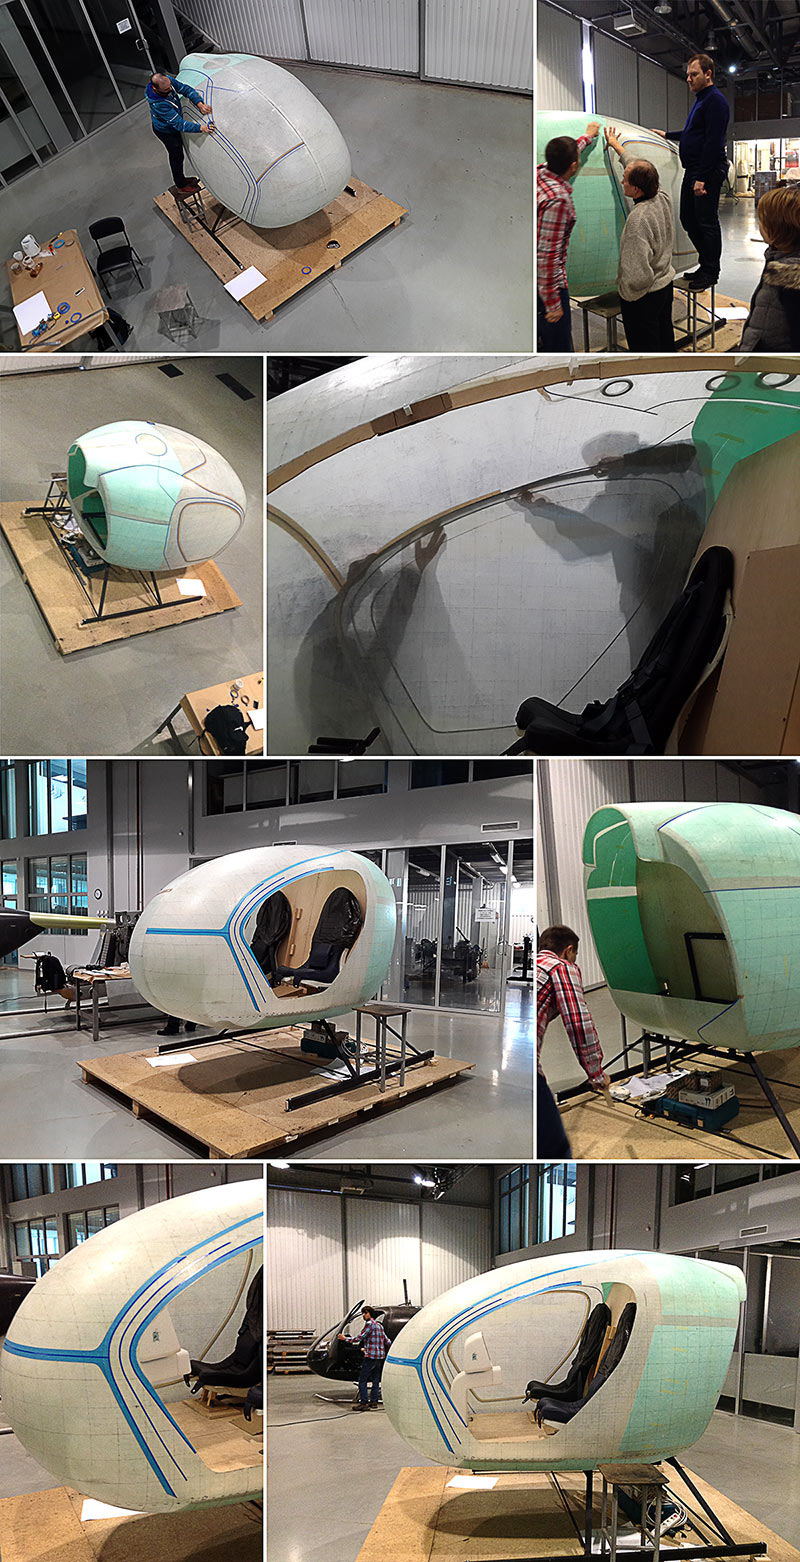
A new mock-up is being constructed. Flying to Kiev.
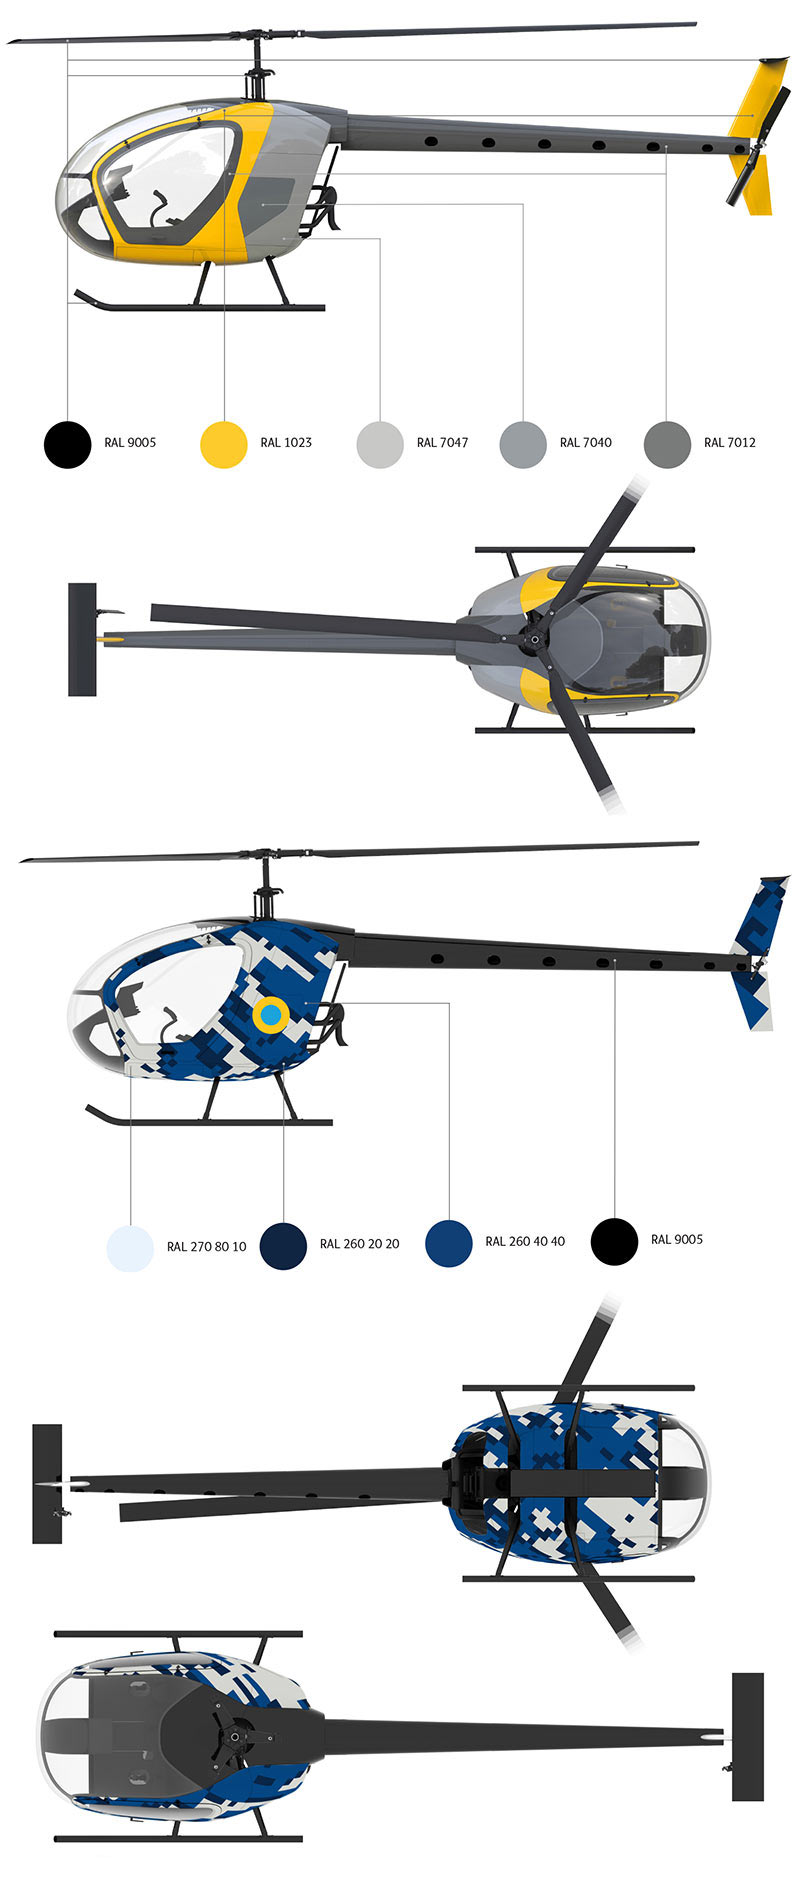
Using the large mock-up to find the final placement of connectors and decide on division of parts and colors. At the last moment getting the idea to make the frontal beam horizontal as a continuation of the frontal vertical stand.
Checking out the idea of a horizontal beam on renders.
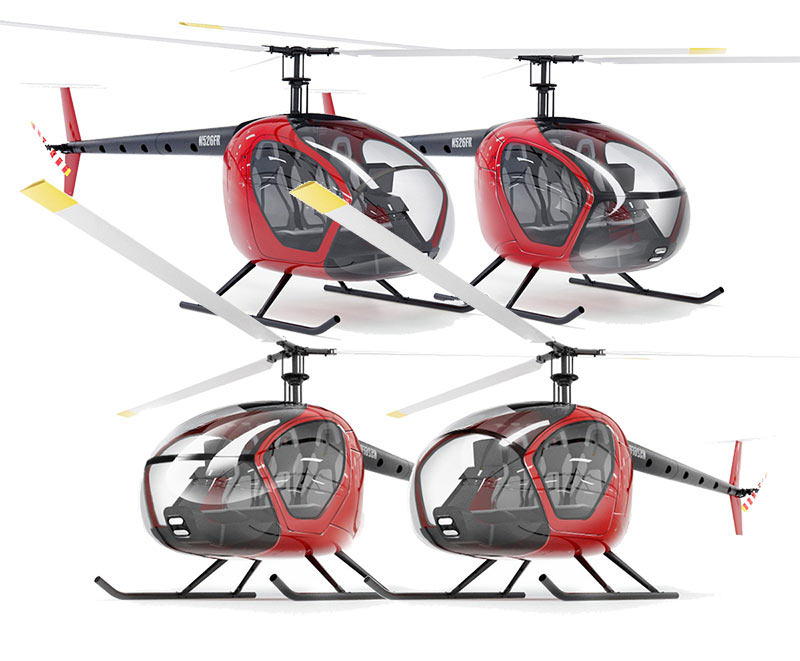
Implementing all the ideas we got while working with the mock-up in blueprints and sketches.
It turns out that the rotor blades overlap with the fuselage. Cutting out an opening for the rotor and the hub.
Automotive door locks and handles wouldn’t work: their travel is too short and they do not lock the door securely enough. Additionally, the designers have changed the location of the door handle. Offering our vision of an external door handle.

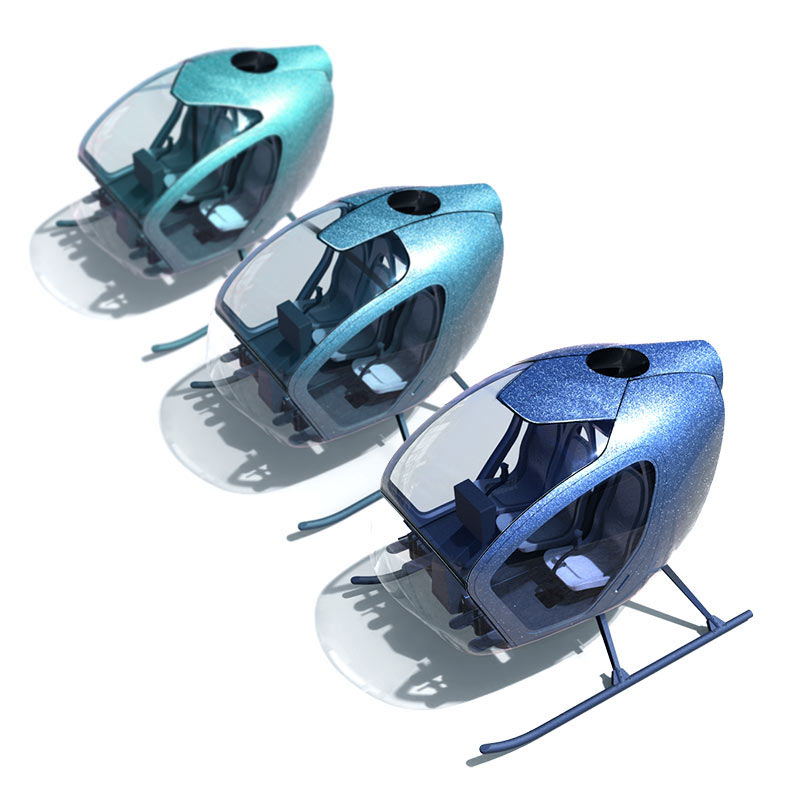
Moving on to supergraphics. Suggesting color options.
Client: Go on.
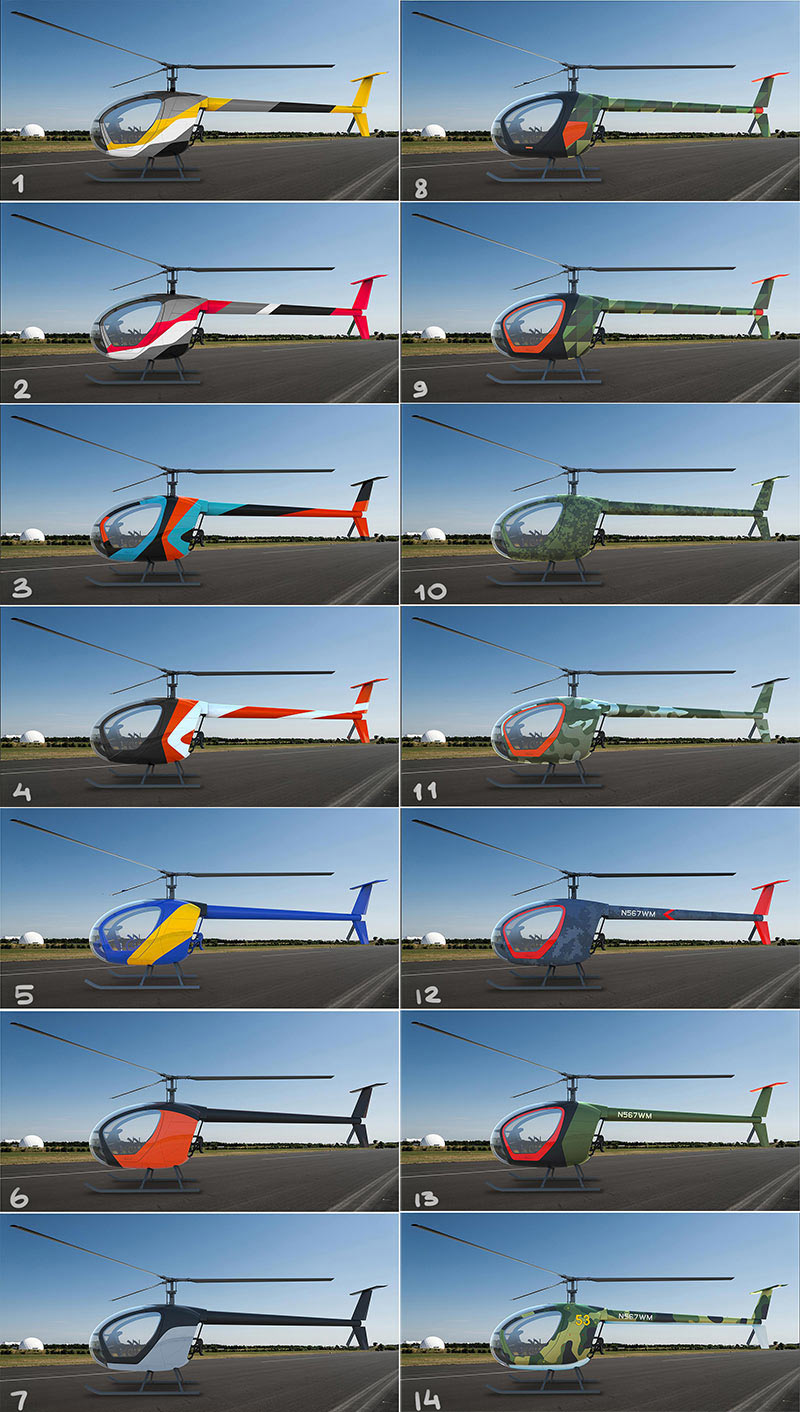
Again not exactly what they are looking for. Suggesting more variants with illustrations.
Client: All right, we have something to choose from.
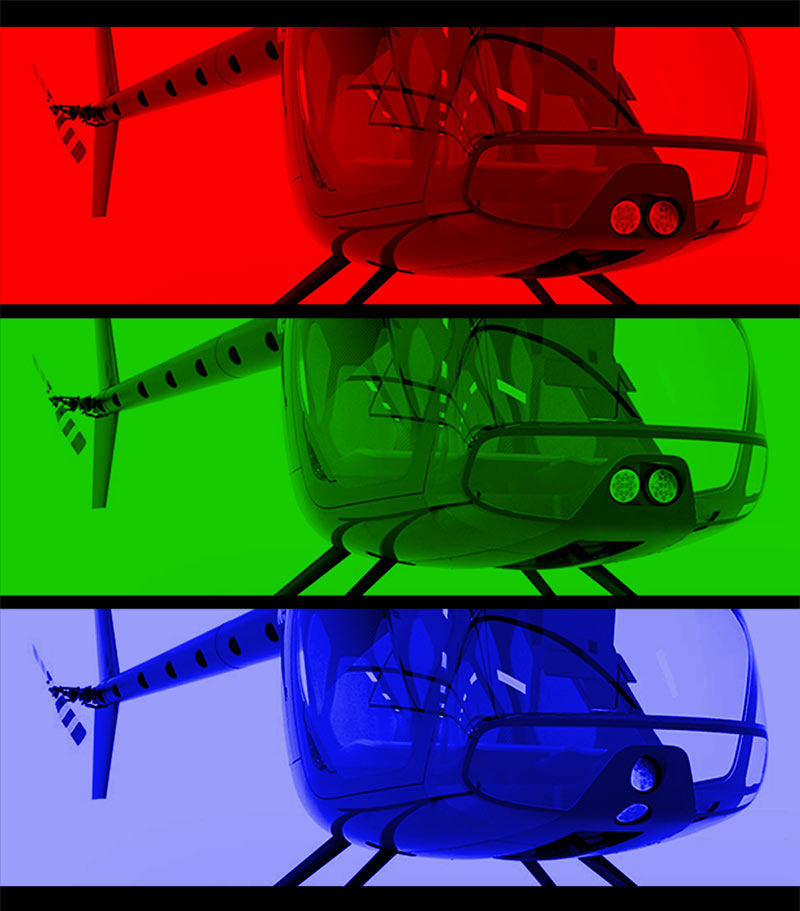
The lights issue comes back.
Meanwhile, the first sample is being built at a factory, soon to be shown at an exhibition.