The making of the Innova illustrated isometric office plan
Photographing
Holding a photo shoot of the entire building. Everything is important: the façade, the general view of the hall, elevators, walls, doors, door handles, trashcans, workplaces, chairs. The more pictures we have, the better. We will need every single detail when we start drawing.

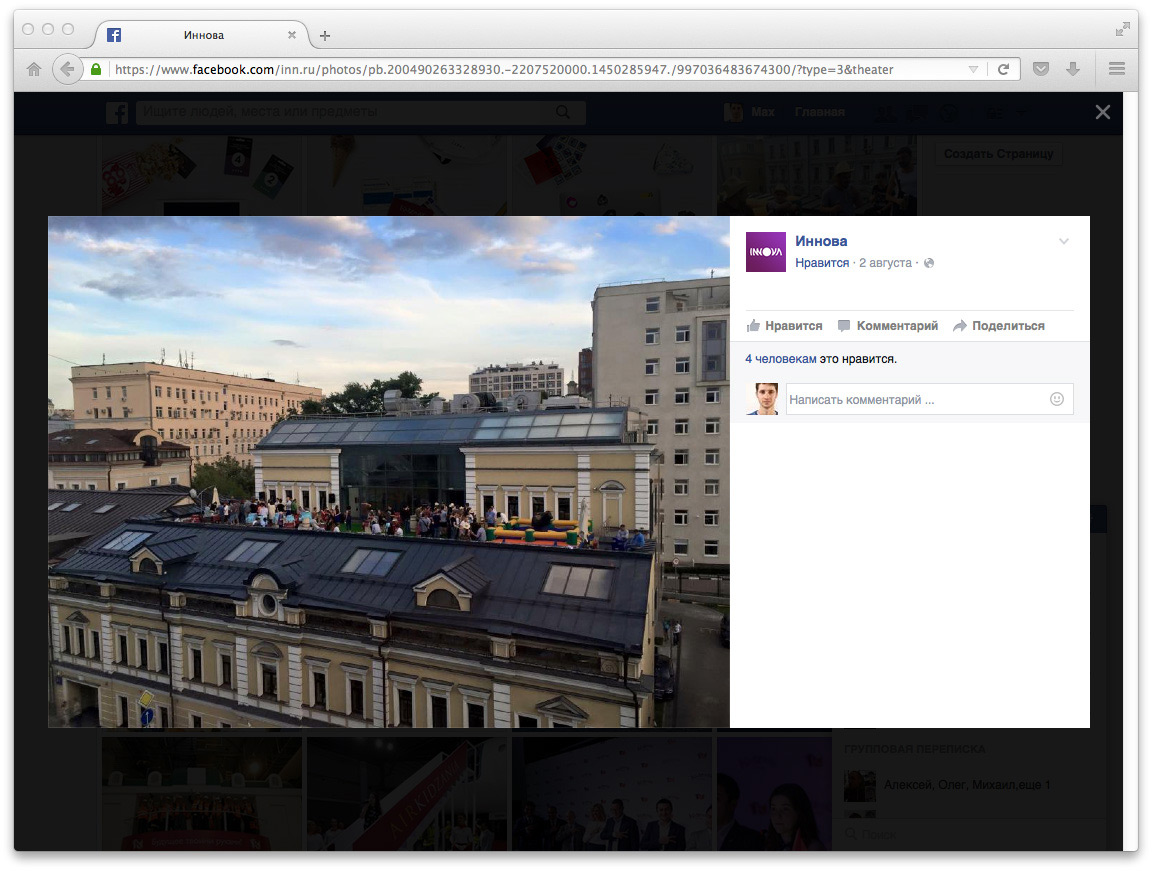
We also need to look for pictures in social networks, this might yield some interesting shots.
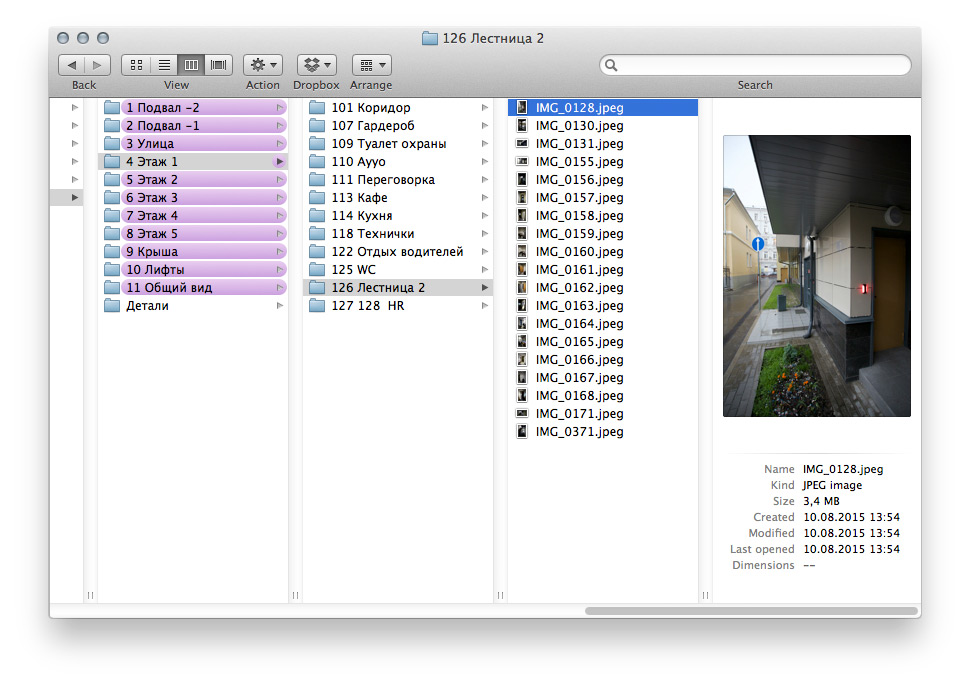
Structuring the photos by folders.
Choosing the angle
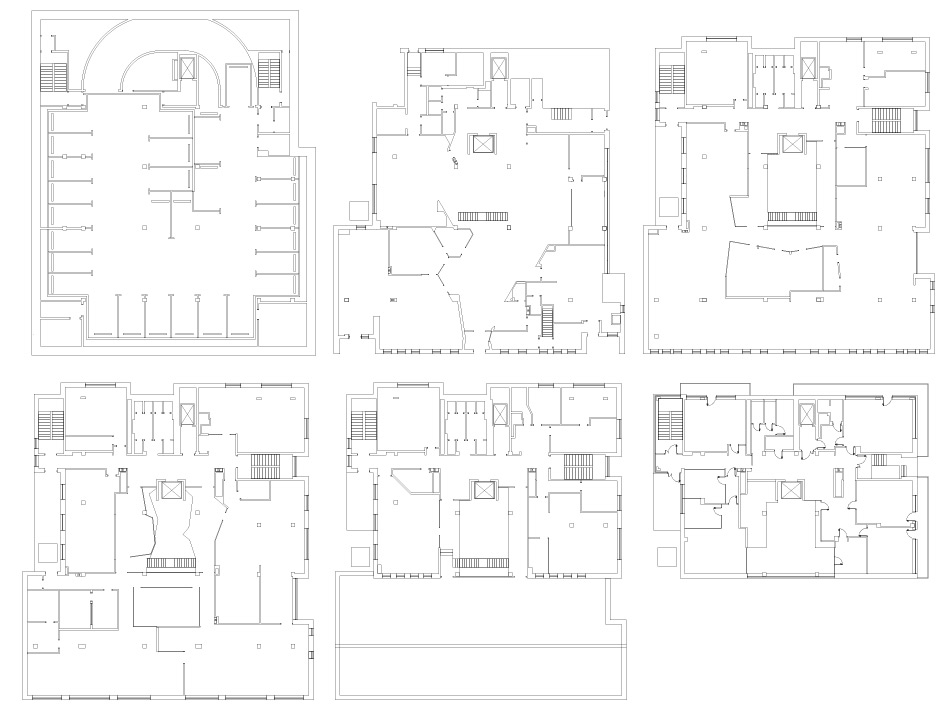
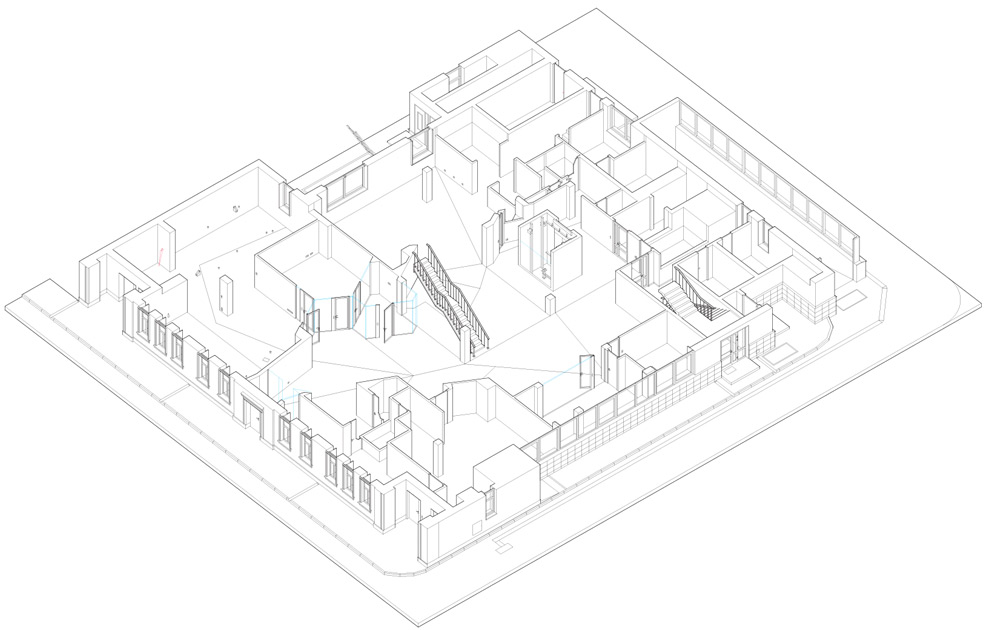
The client sends over floor plans. We will be using them to build a simple 3D model that will help us choose the best perspective for our diagram. The thing is, one of the floors has a considerable area and is divided into lots of offices, conference rooms, bathrooms, etc. We need to choose a perspective that would show every room.
Demonstrating possible ways to approach this to the client.
Демонстрируем клиенту возможные ракурсы.
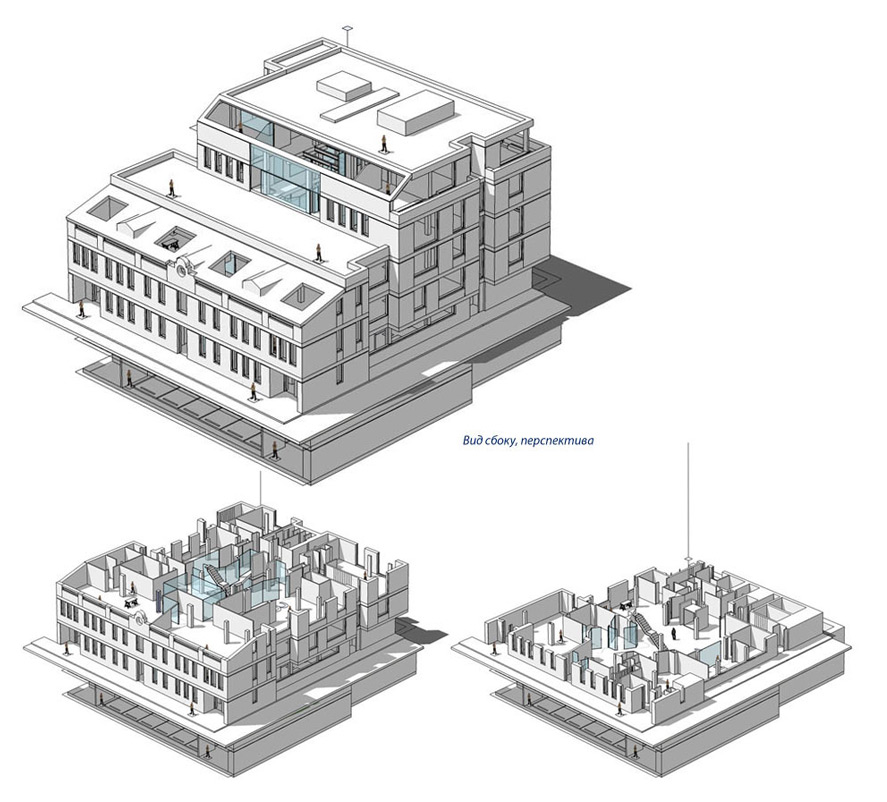
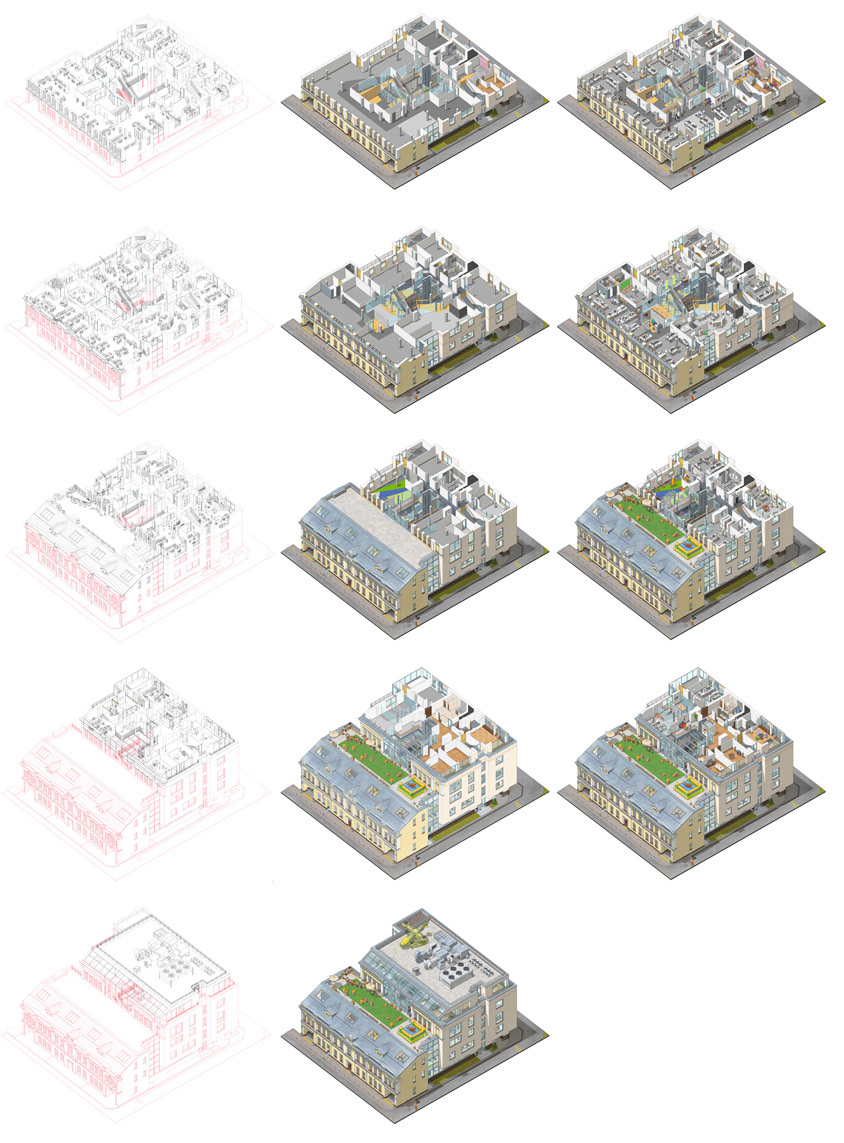
1. Isometric side view. In this view any object would be of the same size anywhere in the office, on any floor. It would also allow to place floors next to each other and there will be no discrepancy in perspective.

2. Two-point perspective side view. Same angle, but with a different perspective. Looks good, but rooms further in the building would not visible, even with removed walls.
3. View from above. All the attention is given to the interior, the façade becomes secondary. All rooms are clearly visible.
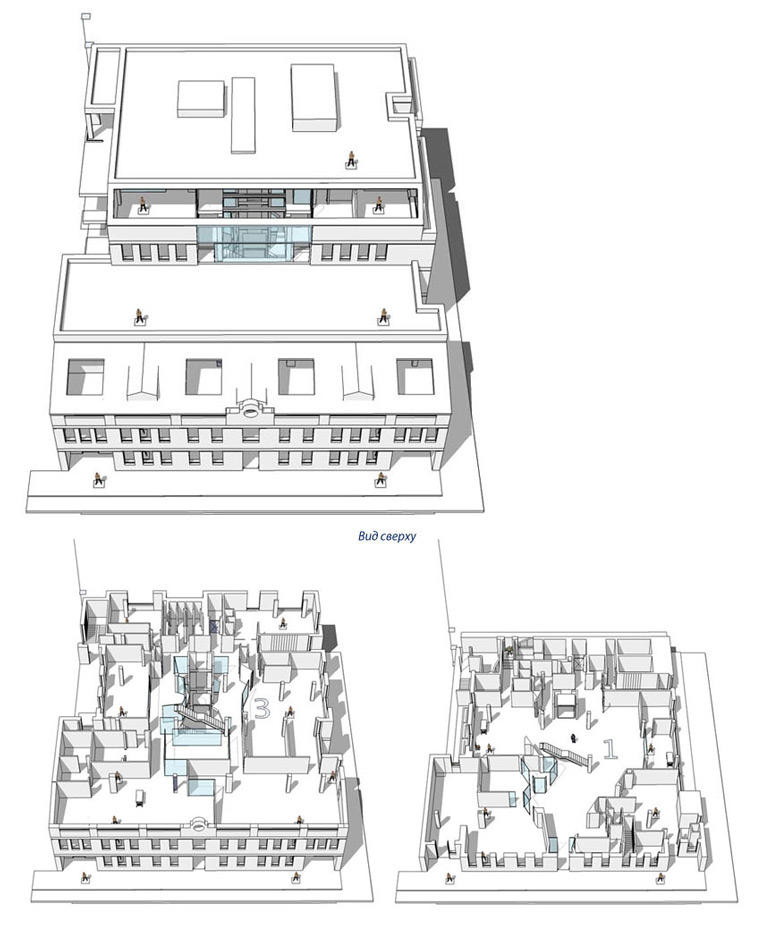
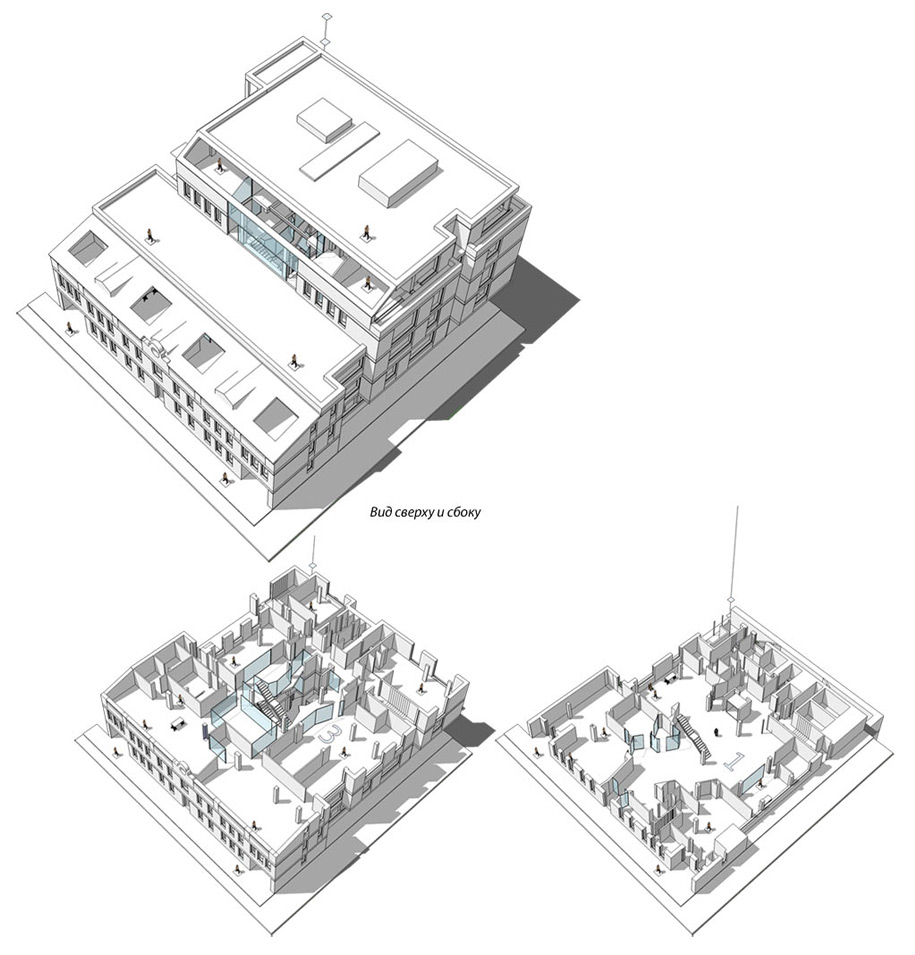
The client decides to go with isometric side view.
General workflow
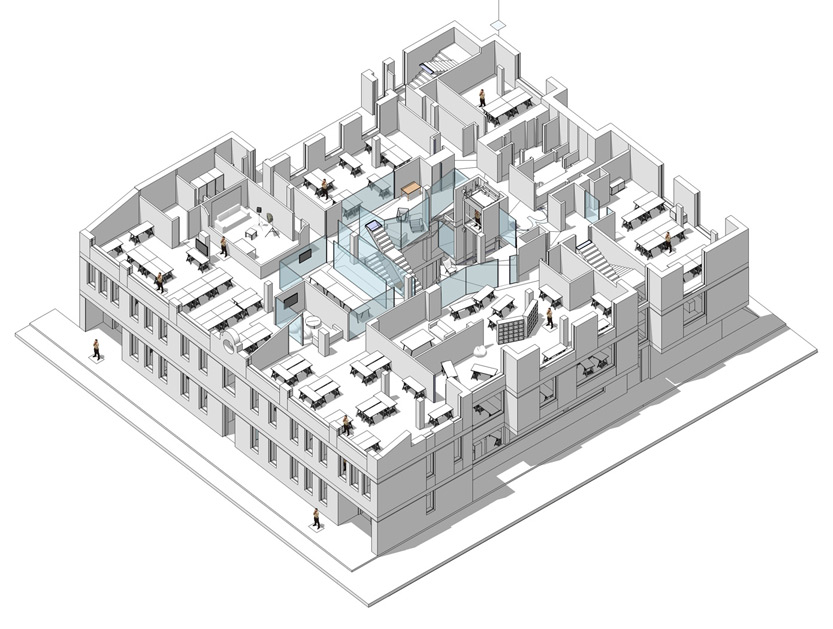
Now that the client has decided on the perspective, we can start making a more detailed sketch. Using the photographs we took to place basic items in the rooms. Some of the offices are too small so we have to remove walls to make sure viewers can see what’s going on there.
Using the resulting sketch, drawing the interior in Illustrator, constantly checking against the photographs. Windowsills, doors, baseboards, the location of columns—it all becomes important.
Simultaneously getting comments from the client. The company has only recently moved into this office and some of the design ideas have not been implemented yet. For example:
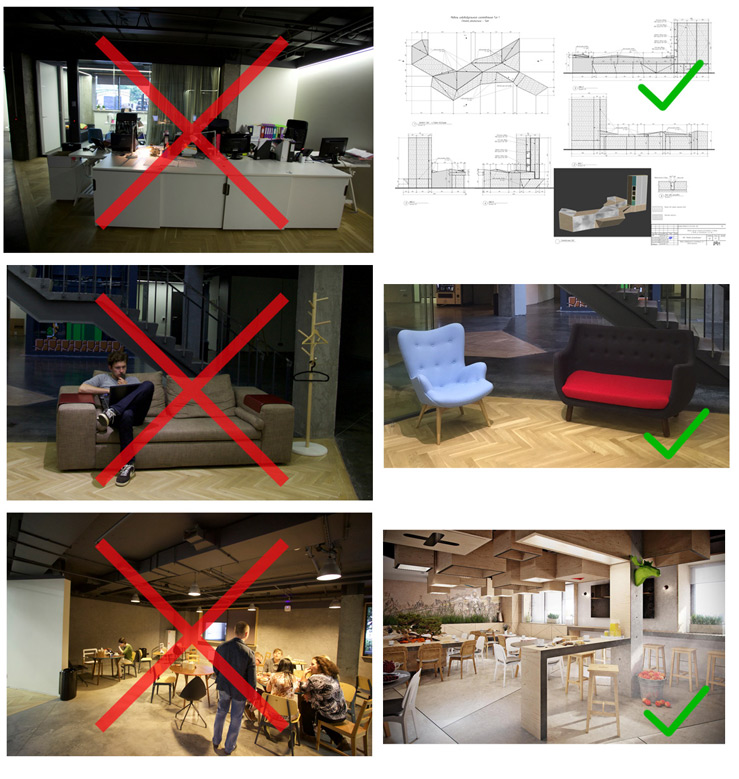
Drawing furniture based on comments and the photo shoot. Since the client chose the isometric view, we can copy and paste common objects: desks, trashcans, cabinets. Moving these objects onto a separate layer and also outside the illustration.
Coloring in Photoshop. Starting with the walls, the floor, doors and windows. Saving the textures so we can reuse them on other floors.
Time to work on the furniture and other items. We’ll add the chairs later together with people. Drawing shadows.
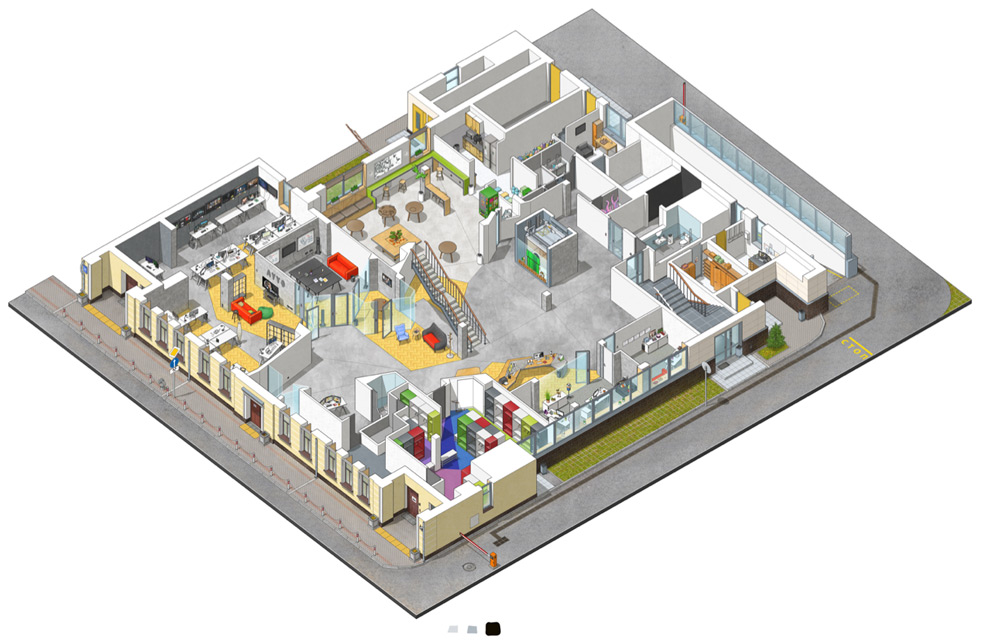
Working on the remaining floors in a similar fashion. Outline—room coloring—object coloring.
Workplaces
We need to keep in mind that the client chose the isometric view. This perspective makes any object look exactly the same in any point in the building, allowing us to use exact copies of objects. But it’s not all that simple.
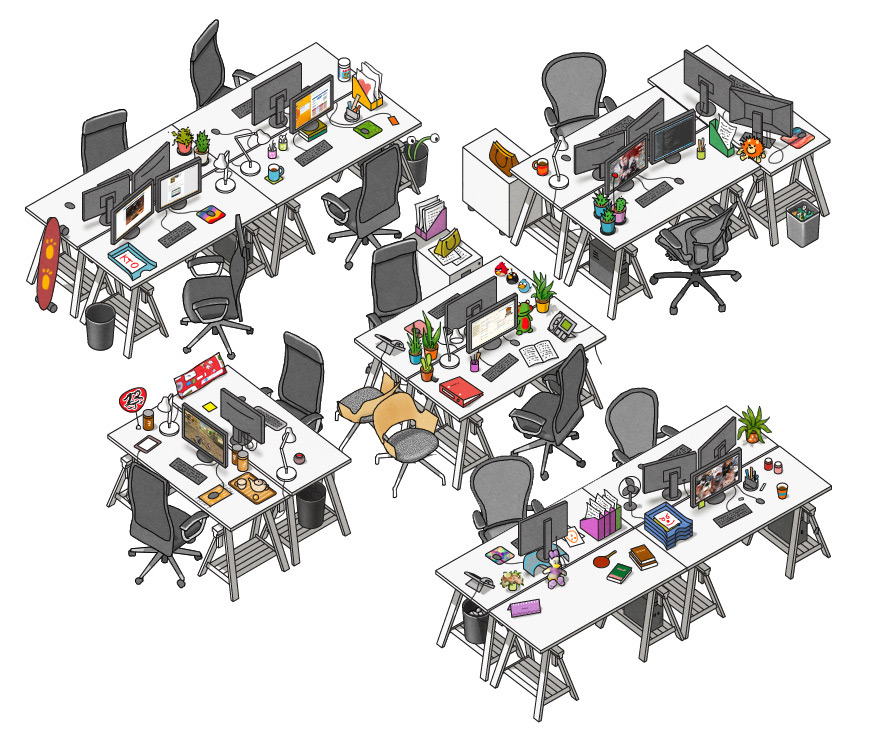
The office has a lot of work desks. If we decide to copy and paste all of them, the result will look lazy and boring, as if there are no real people working here. At the same time, we can’t create photorealistic copies of every single workplace. We need to find a golden mean between interesting detalization and time spent working on it. Usually, a workplace is made of a standard set of items: a desk, a chair, a computer, a trashcan, sometimes a phone, a folder and a desk organizer.
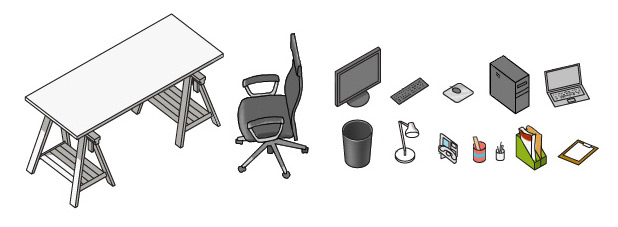
Using these objects to put together a workplace.
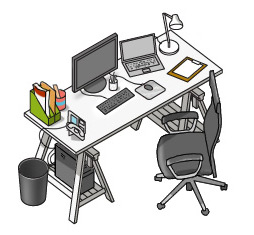
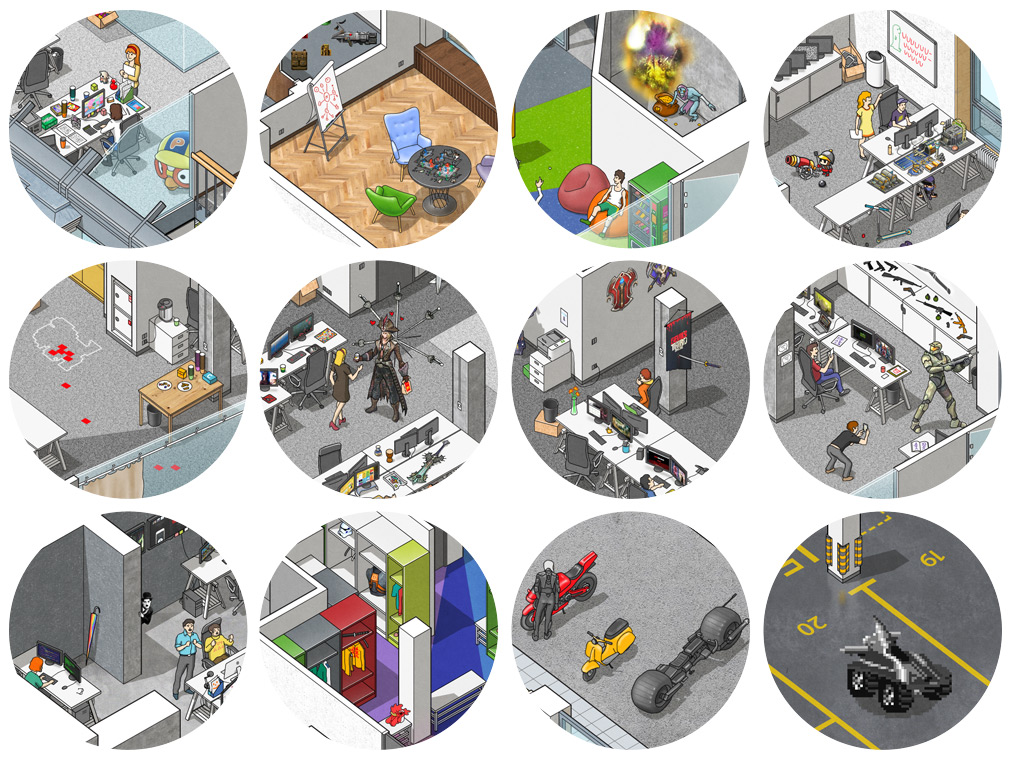
Not bad. But how do we make sure this one stands out? Let’s imagine it’s occupied by an Adventure Time fan absorbed by work.
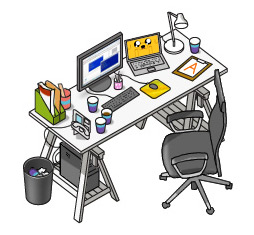
Much better. It means we need to add a story or some interesting artifact to the standard set of items to make it unique. Especially since many of the employees already have interesting objects on their desks.
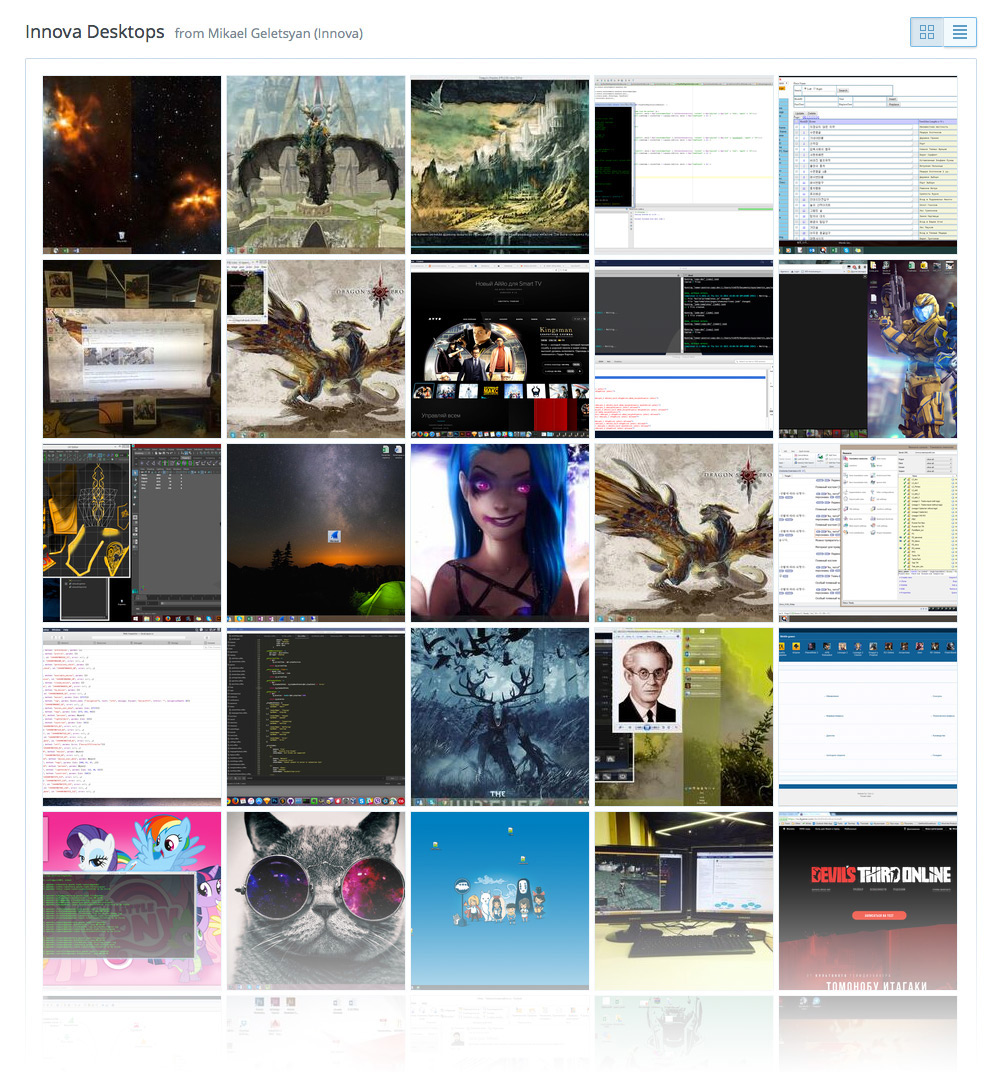
The next question is: what should the computer screens show?
On the second floor alone there are over 60 screens that the viewer can see. Idea: we should ask company employees to take screenshots of their desktops. Asking Mikael, Innova manager, to send out an email with this request. The screenshots are collected in Dropbox.
Characters and details
Unfortunately, we have to abandon the idea to draw all company employees. First, it will take too much time. Second, people always come to the company and leave. Finally, some people might get offended if we end up not drawing them for some reason. Making a decision that even though the workplaces will copy the real ones, all employees will be fictional.
Nevertheless, the client gives us a list of 25 characters that have to be featured on the diagram.
Since the company creates entertainment services, the plan includes a lot of game and movie references. The client asks us to mention not only their own projects, but other widely known films and games. We end up using a lot of such references.
Two files
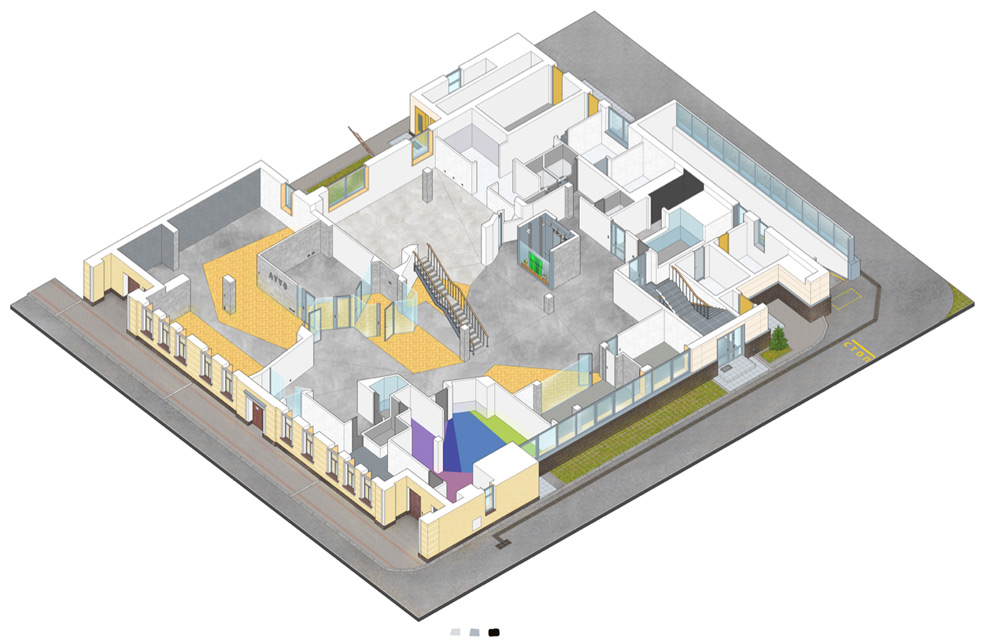
At the end we send two source files to the client. Each floor is in its own folder. Each folder includes separate layer files for wall outlines, colored walls, shadows, objects, people, windows and the central elevator. In the first file all floors are isolated: shadows from one floor don’t drop on others, there are clear outlines, etc. This file allows to use each floor separately or on an exploded diagram.
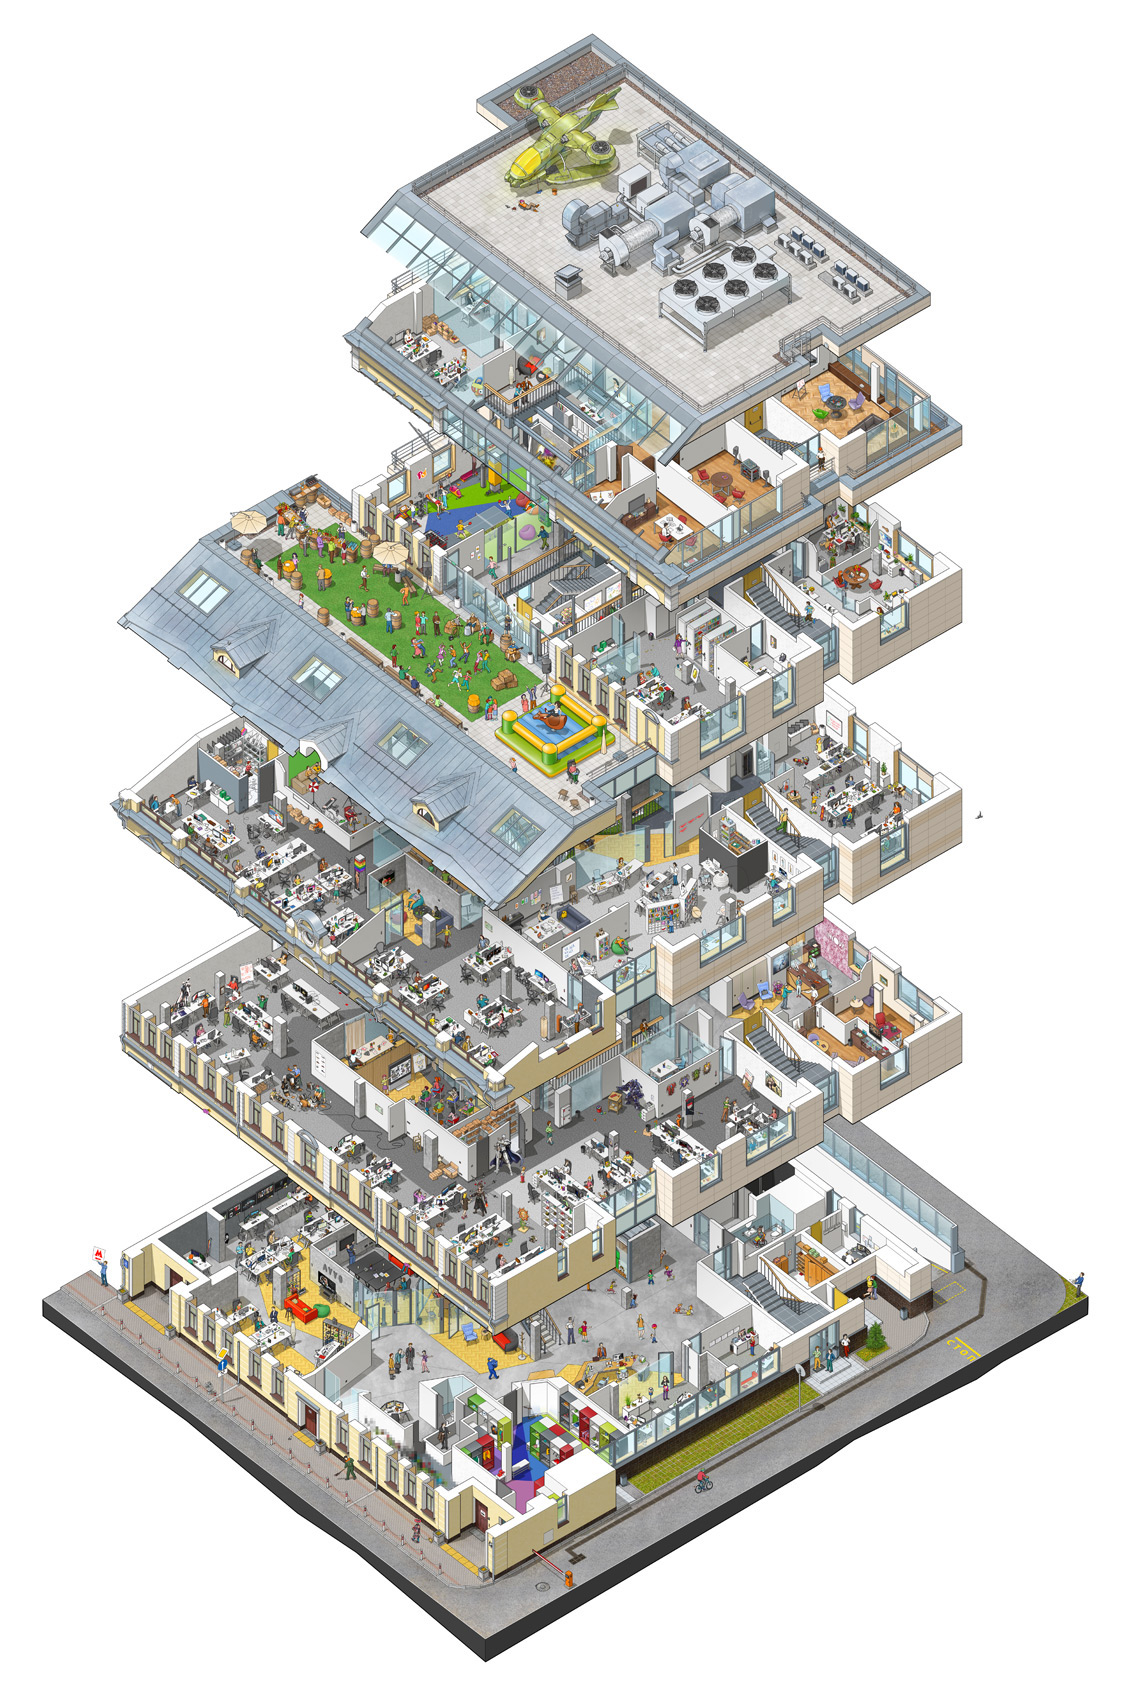
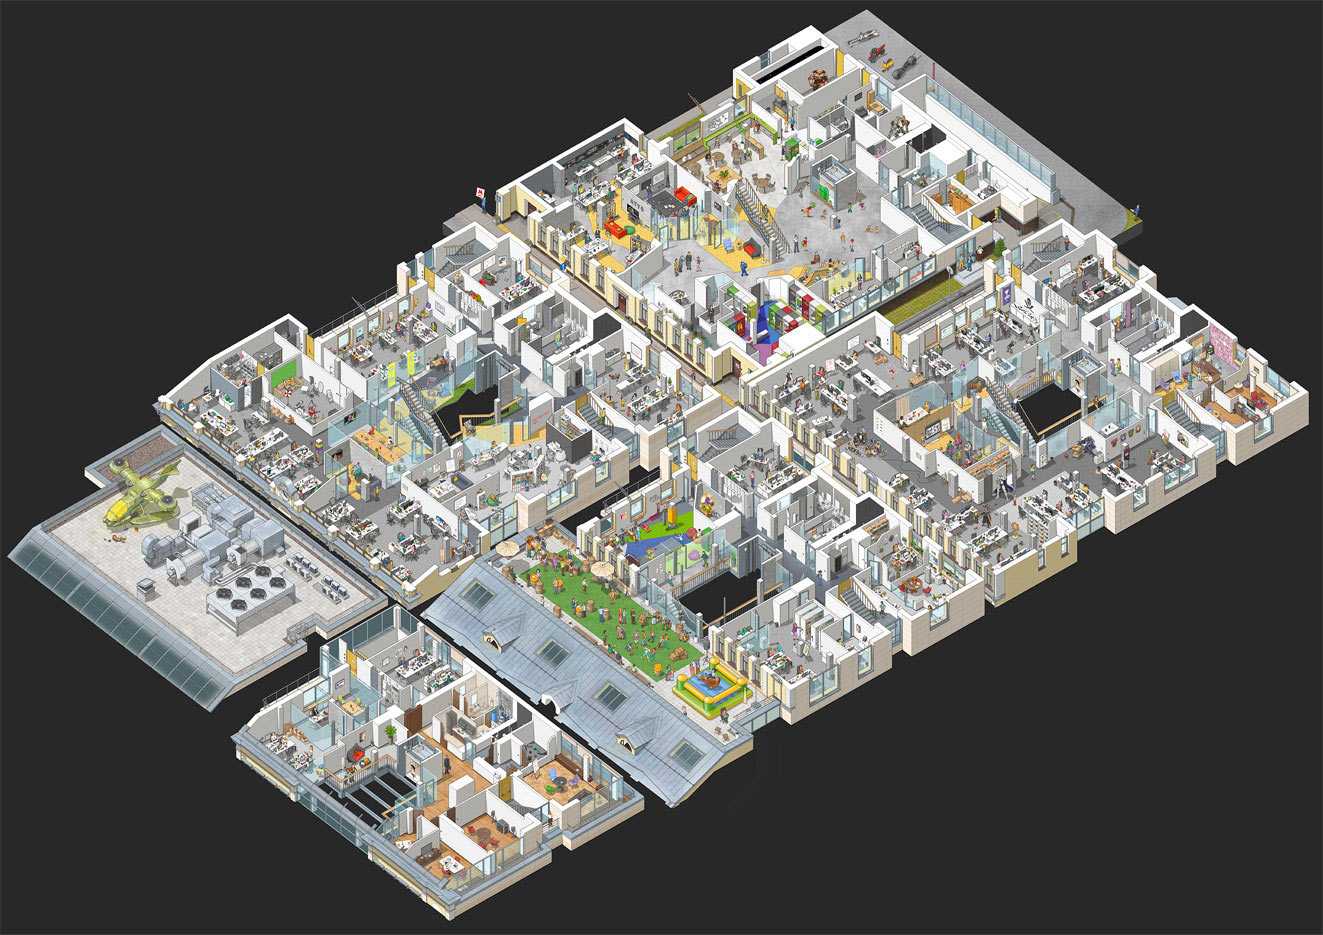
In the second file each floor is combined with the previous ones. Shadows on the top floor drop down taking into account all the bottom floors. There are no stitches between the floors. The overview page of this announcement shows a good example of how this file can be used.
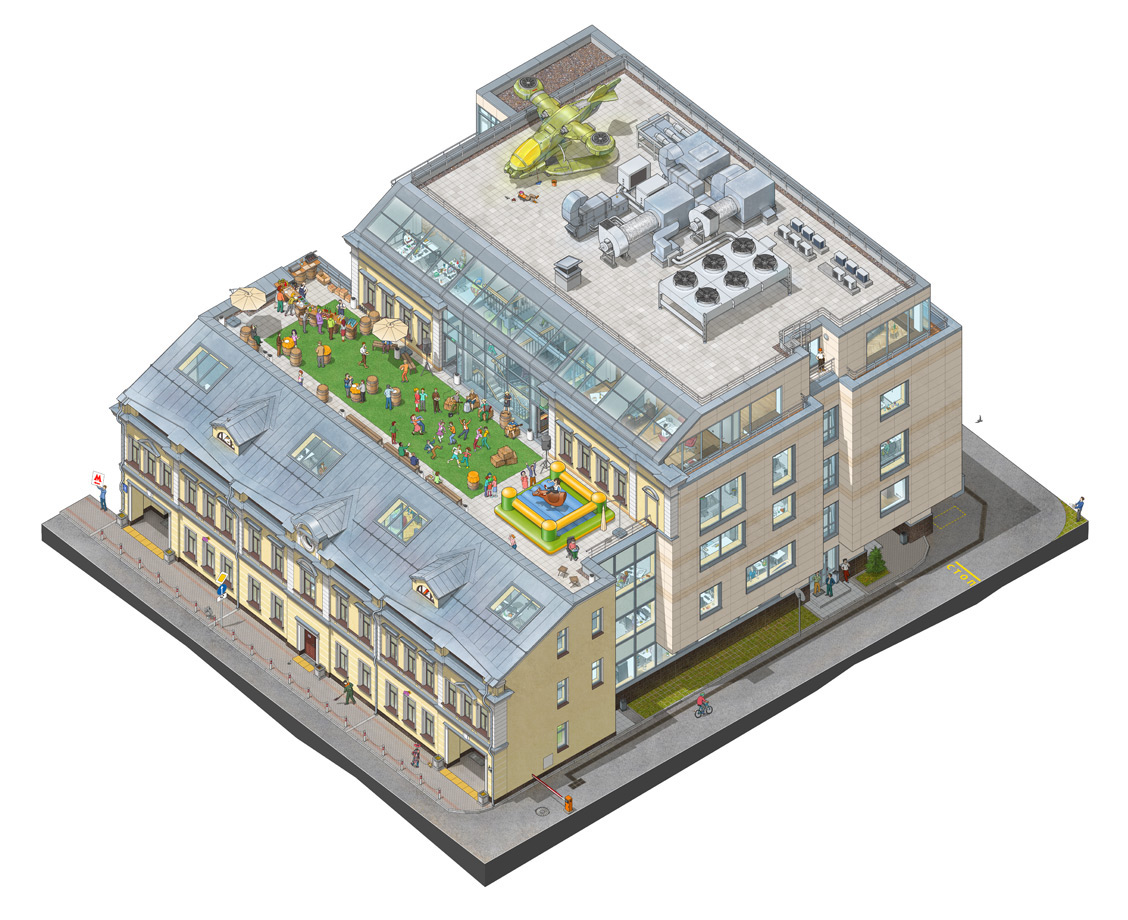
Larger than a football field!