
|
Sergei Chikuyonok
How to cut out objects from their background July 5, 2006 |
|
| Task: | to demonstrate a simple and effective technique for cutting out images to enable accurate superimposition onto a background. |
||
Technologists often have to prepare irregularly-shaped GIF images to be imposed on a nonuniform background. In order to make the file smaller and hide the jointing flange, background needs to be removed:

A conventional way to do this is by using Magic Wand or Magic Eraser. But what if they won’t do?
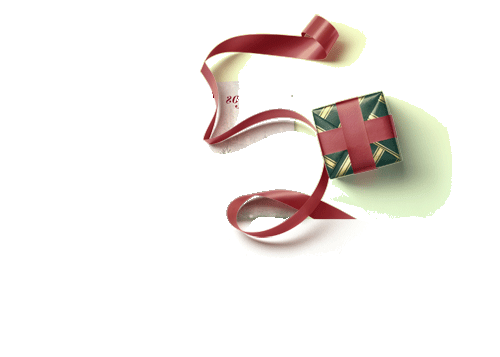
One day Designer sent me this sketch:
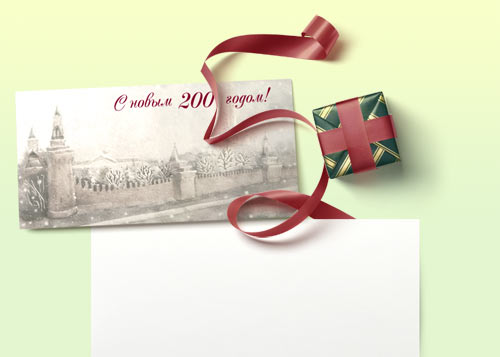
What I had to do was to save the ribbon and the box (together with the shadow) as a separate image that would go over the greeting card and the paper sheet. But the designer made an odd shadow—it appeared to be a separate layer in Multiply Mode, and it was drawn on a white background. Merging the ‘ribbon and box’ layer with the ‘shadow’ layer had unpredictable results. So anyhow, there was no way those “magic” tools could be used—I would spend way too much time selecting the area to remove. Besides, I would risk selecting the pixels meant to stay and clearing these would make the shadow look too sharp and unnatural.
This task that may seem complicated at first, but it can be solved rather easily. It’s just a matter of finding the difference between the image with the ribbon and the box and the one without them.
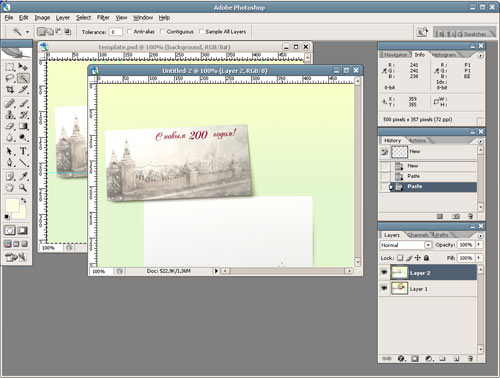
| 1. | Select the image (Ctrl+A), copy merged (Shift+Ctrl+C), create a new document (Ctrl+N) and paste the image into it (Ctrl+V). |
| 2. |
Go back to the initial sketch, and keeping the selection hide the ‘ribbon and box’ and the ‘shadow’ layer (which is everything that has to do with the objects being cut out). Copy the background image (make sure that the background layer is active) and paste it into the newly created document. You should end up with a two layer document—one layer has the ribbon and the box, and the other one doesn’t:
|
| 3. |
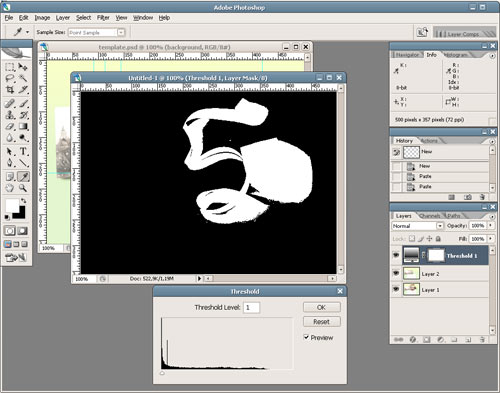
Select the upper layer (Layer 2) and switch from Normal to Difference mode:
|
| 4. |
Click on the icon
|
| 5. |
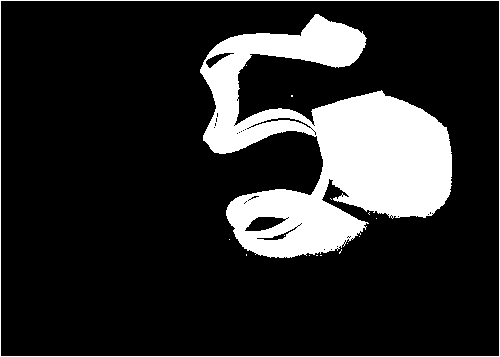
As a result, you have a bitmap mask in which black color marks the area to be removed.
|

|
Housekeeping tip |
Difference Mode enables you to highlight the area that make the two layers different. And Threshold does two things: it fills with white the pixels with brightness level higher than 1 and prepares the layer for making a selection (try to select the black in Layer 2 without creating this layer). |
|
And finally, keeping the Threshold layer active in the Layers palette select all the black area using Magic Wand (or go Select → Color Range), hide Threshold and Layer 2, select Layer 1 and press Delete. Look what you got:
This is the image that would fit perfectly onto the background. I use this technique all the time and it came in handy when I had to deal with more difficult situations, too.
