
|
Sergei Chikuyonok
About PNG. Part 2 15 January 2008 |
|
| Task: | Learn to work with PNG. |
||
Last time we looked at PNG format and its peculiarities. And now lets use what we’ve learnt to optimize images.
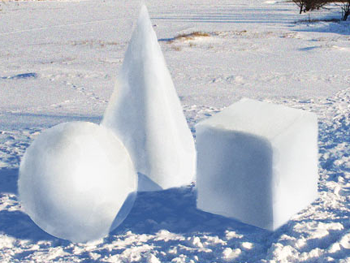
We’ll start with the most simple technique—posterization. In complicated terms, Posterize command lets you specify the number of tonal levels (or brightness values) for each channel in an image and then maps pixels to the closest matching level. To put it simple, posterization means changing the number of colors.
Lets open a test image (PNG, 12 Kb) in Photoshop, then go to Image → Adjustments → Posterize. Move the slider to see how the image changes:

|

|
You see that the lower is the value, the fewer colors appear on the image and the larger are single-color areas. And the smaller is the file size, because large single-color areas are easier to filter and pack. This method is especially effective with photographic images on which posterized areas are not noticeable.
|

|
The next technique is a little more complex and is used for images with transparent areas. What it does is it saves all the solid pixels into one PNG-8 file and the transparent pixels into another. You can read Vladimir Tokmakov’s article to see how it works. As for me, I am going to show you how to sort out solid and transparent pixels.
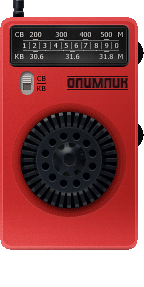
Here is an image we’ll take (PNG, 62 Kb):
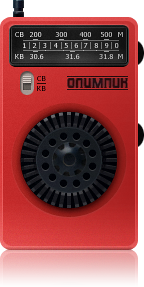
Open it in Photoshop. The image has to be a single layer, so if you have several layers (shadows, reflections, glare, etc.), merge them.
First, we need to select the object on the layer. To do this we Ctrl-click (or ?-click for Mac) on the image in the Layers palette:
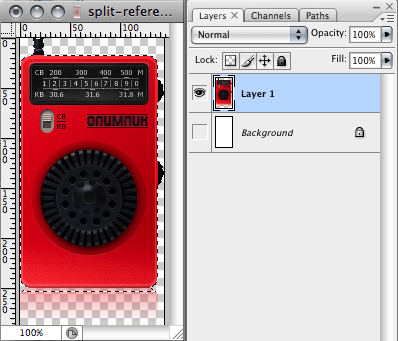
Then, go to the Channels palette and make the selection a new channel by clicking the relevant icon:
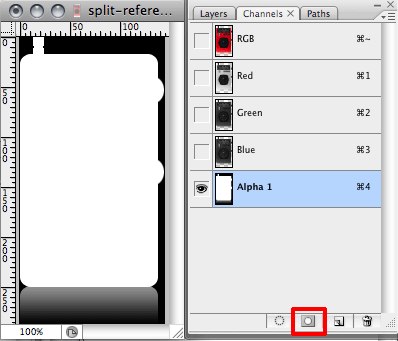
Deselect (Ctrl-D or ?-D), select the newly created channel and run Threshold (Image → Adjustments → Threshold). Move the slider to the very right:
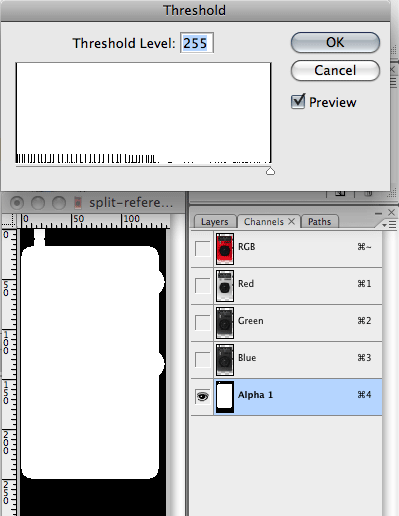
We’ve made a mask for selecting dead solid pixels. What’s left to do is to run this selection (Ctrl-click or ?-click on Alpha 1 channel), go to the Layers palette, select the image layer and run Layer → New → Layer via Cut. As a result, there are two layers with separated solid and transparent pixels.
Now we need to save these layers into two separate files—solid pixels are subject to PNG-8, transparent ones to PNG-24 (in addition, we can have this image posterized):
128 colors + dithering 17 КБ |

posterization 35 6 Kb |
Here is the result:
|
62 Kb |
23 Kb |
|
Housekeeping tip |
The attentive reader might notice that all operations can be easily recorded as Actions, which will allow performing the separation with the click of a button. |
This method has a drawback—you get 2 images, which are not so convenient to use (for instance, when making a product catalog). Next time I will describe the optimization technique that is rather complicated and not so universal, but is advantageous as there is only one file in the end.
