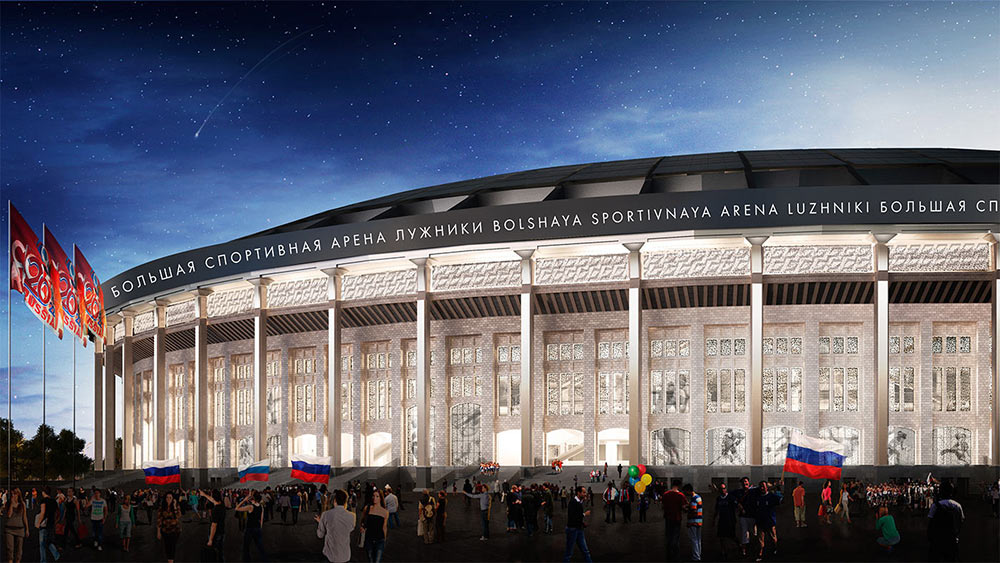
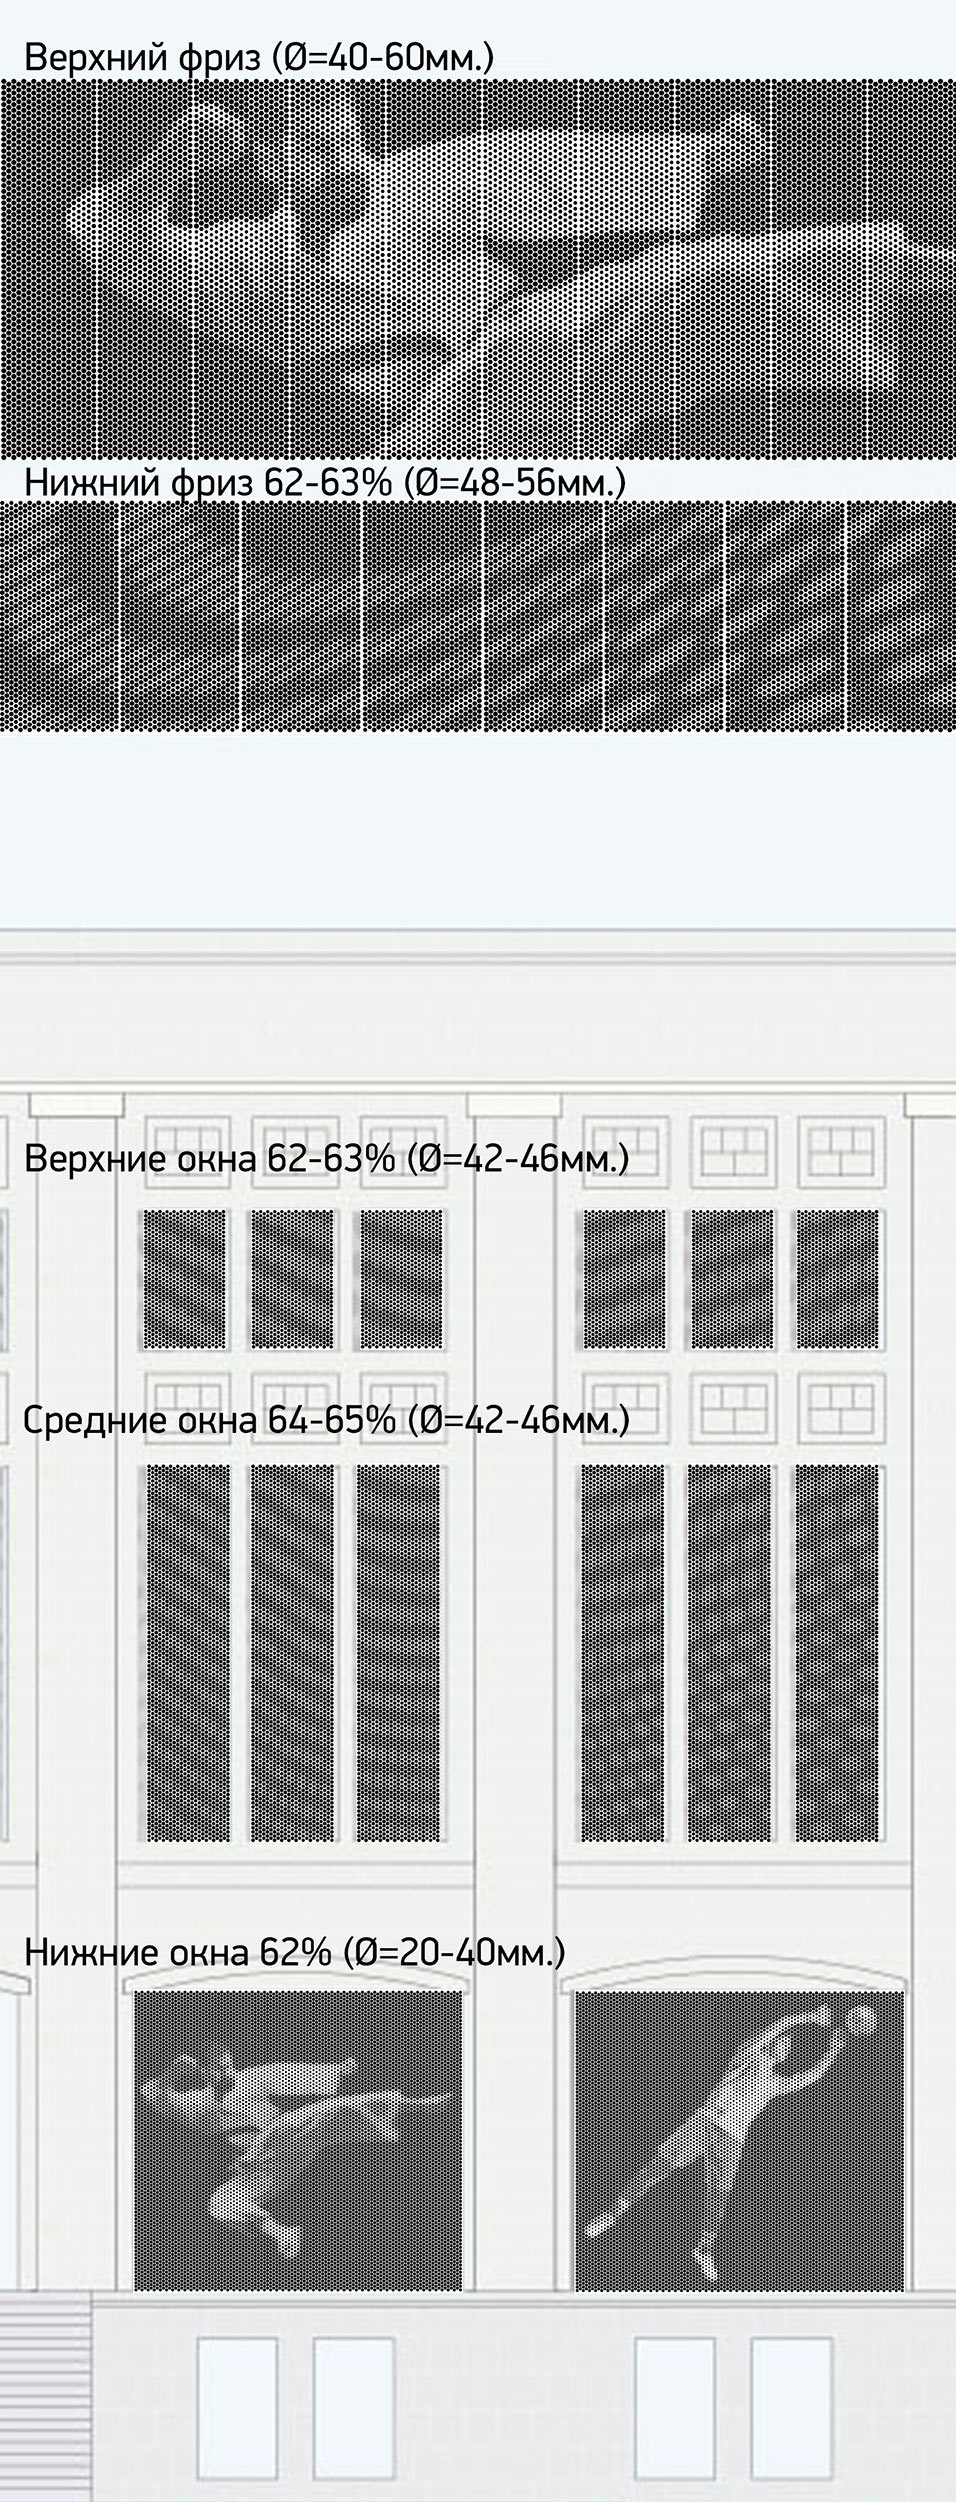
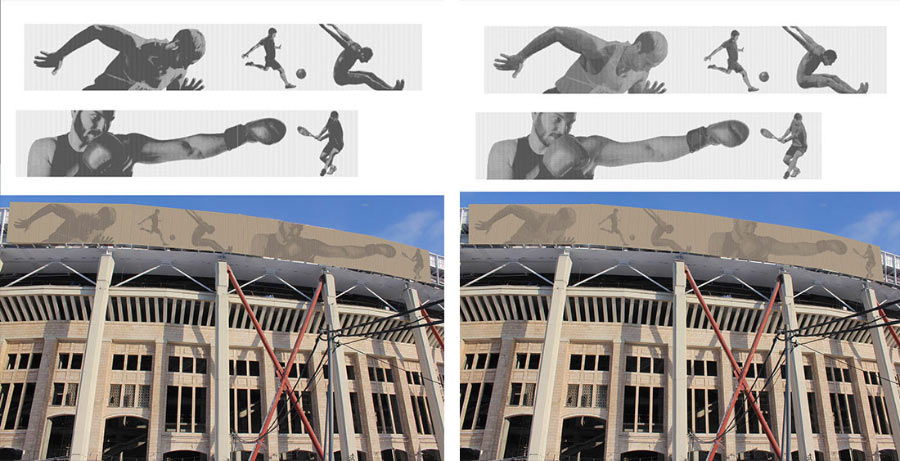
According to fire safety regulations, the frieze has to be ventilated and open to air circulation. Deciding to create a grid with perforated images.


We also want to use moire to create an impression of animation.
Creating sketches of the pattern.
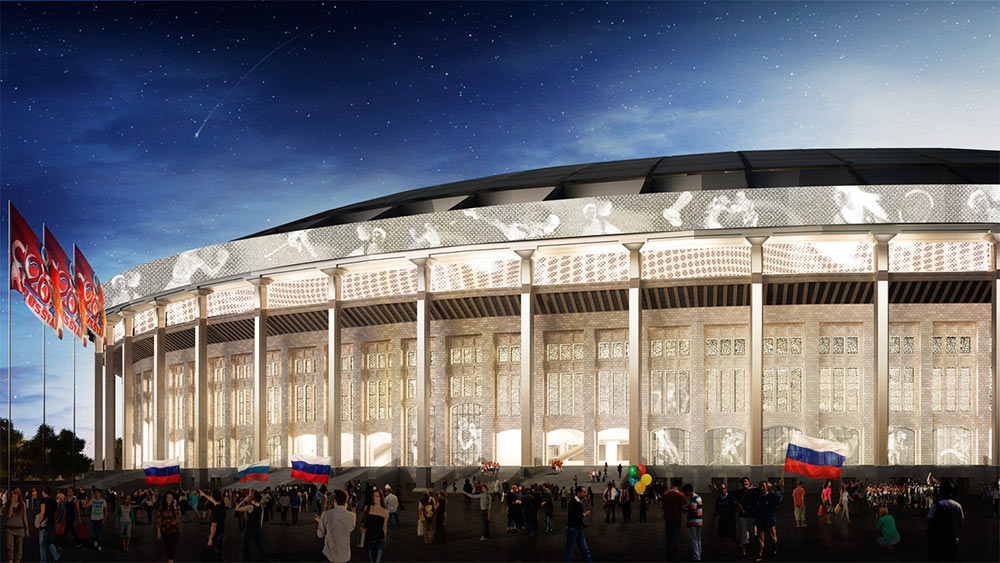
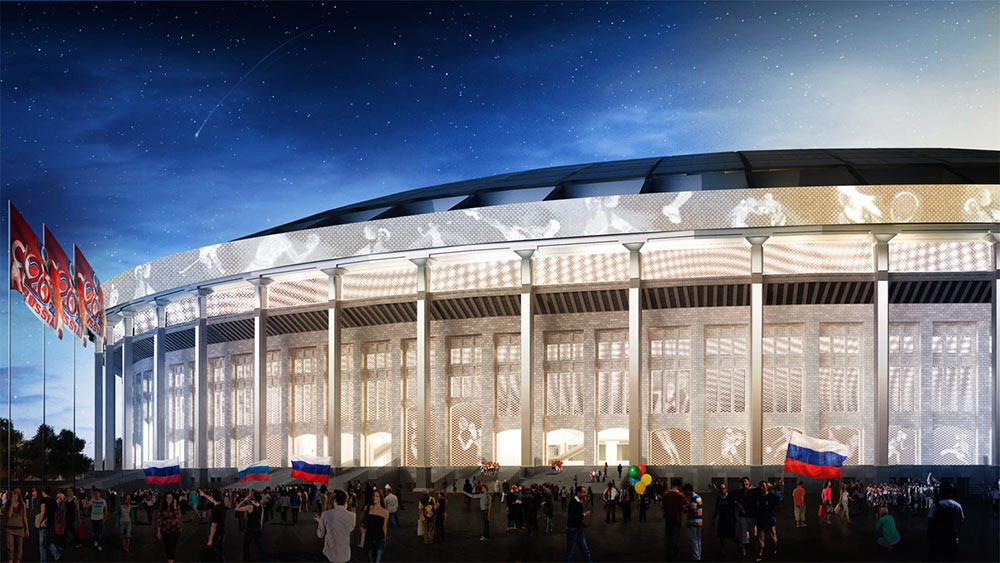
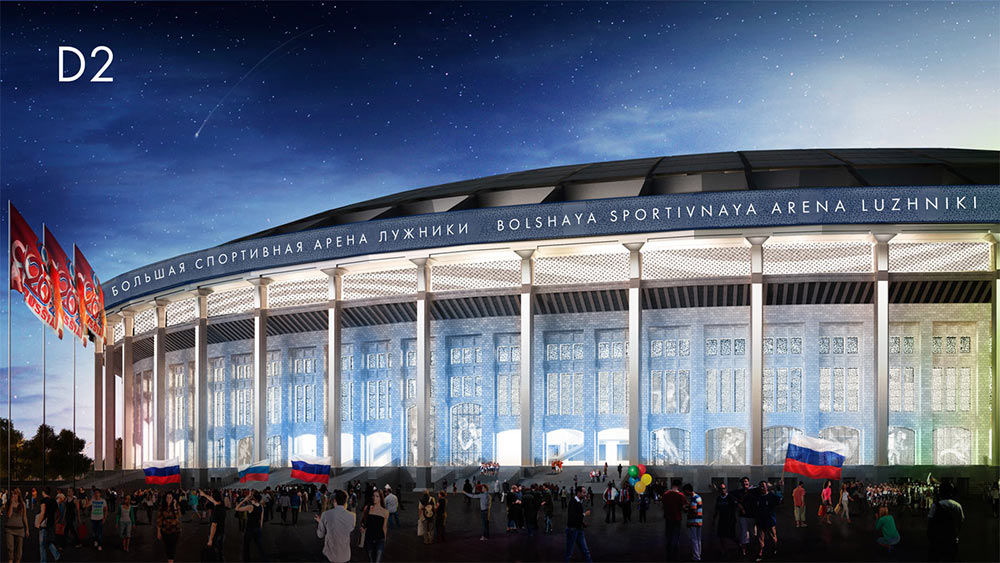
It’s important to check how the images will look in the dark when the stadium is backlit.
Getting the client’s approval for the sketch and continuing to work on details. A photographer and a couple more designers join the project.
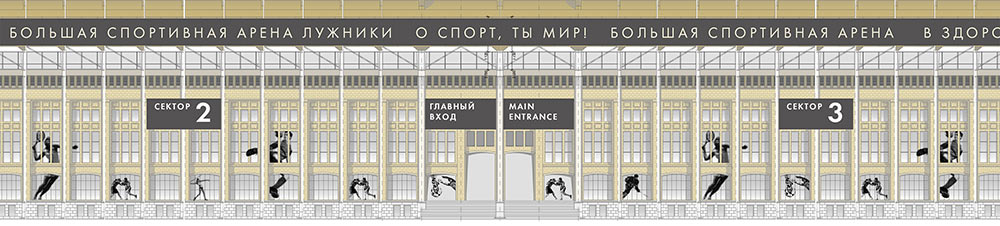
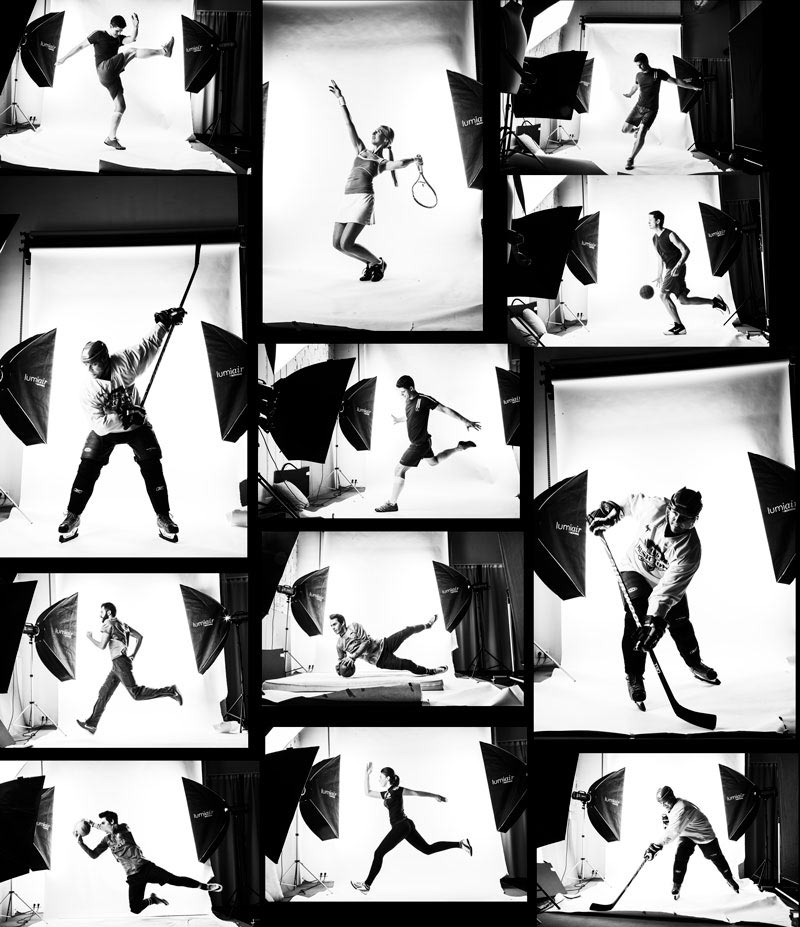
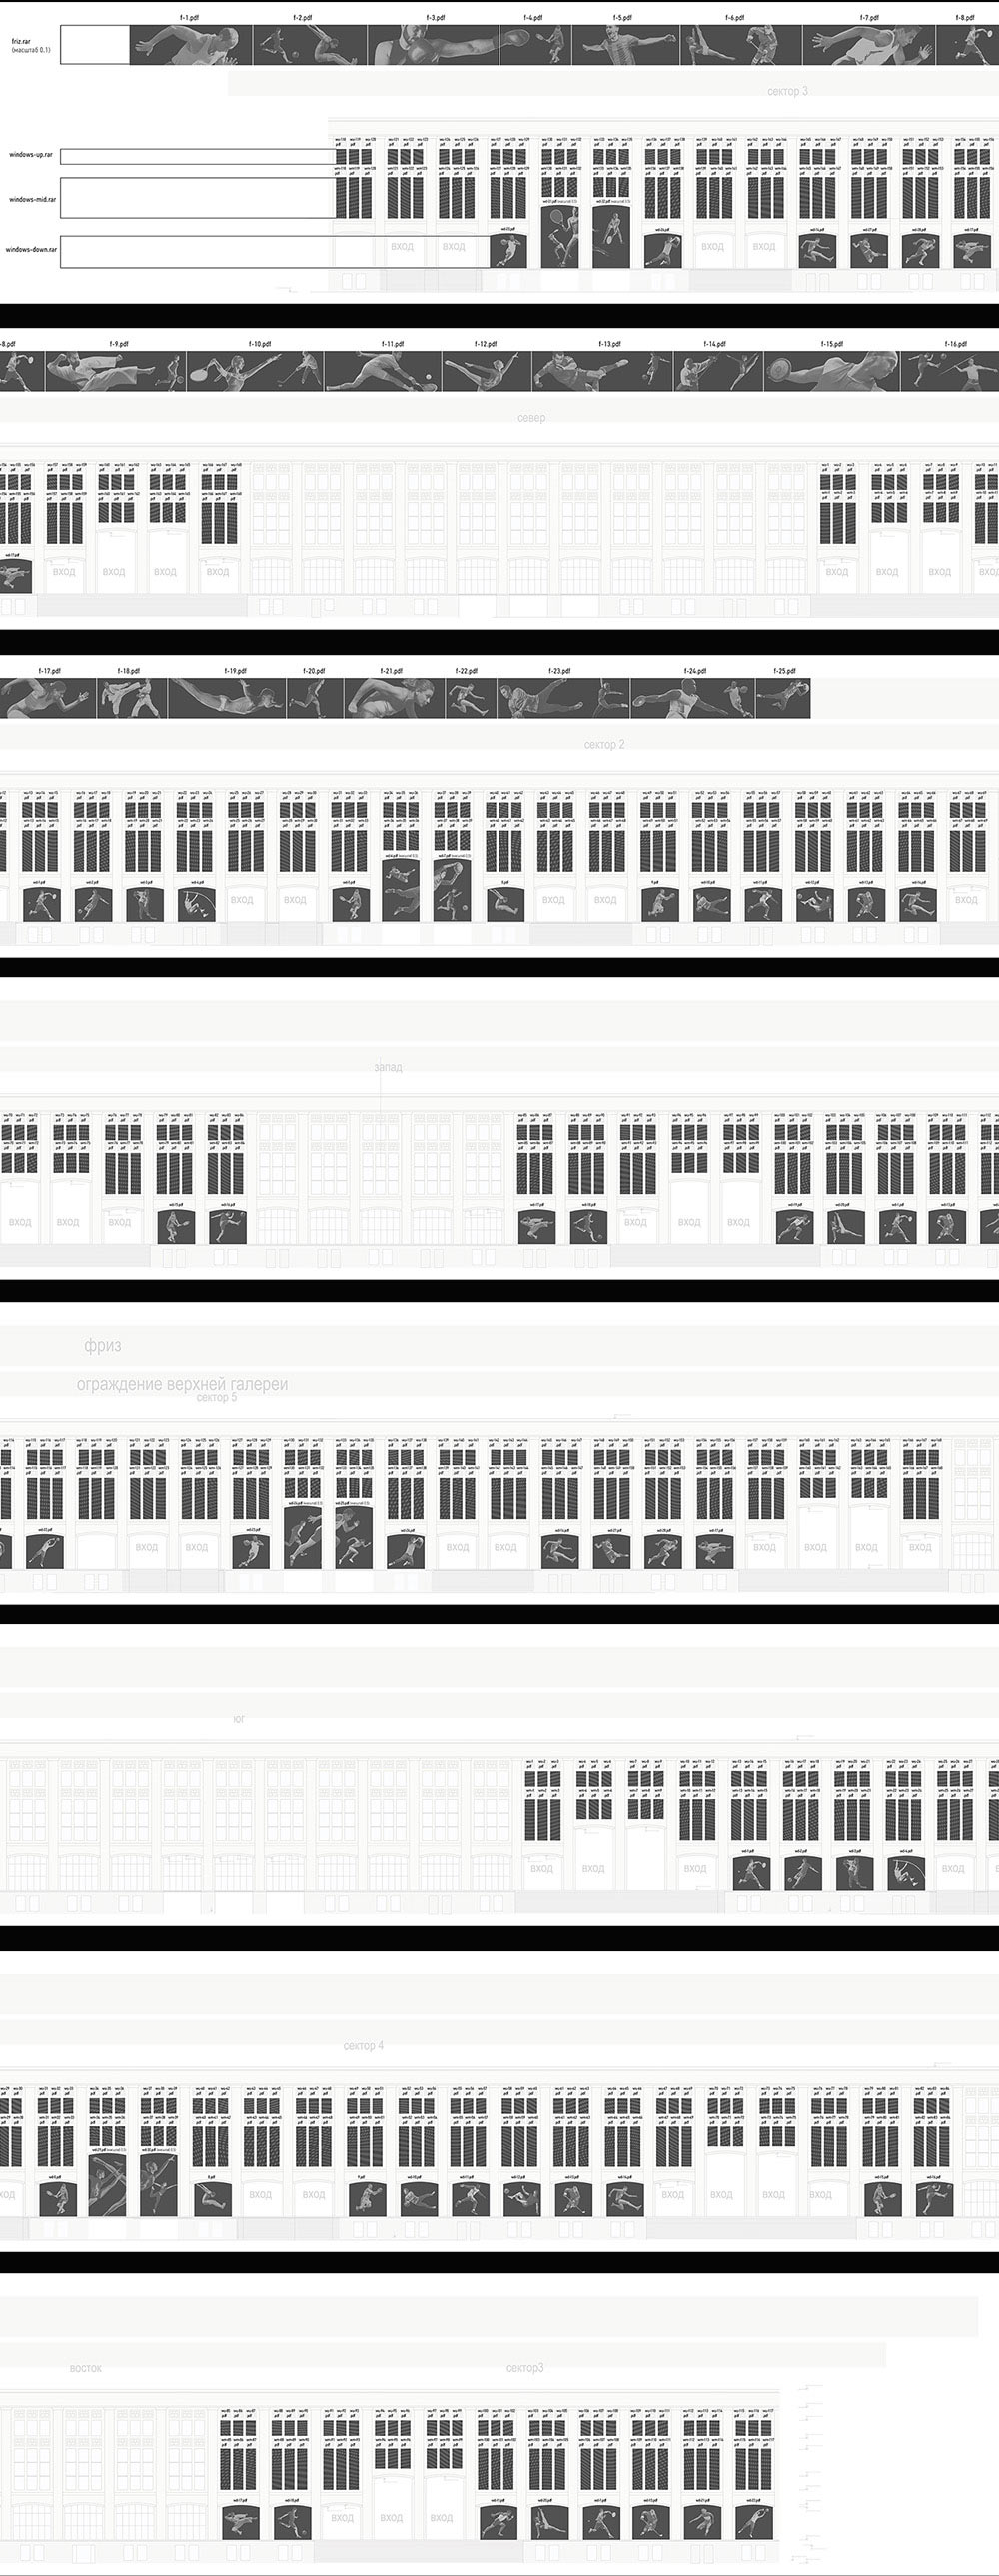
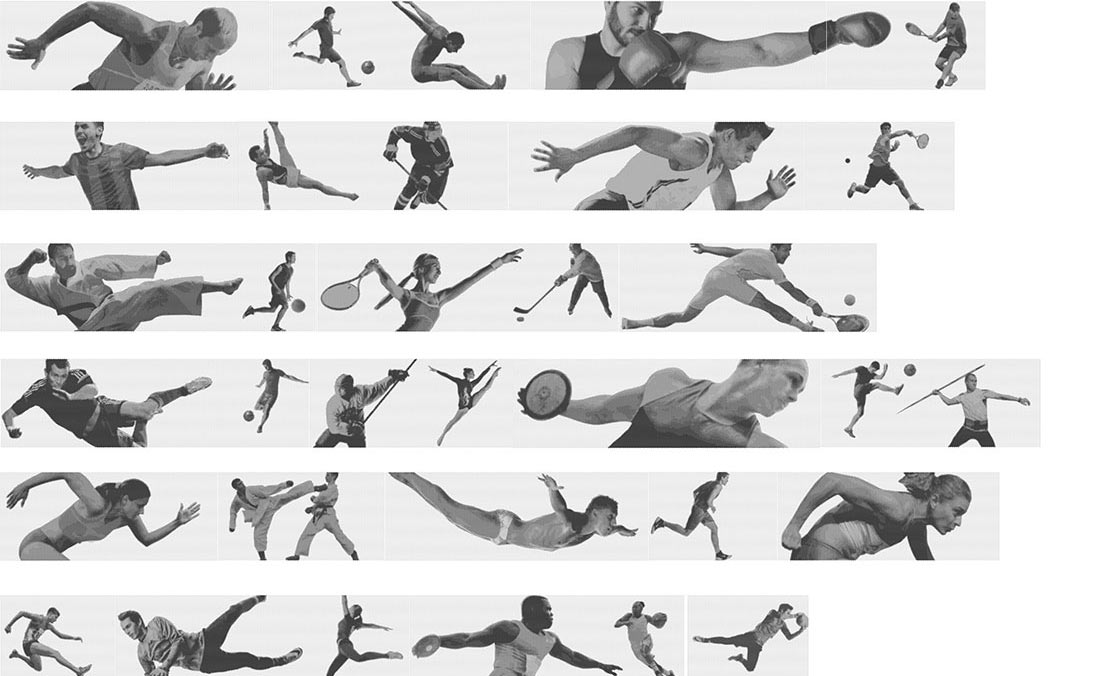
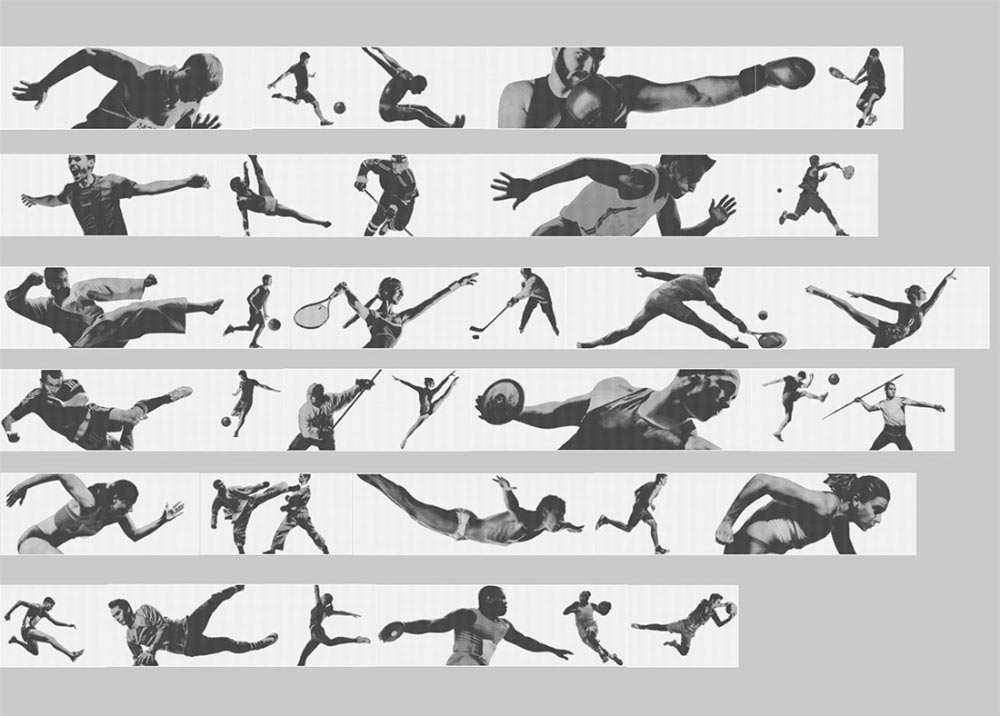
We need expressive silhouettes of athletes for the frieze and the bottom windows. Searching for models and the gear, getting them to run, jump and catch, taking photos and retouching. Buying a couple of missing shots from trusted photographers.
Searching for the rhythm for the frieze.
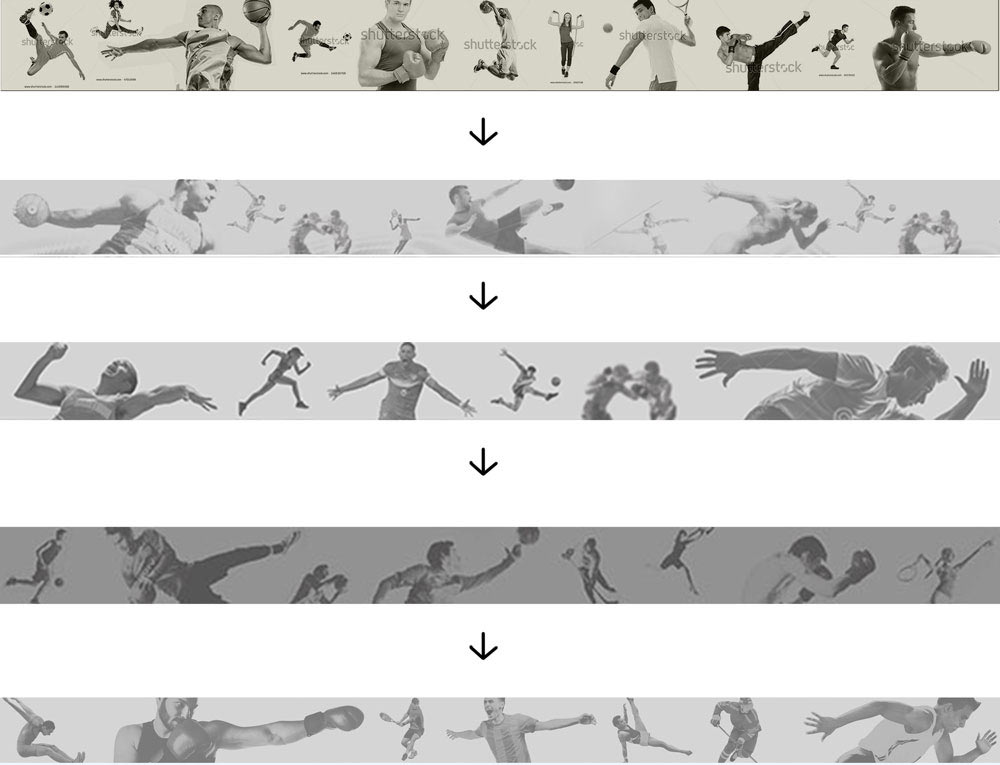
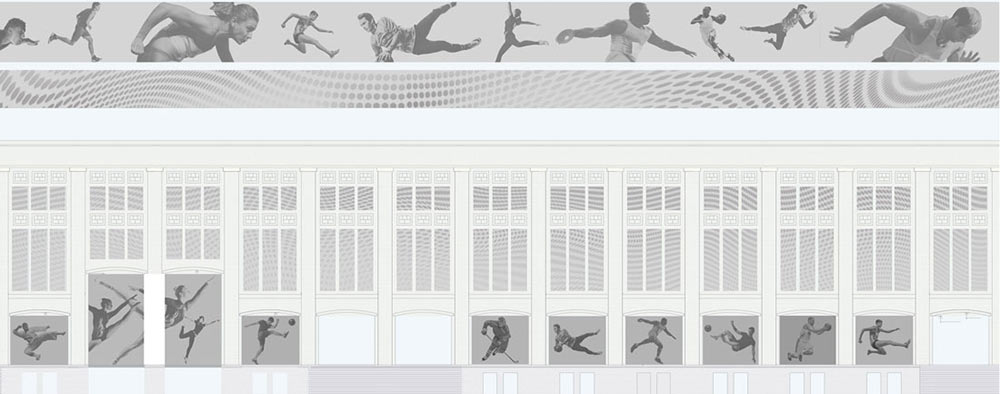
Deciding on the pattern, composition and the rhythm of images and the bottom of the façade.
Turns out, we need to prepare vector files with perforation already in place. Asking studio programmers to write an application for generating perforated images out of pictures that would also allow to choose between round and square holes and display their percentage, which is needed to satisfy fire safety regulations.
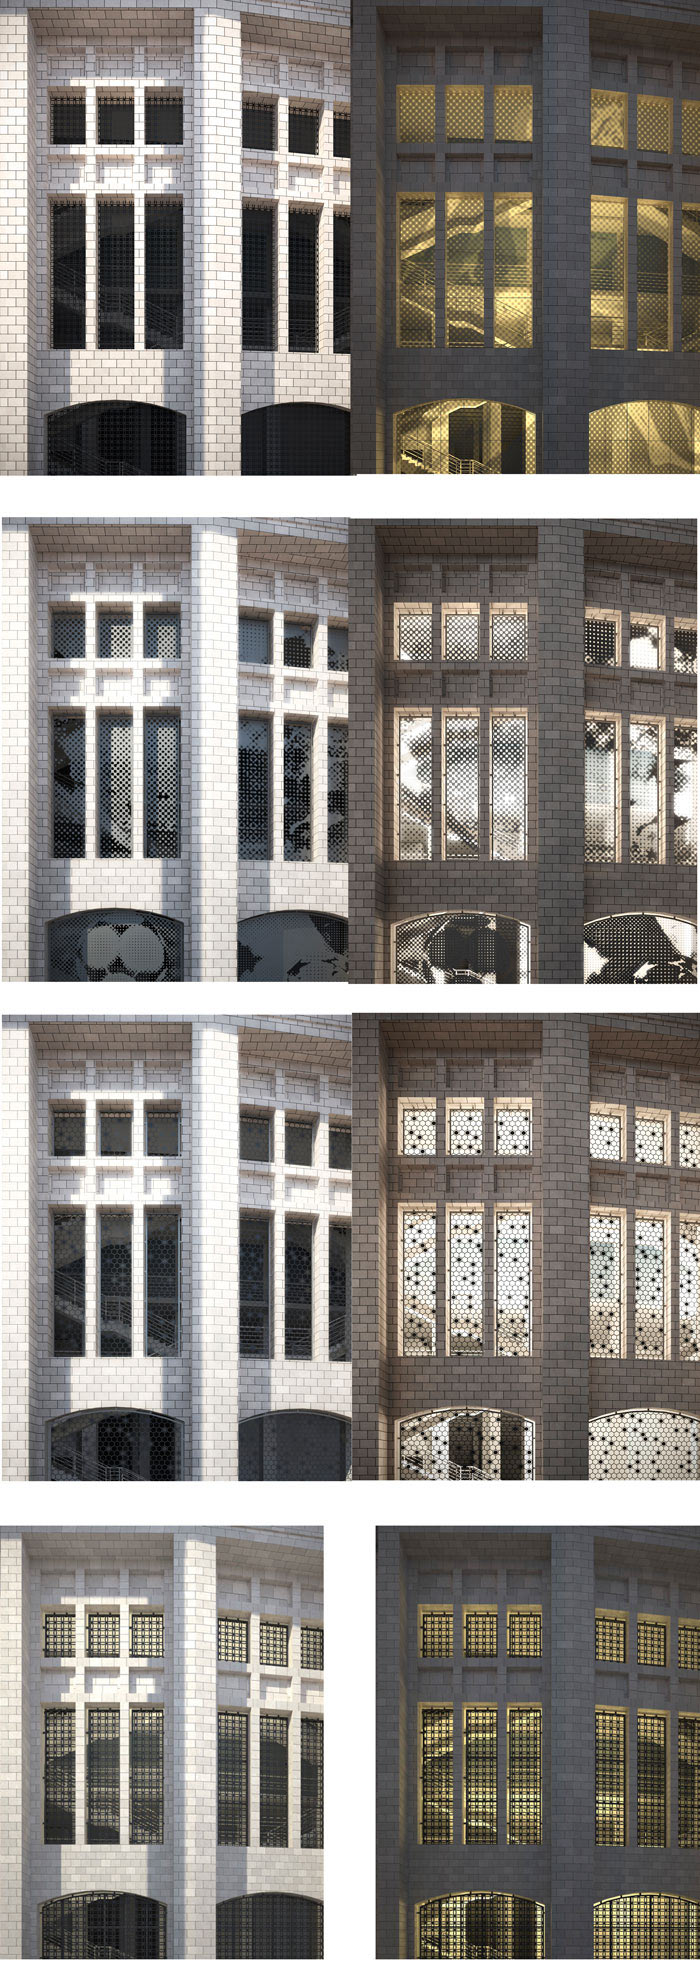
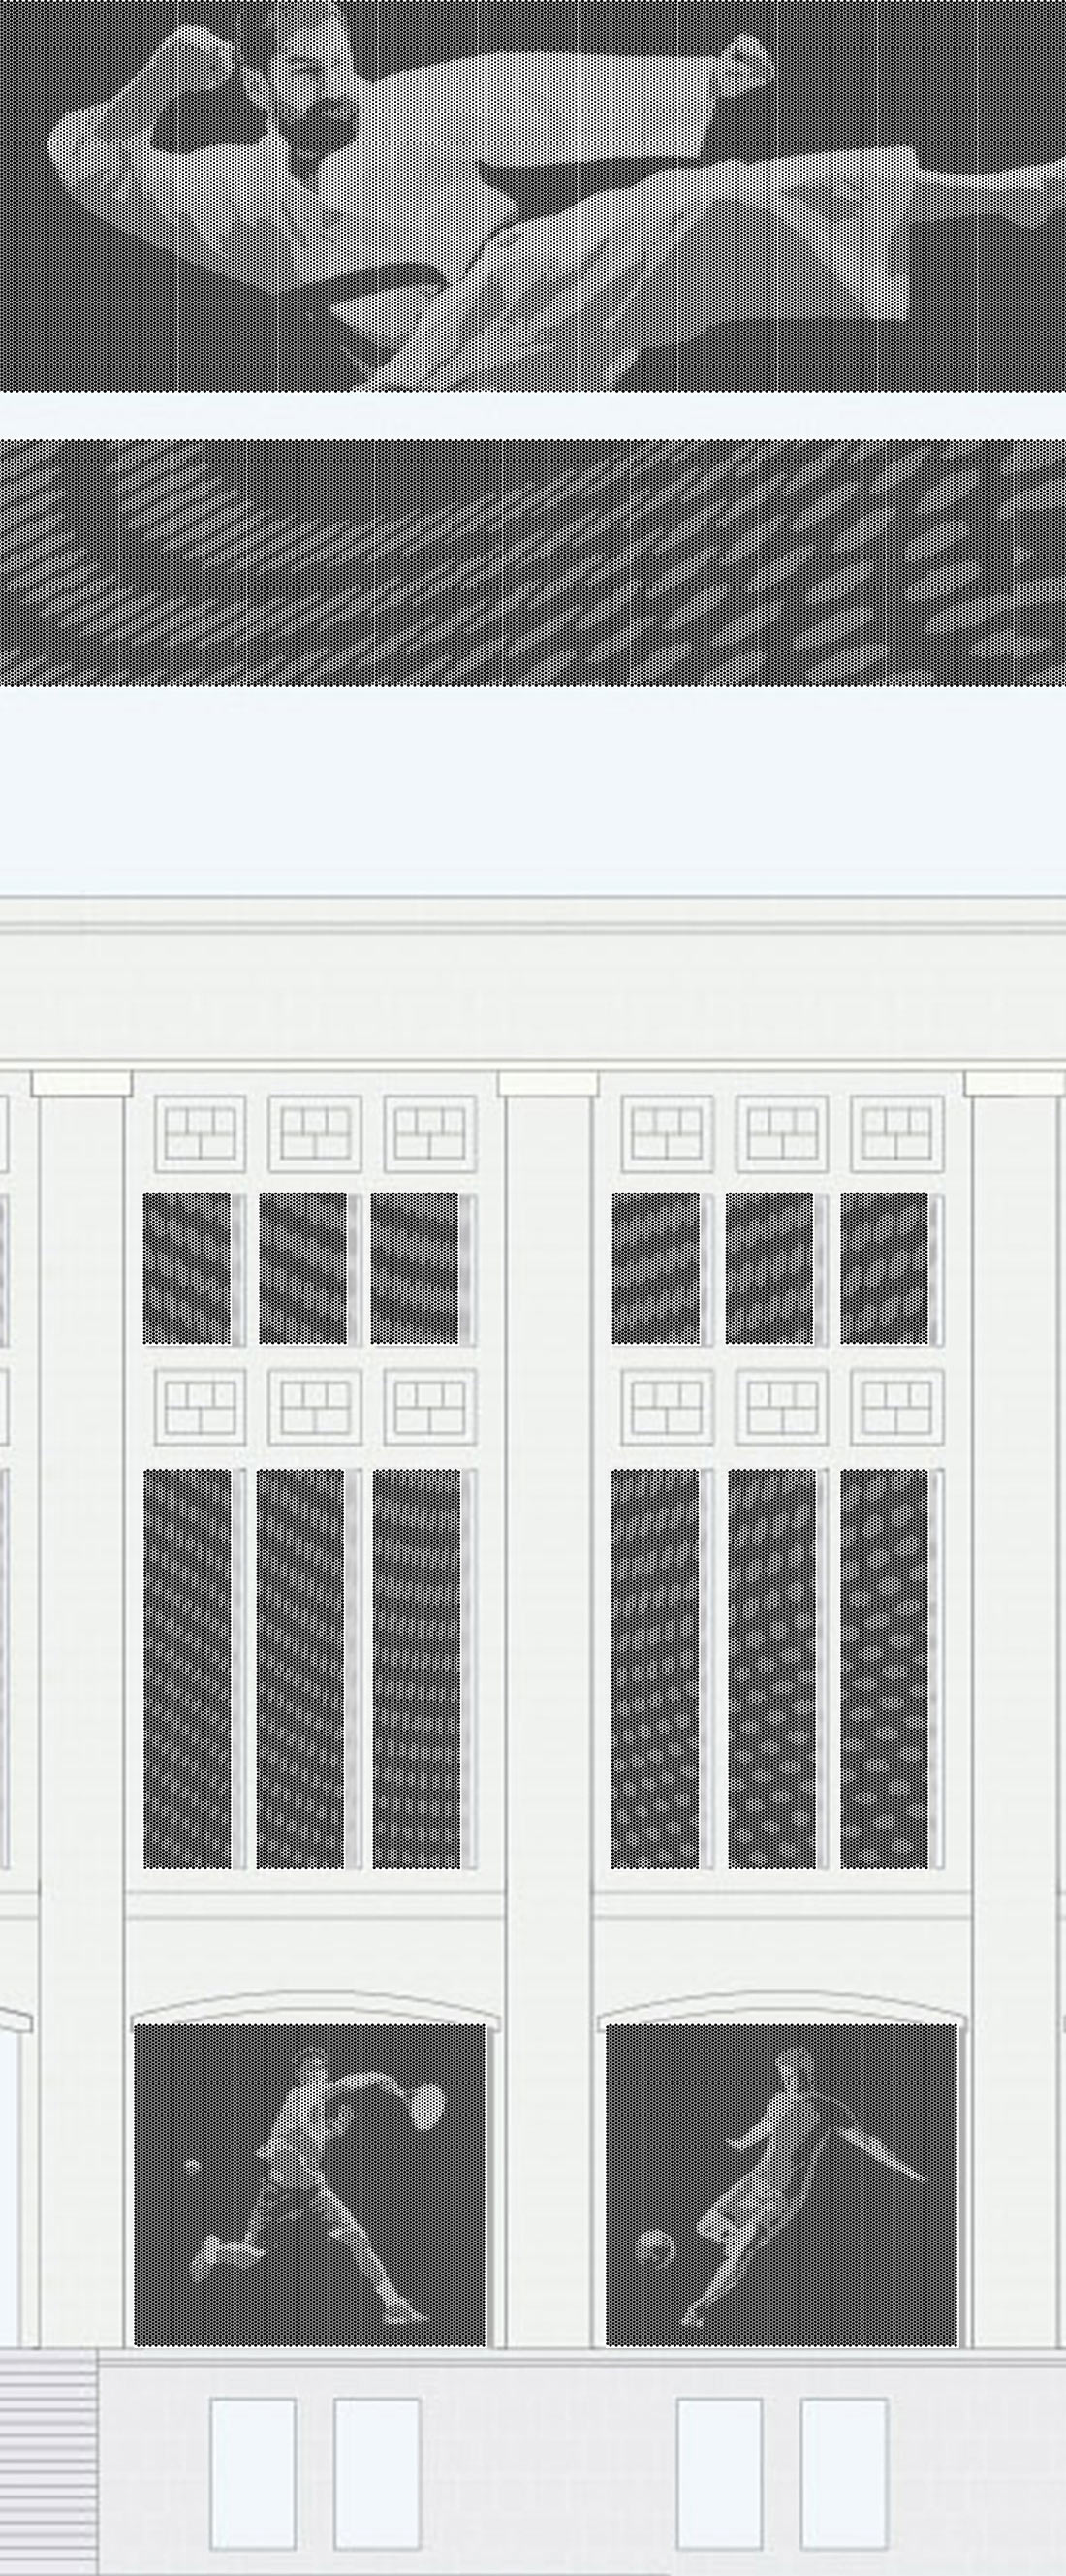
Getting the first version of the application from the developer and technical limitations on hole number and diameter from the production subcontractor. Deciding to use round holes as they ensure smoother halftone transition.
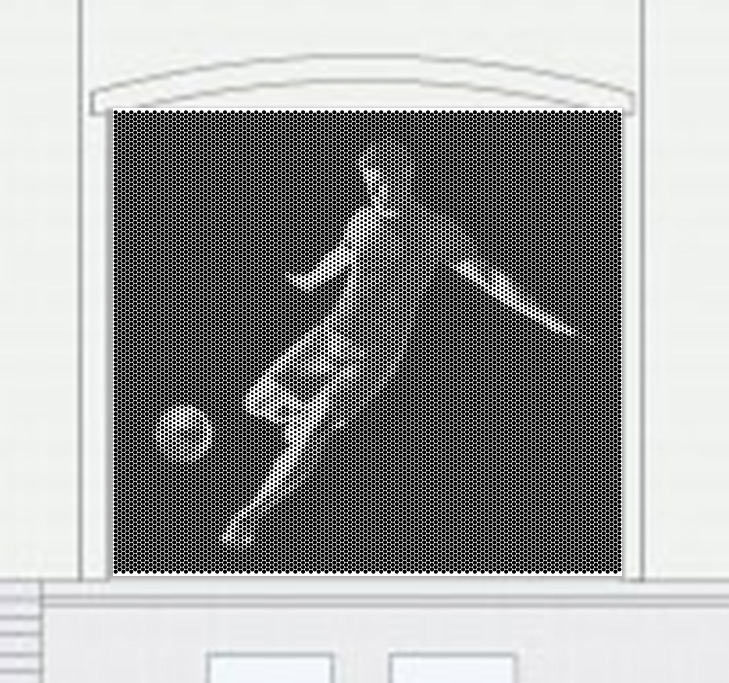
Using a fragment of the façade to experiment, trying to make sure that the picture looks good and at the same time complies with all fire safety regulations (perforation should make up at least 61% of the image).
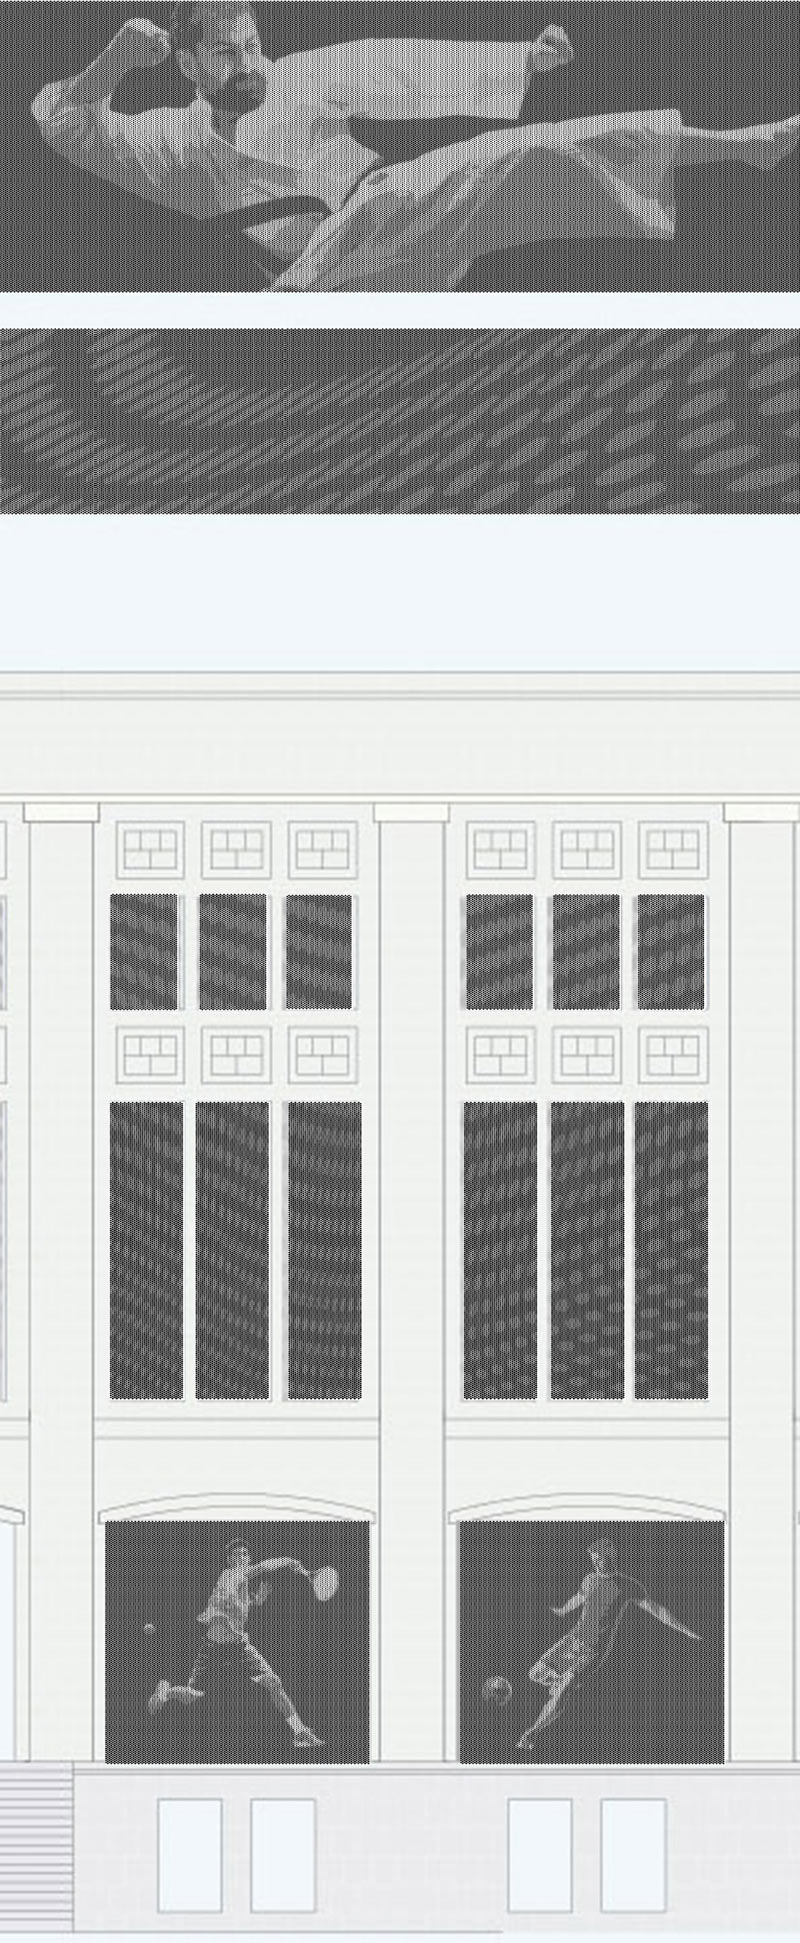
Right now the result looks rough: the halftone transition is abrupt, plus we want to increase hole diameter and make sure it gradually grows towards the top so that the circular texture is visible when looking up from the ground.
It appears we can’t achieve a nice-looking picture with smooth transitions given the current limitations on hole number and diameter. Using our application to approximate the number and size of holes we need to get satisfactory results, talking to the subcontractor once again and getting new technical requirements that allow using more holes of bigger diameter.
We need a single picture out of those used on the bottom windows to prepare a test mock-up. Generating and sending to the client.
Receiving new information regarding technical limitations. As it turns out, there has to be sufficient distance between the holes to prevent the panel from bending. Our application allows us to set this distance. Using it to prepare another mock-up based on this requirement.
Getting the client’s approval and starting to prepare everything for printing.
The future of all images except for the frieze is now in question, which is why we proceed to work exclusively with frieze. The test sample reveals that the result is too dark. Getting new information from the client: the diameter of background holes should not exceed 20 mm (0.8″). Using a single image to prepare a new test file.
Looking at the result.
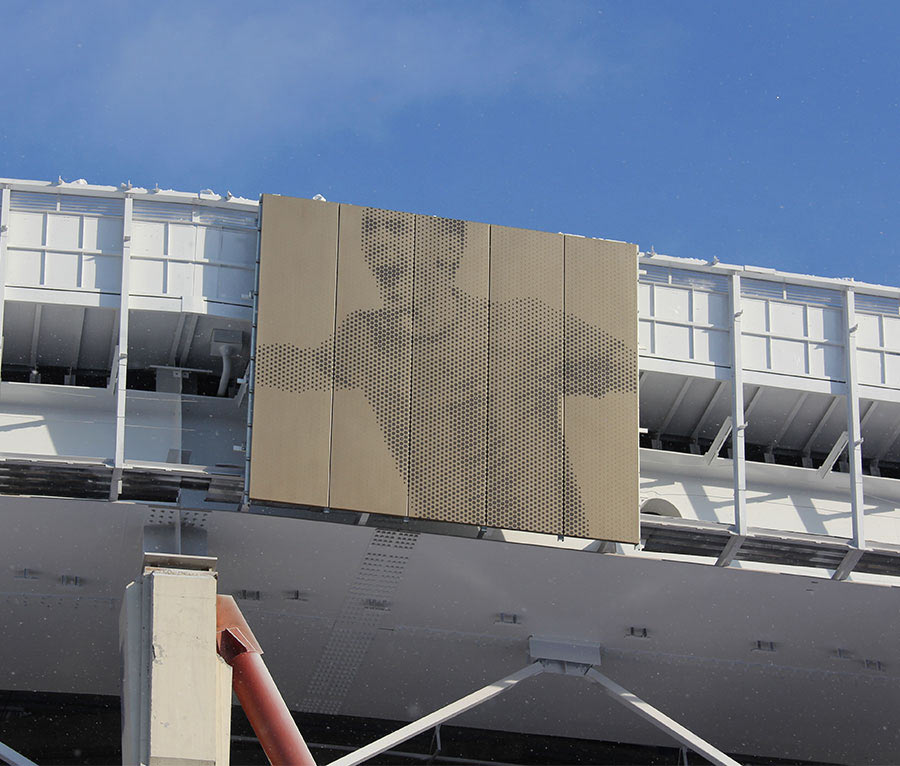
The client has decreased the size of background holes to 10 mm (0.4″) and asks to keep it this way and increase the contrast of the image.
Creating a couple of variants with different ranges of diameters while also increasing the hole size to 20 mm (0.8″) reasoning that otherwise the hole pattern won’t be visible.
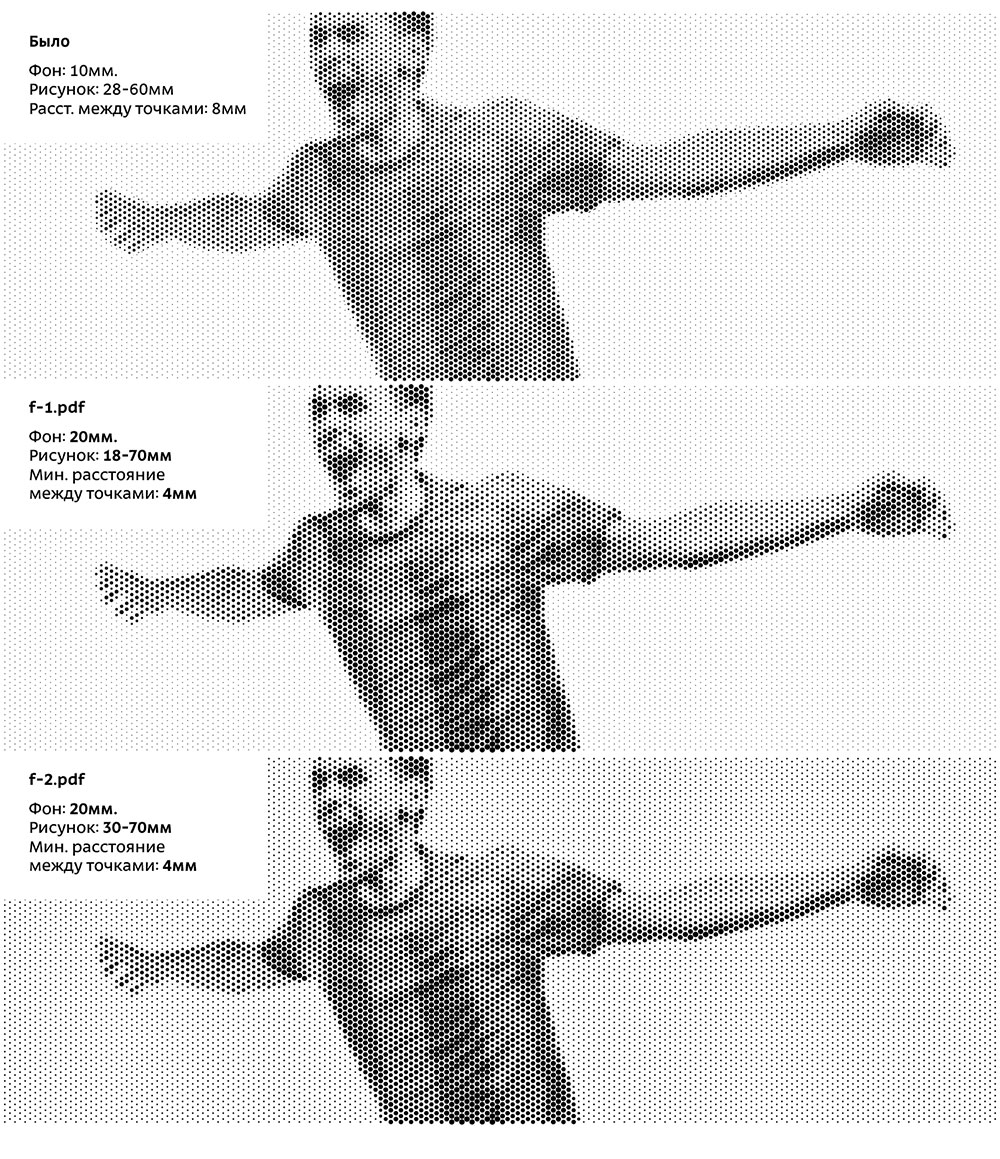
The client insists on 10 mm (0.4″) holes insisting that otherwise the result will be too dark. Printing out pictures, meeting, arguing, reasoning and ultimately agreeing to review two more variants with various diameter ranges. Using pictures with different textures as samples to make sure all of the images would look good.
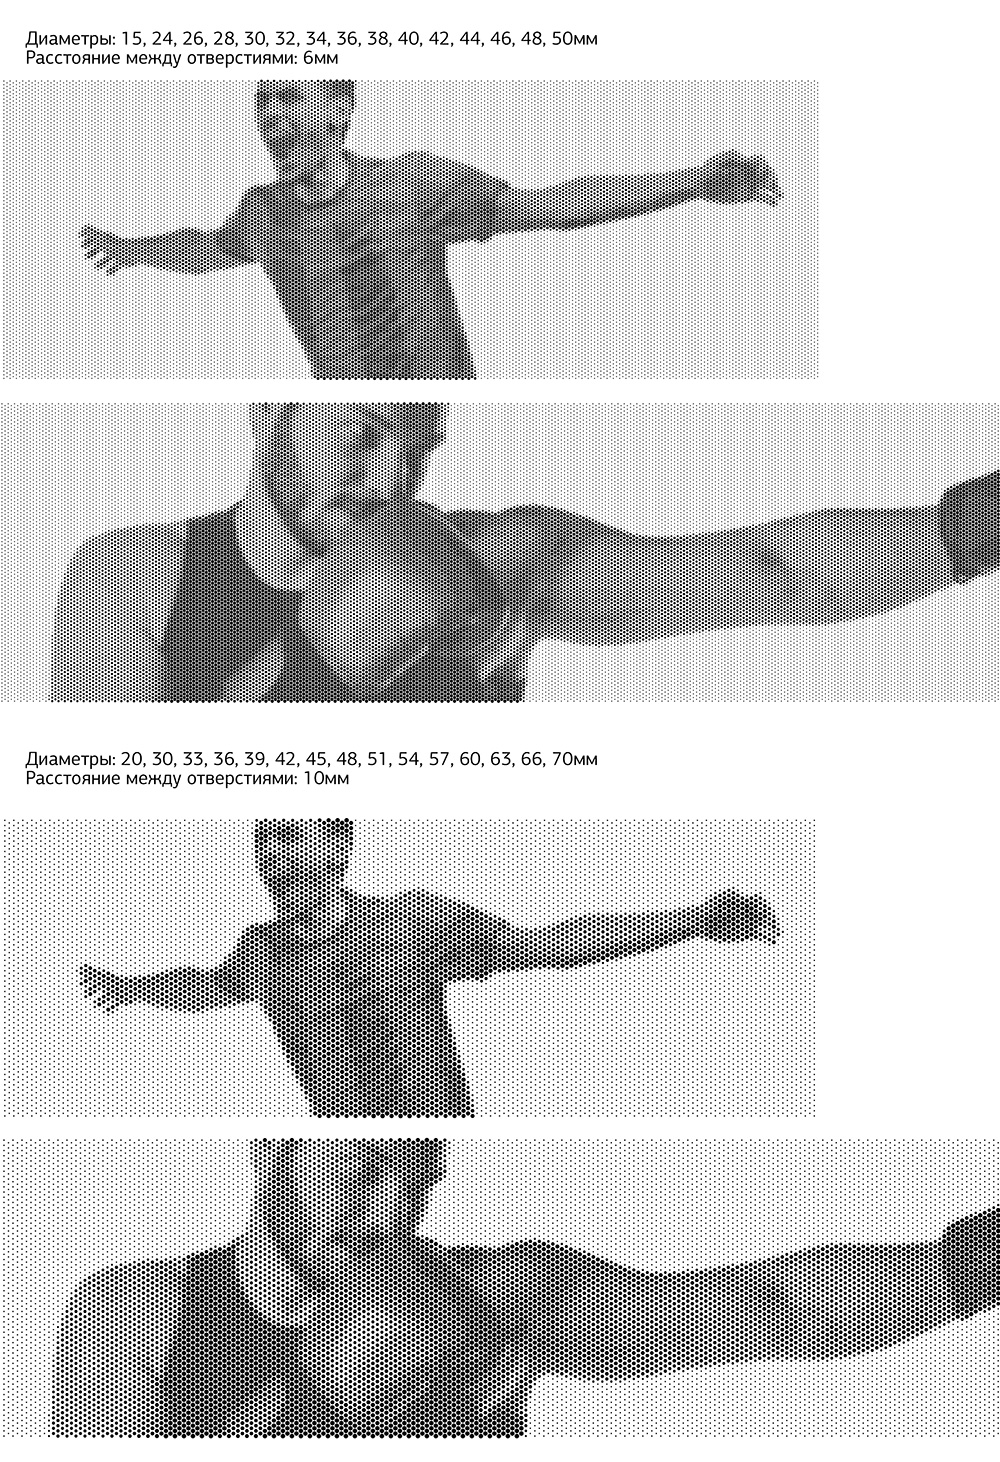
The client talks to the subcontractor to clarify technical requirements and chooses the 15–50 mm (0,6″–2″) range.
Starting to prepare all pictures for production and realizing that there are still issues remaining: there are discolorations and halftone transition areas are still rough.
Using the most evident example to try to solve the problem given the current constraints on hole size and diameter. Realizing there is no other way but to expand the diameter range.
The client says that there is no way to expand the range and that we need to work within the current limitations.
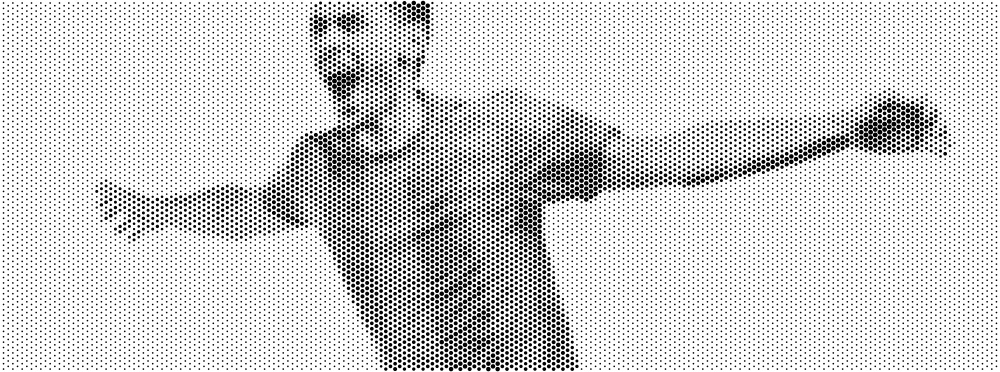
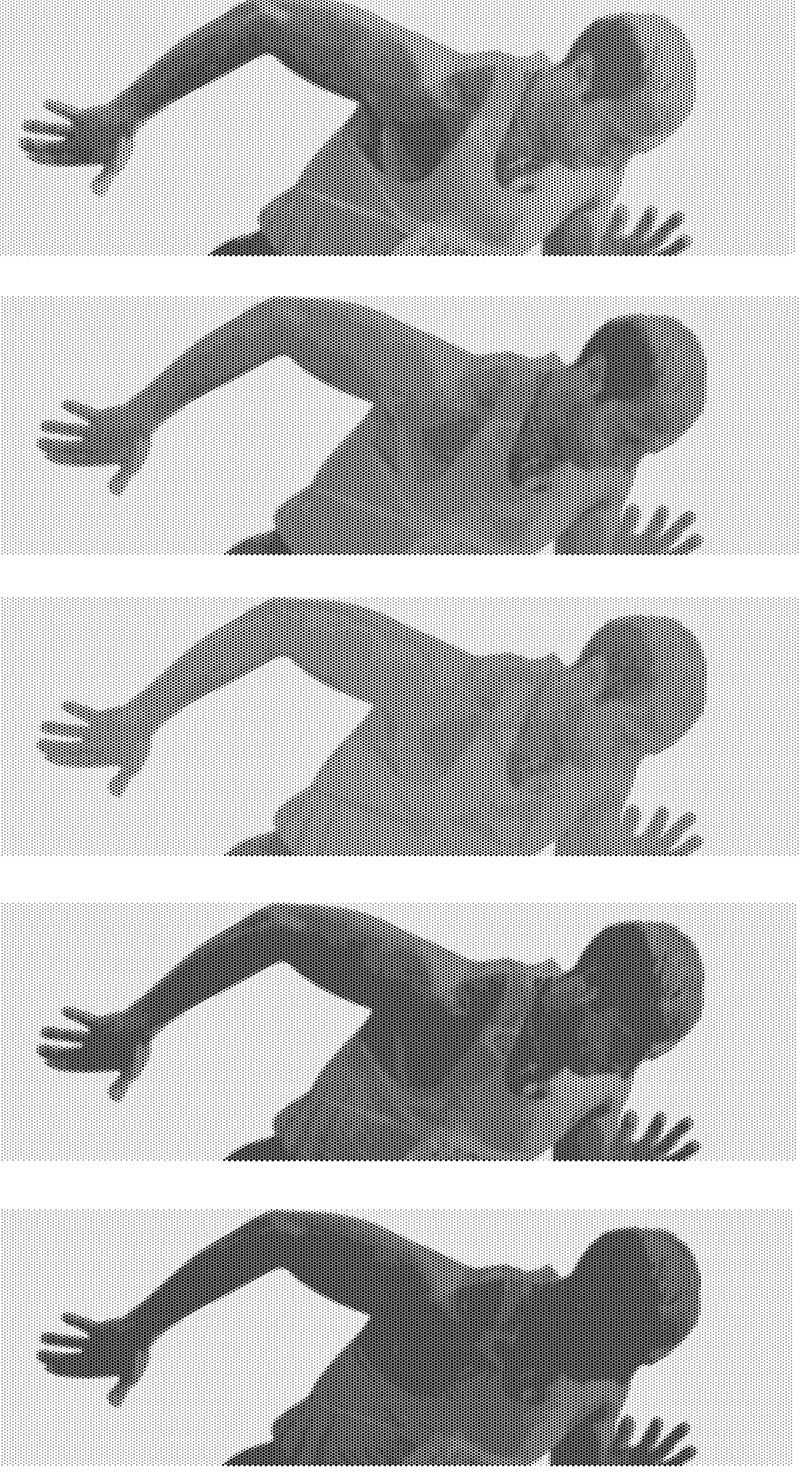
There is no way we can make our pictures work using the current range. We get an idea to transform them into silhouettes with only occasional highlights to emphasize the shape. There are no blotches, plus the contrast is now higher.

Using the color and the tone of the test panel to come up with two variants. Talking to the artistic director and getting the client to approve the contrasting design.
Preparing final images by equalizing their tone and cleaning up all problem areas.
Sending the files.
