The making of the Moscow design code
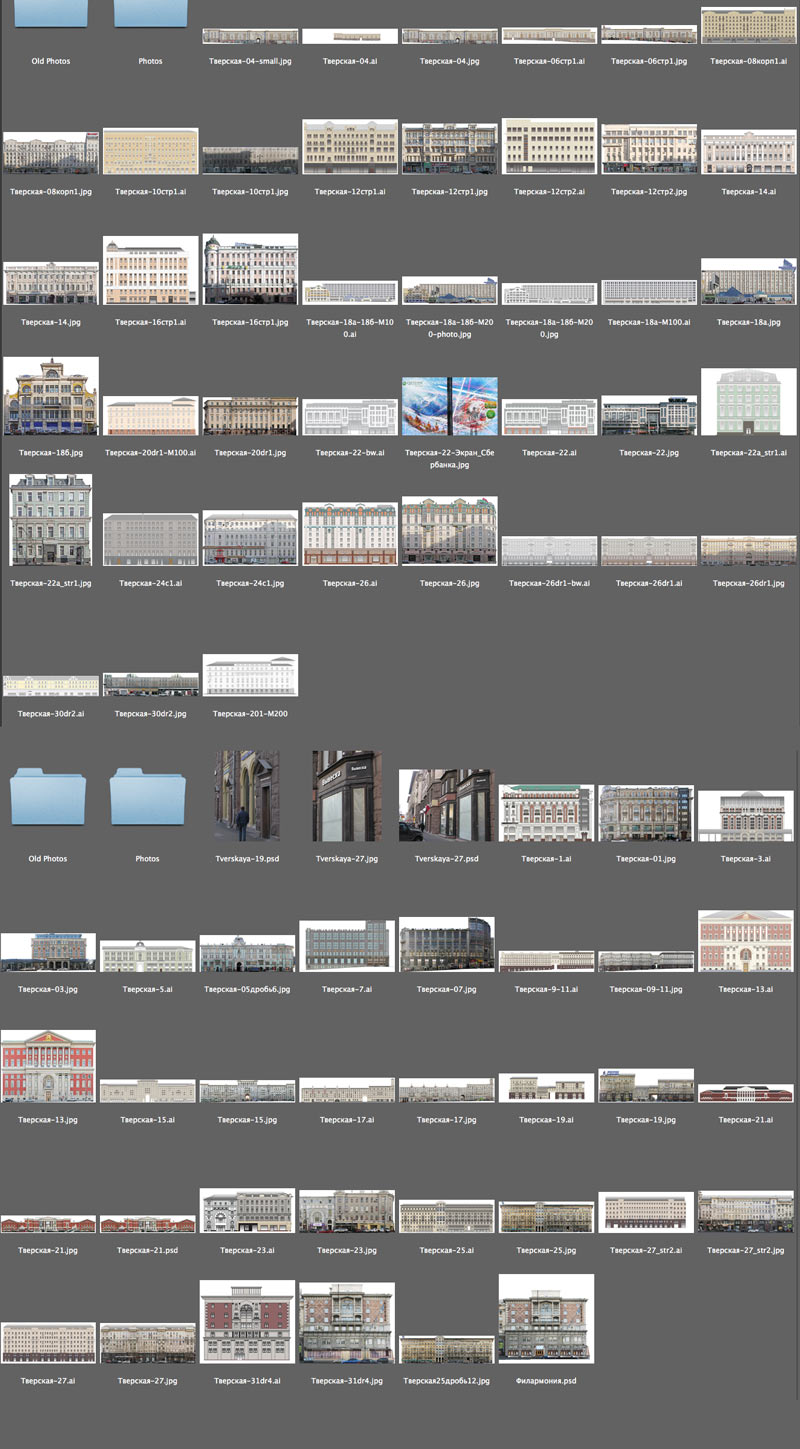
Receiving the current photos and vector images of the buildings from the customer.
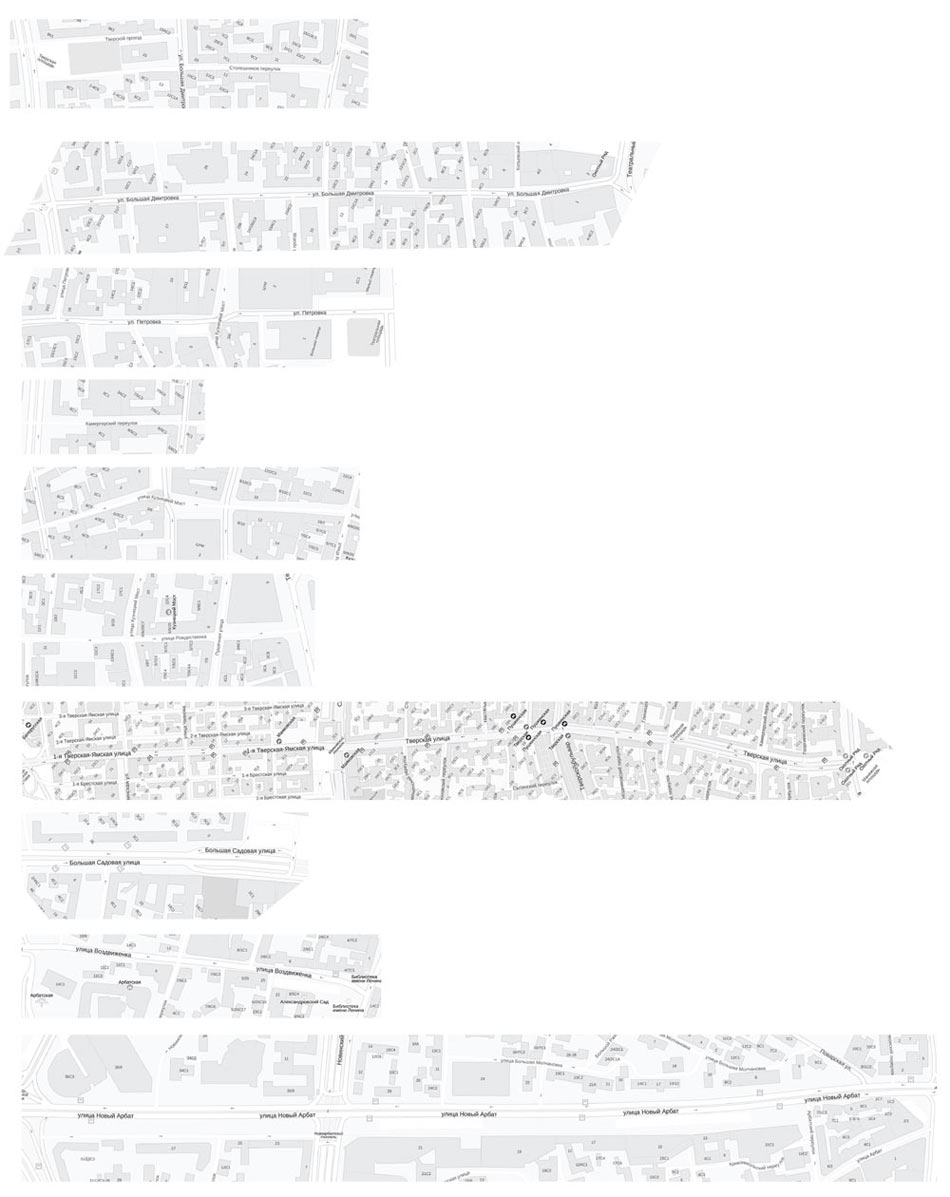
Estimating the size of the project.
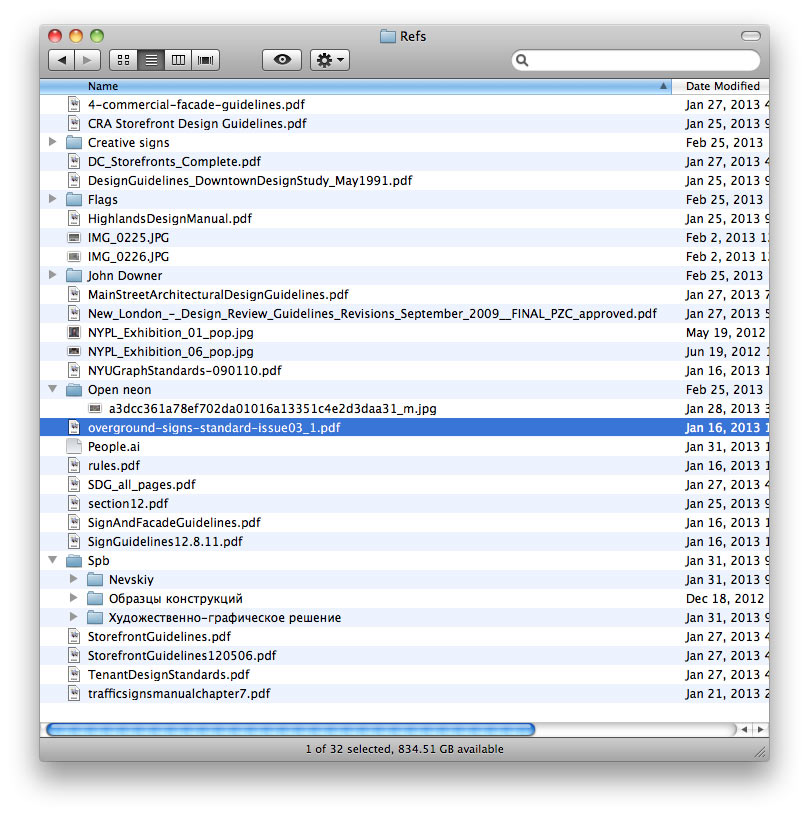
Studying examples of guidelines for signage on commercial building facades from other cities of the world.
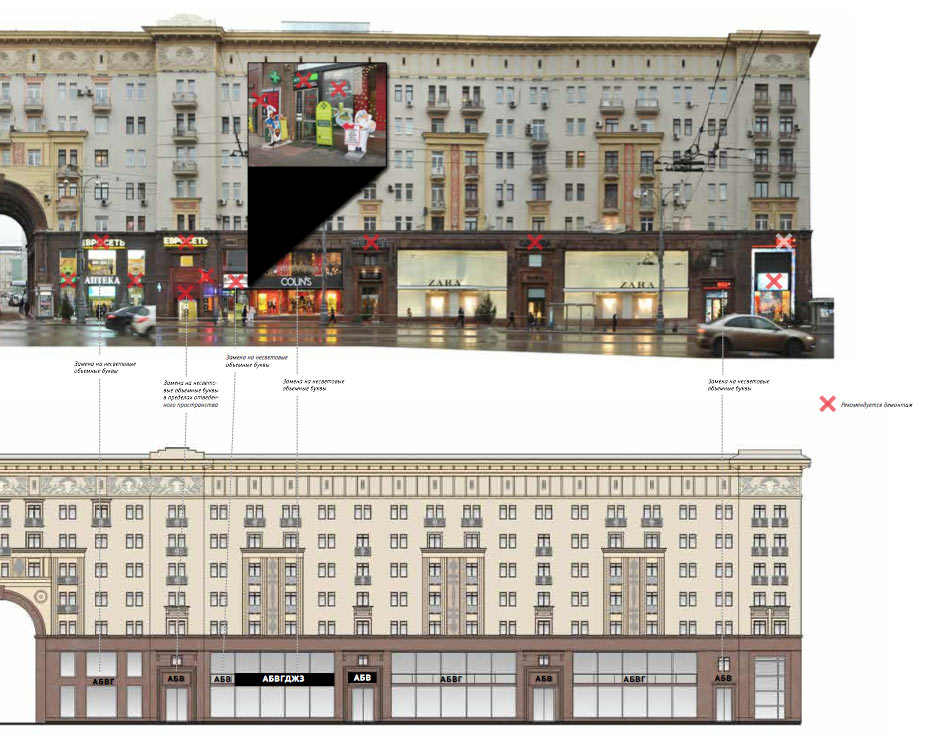
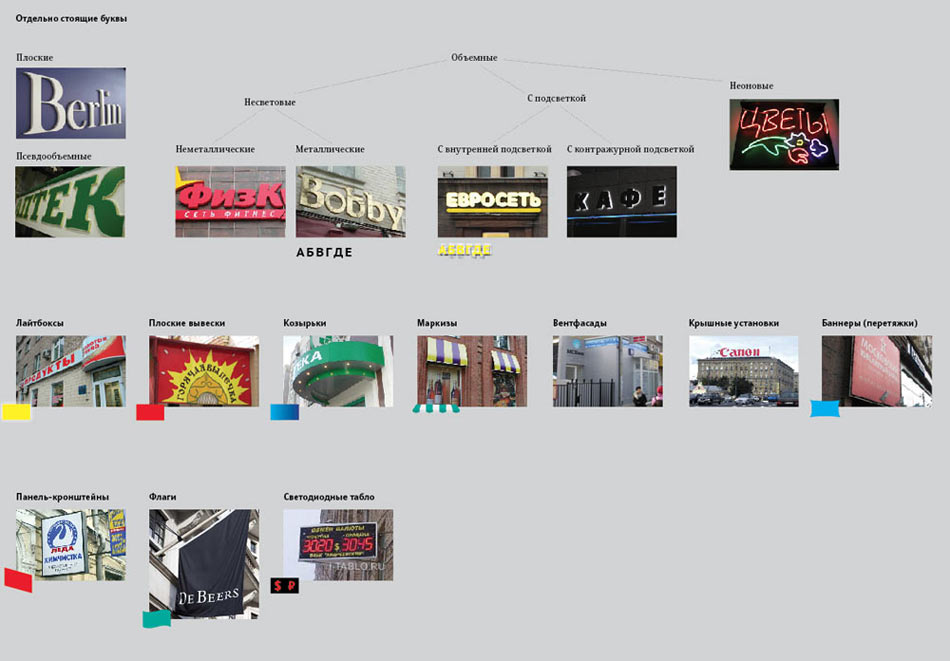
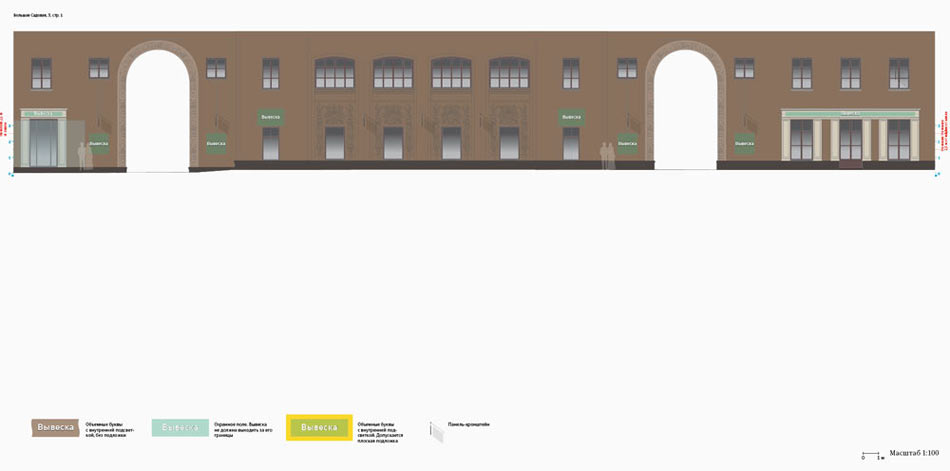
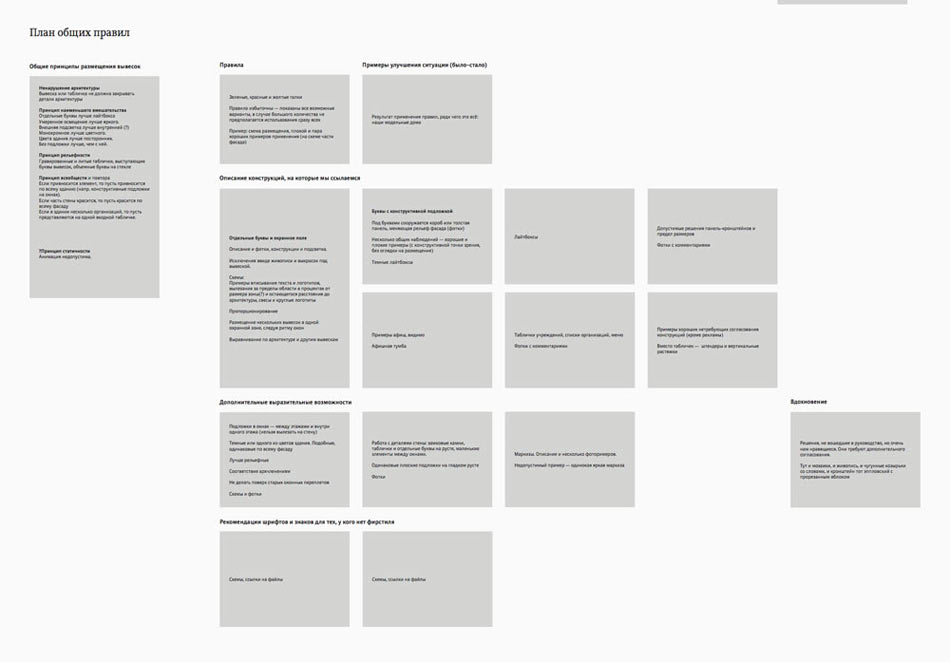
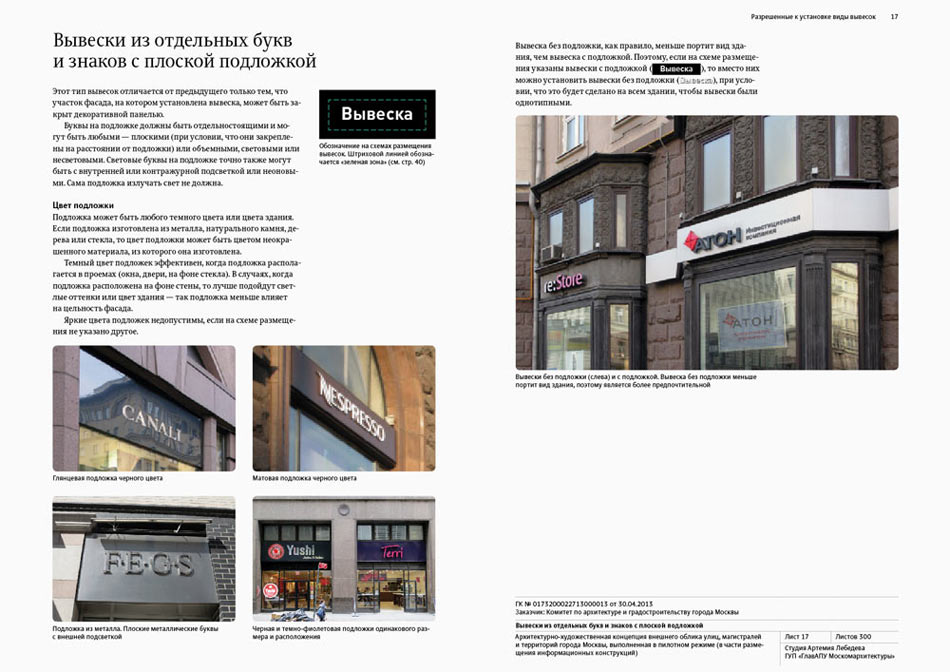
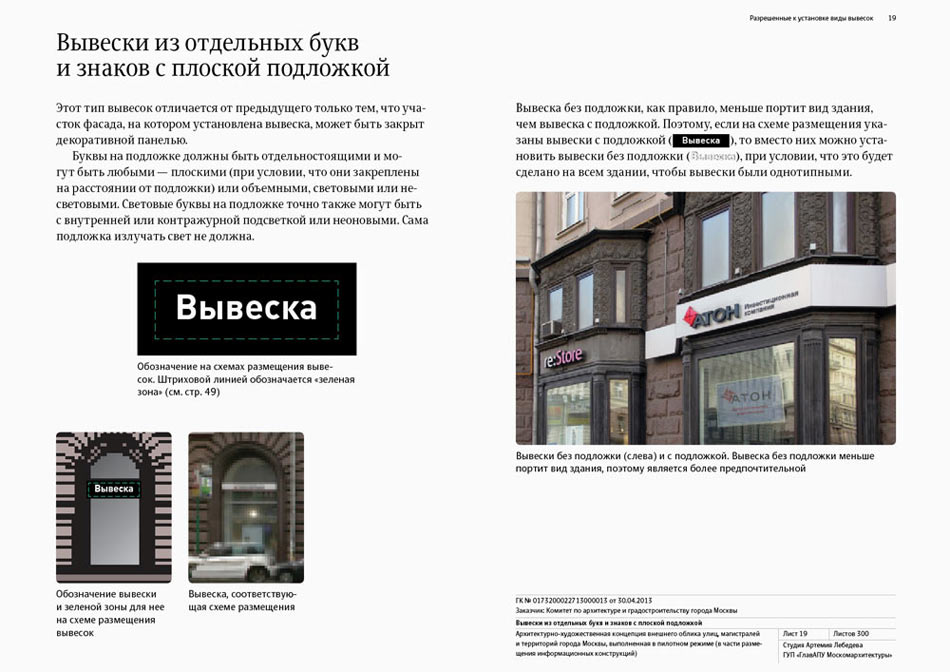
Thinking on how to mark different types of signs. Notice two variations: 3D letters against a background and solo. It becomes obvious, that there’re some overcrowded spots we need extra zoom-ins of.
At the same time, building up a classification system.
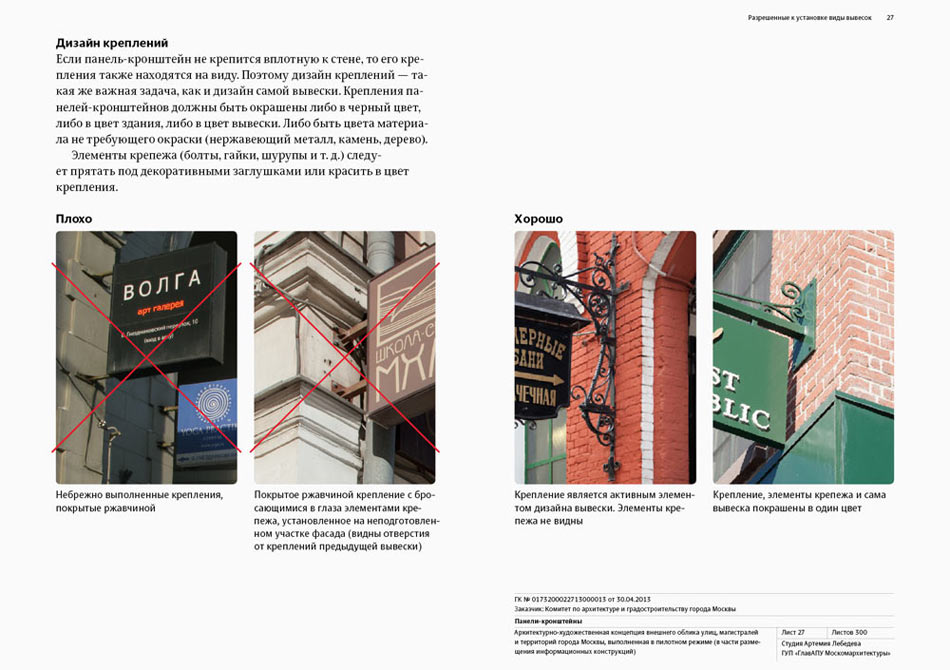
At first, trying to suggest a replacement for the crossed-out signs right away.
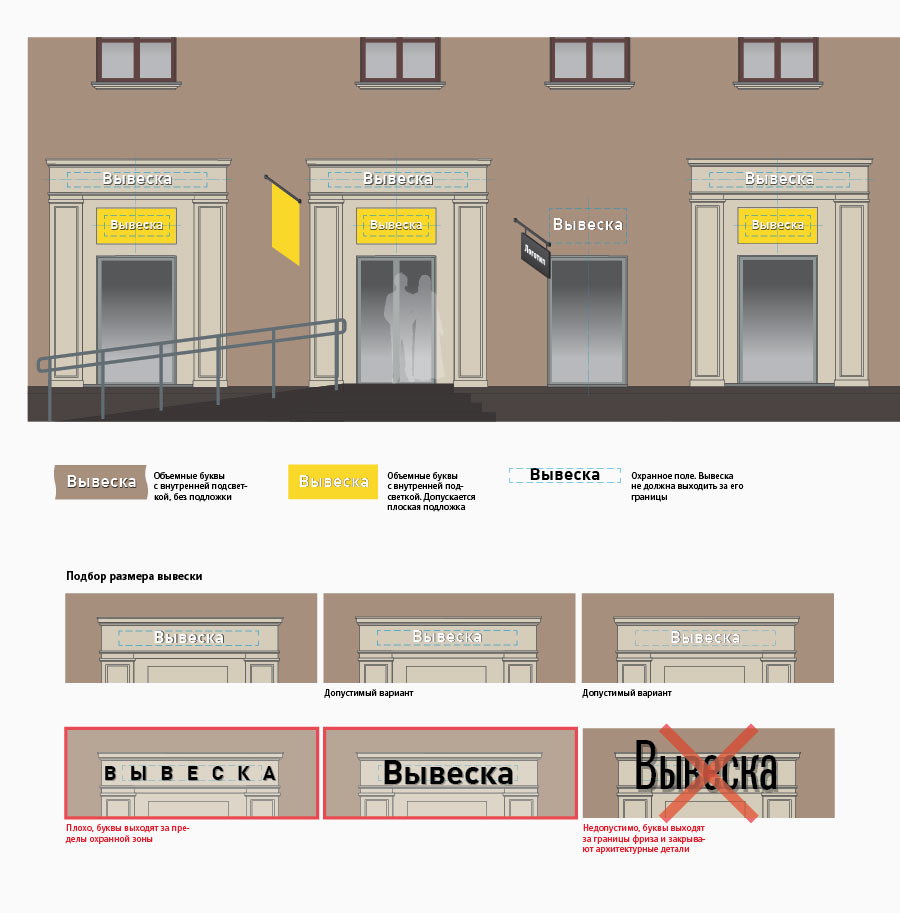
But it prooves unrealistic to offer a complete design for all signs. Soon, a helpful idea pops up to limit locations for signage to “green zones.”
Thinking on how to label such zones, and also banners, blades, and other signage types. Placing the reccommendation to limit signage to the green zones in the header of eah page of the handbook.
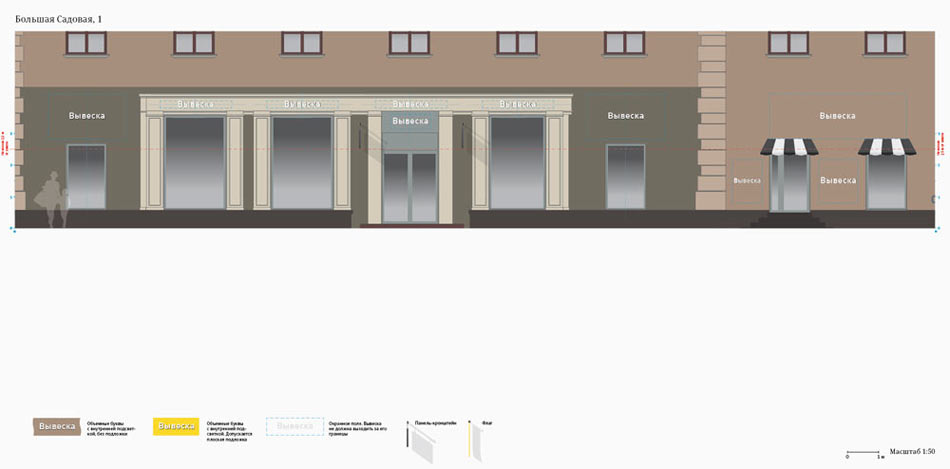
Determining the scale: 1:50 is too large, 1:100 is just perfect. Also selecting the page dimensions.
A complete facade can’t be printed in small format without loosing the details.
Settling for 600×297 mm. This large, the format still pushes some buildings to spill out over several pages.
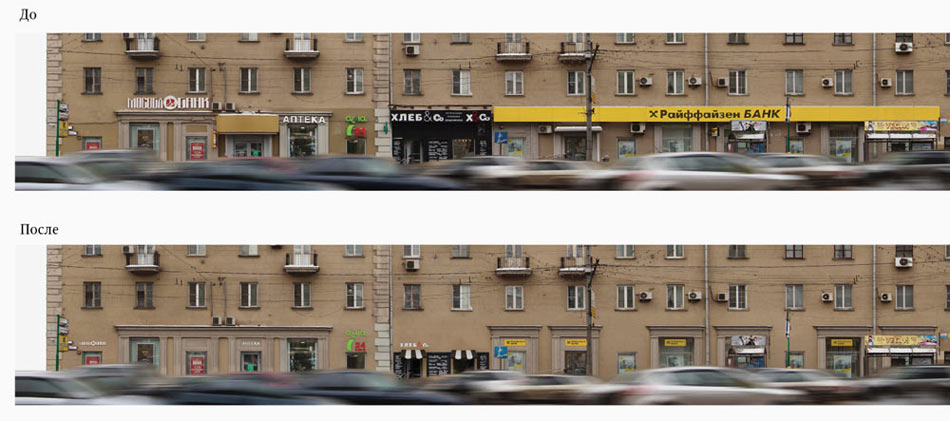
Putting our proposed rules to test by digitally mounting the new signs.
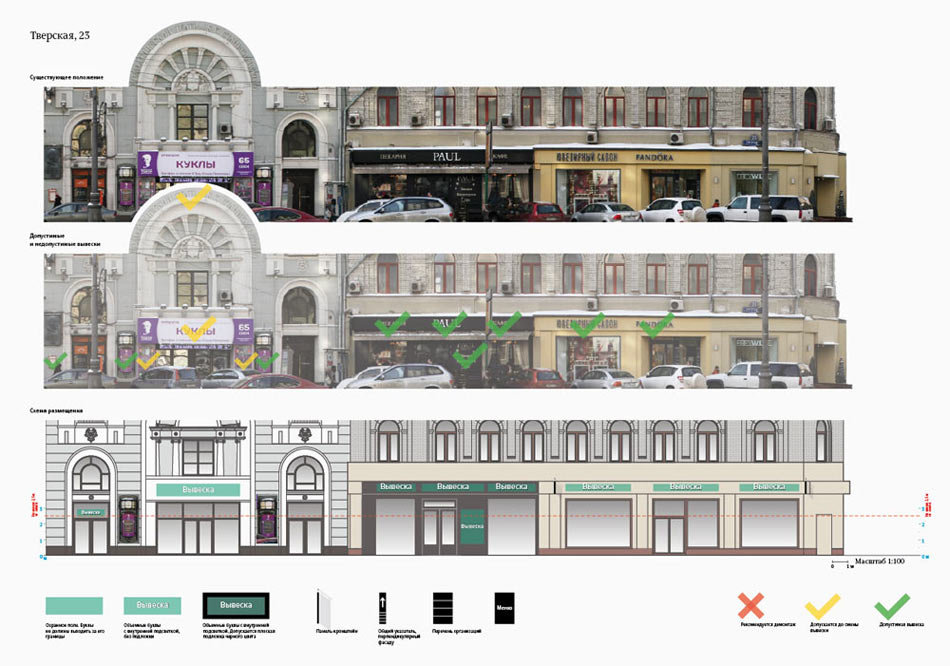
Testing vector images in black and white in an attempt to make the signs stand out.
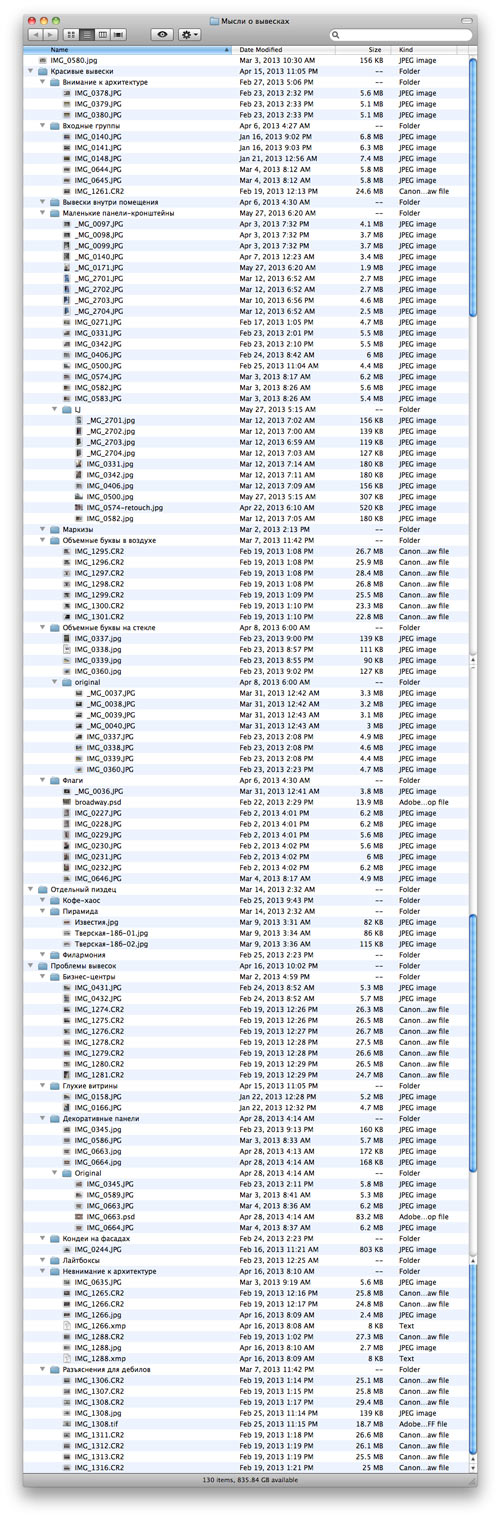
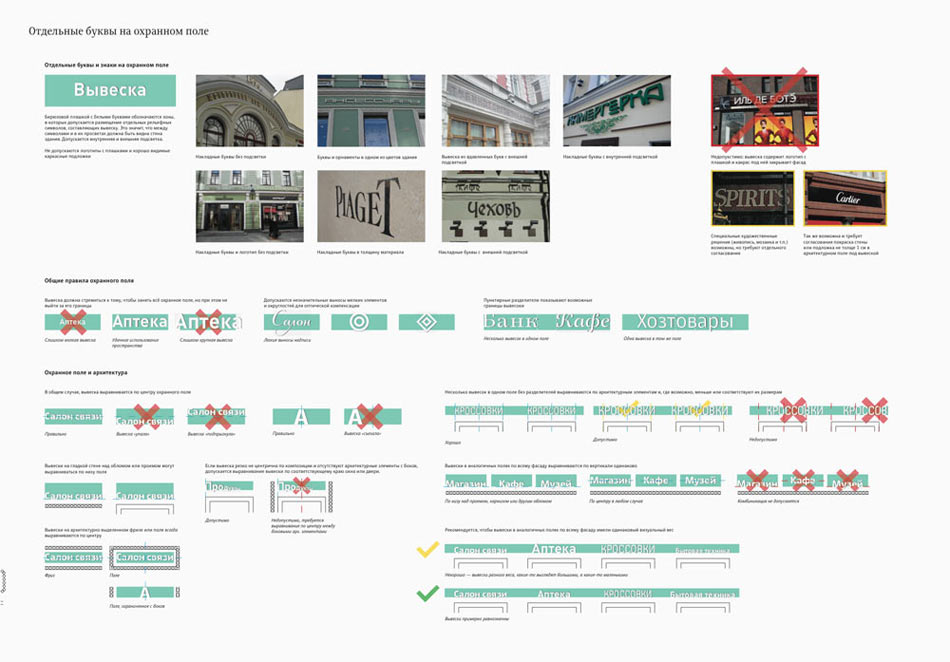
The greatest challenge was to boil down a list of the main problems with the existing signage. Evidently, it’s all a mess, but how to identify separate problems?
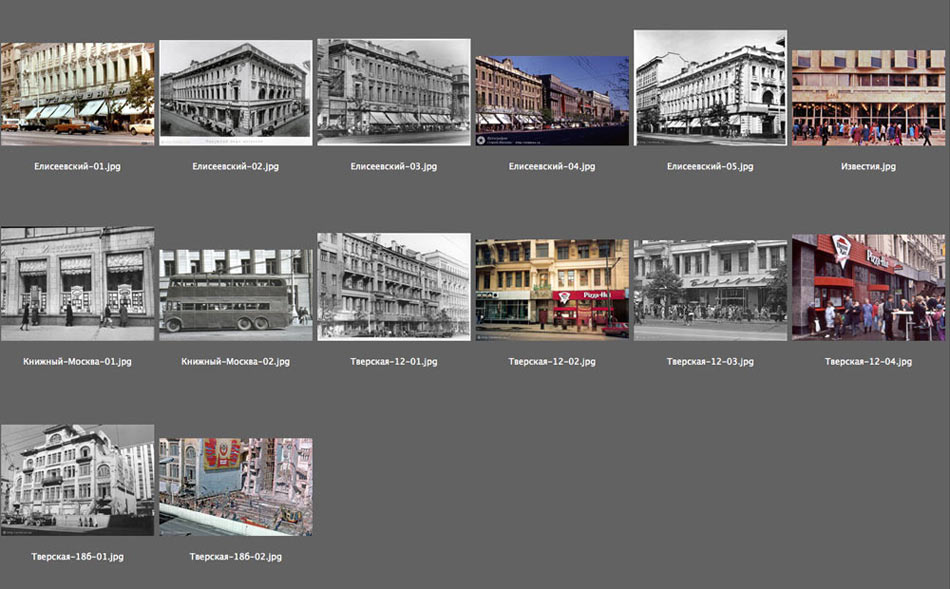
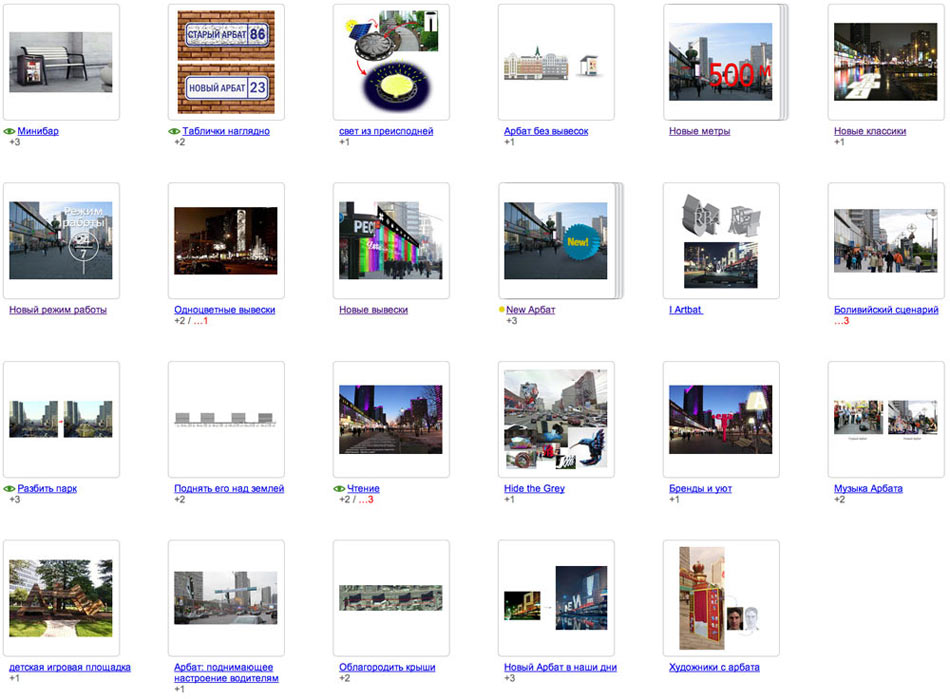
Eventually gathering a collection of good and bad examples, categorizing them, training an eye for details and good taste.
One of the meetings with the customer reveals the markings of the unacceptable signs are barely visible.
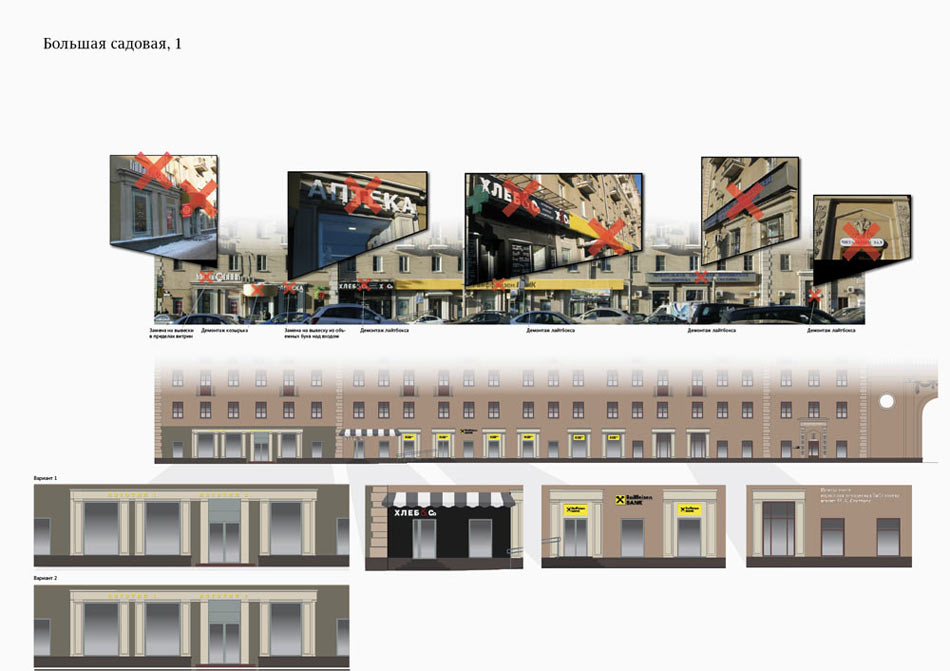
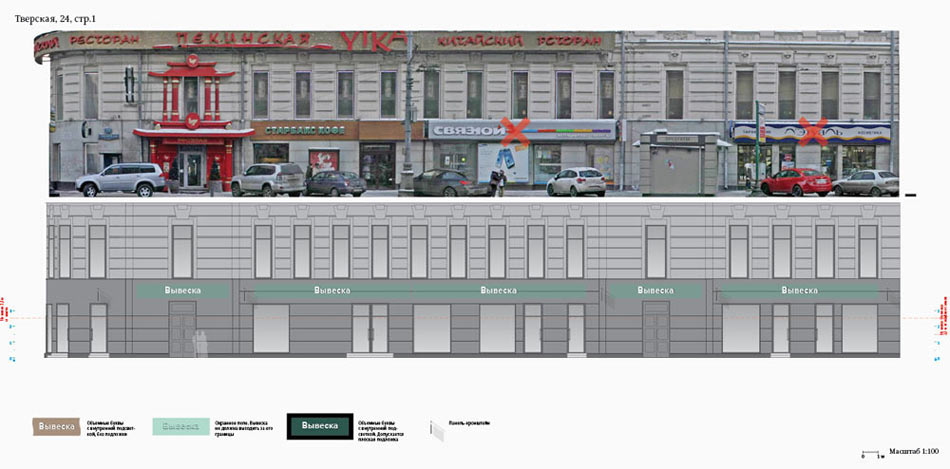
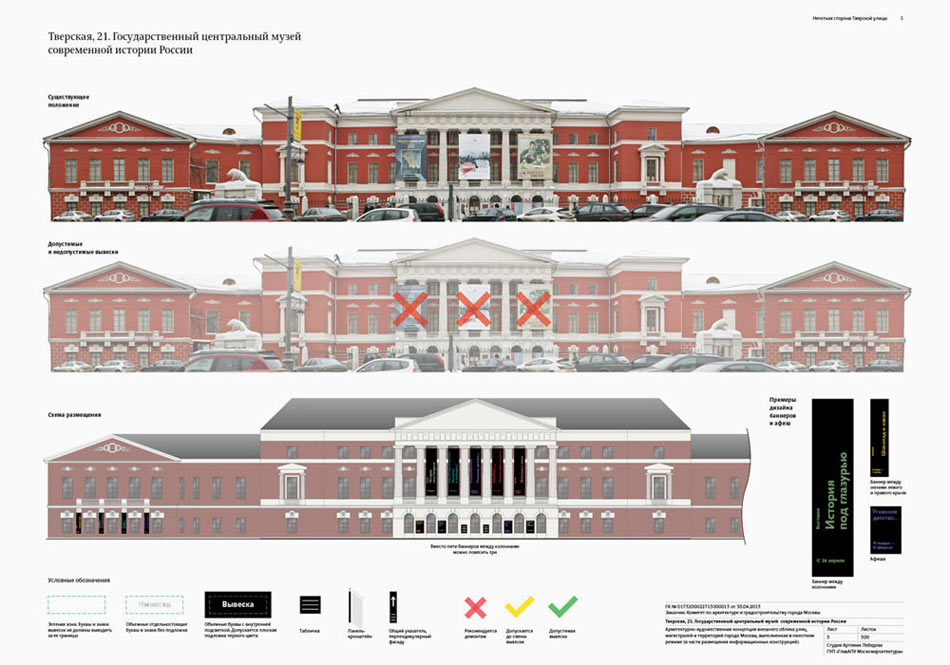
Receiving a three-stage structure: The Existing Situation, Acceptable and Unacceptable Signs, and Placement Map. The page grew to a standard A2 size.
Learning that the approved signs can’t be just disapproved and uninstalled. An extra marker came to life: the yellow check mark.
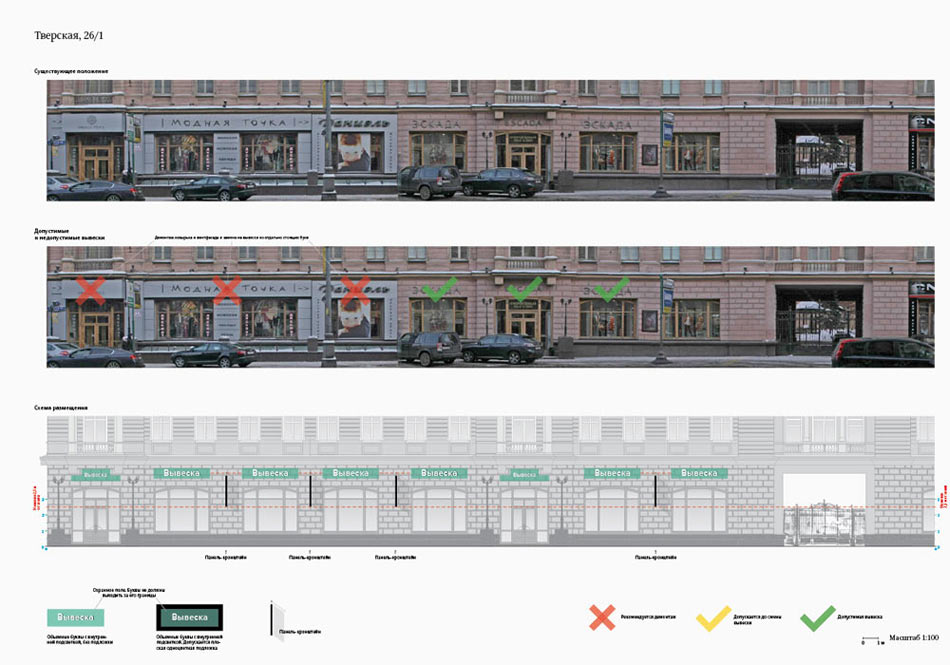
To bring the markings upfront, painting the buildings on the middle and bottom images near-transparent.
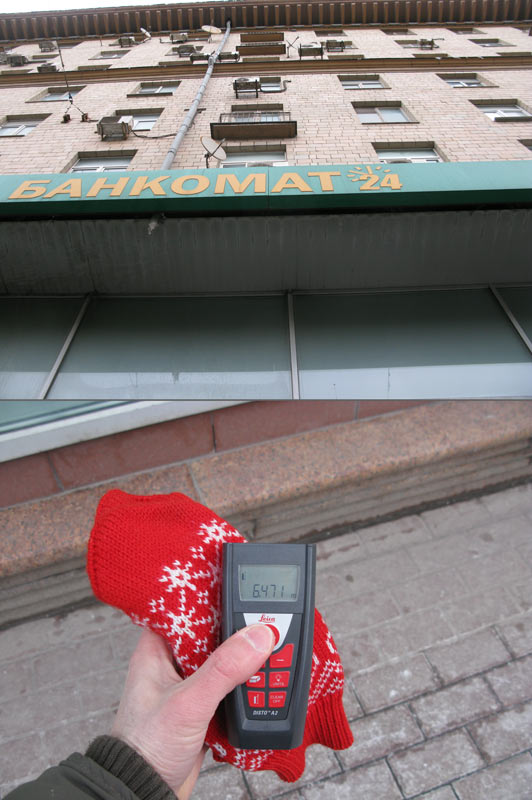
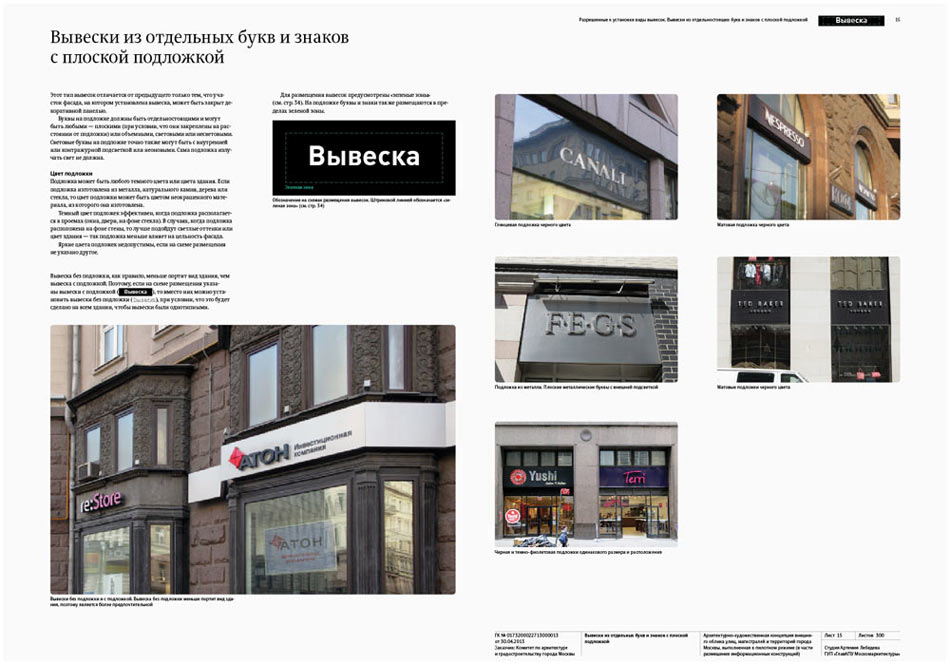
Taking pictures of the signs from a “pedestrian’s point of view.” This approach also helps us figure out how each sign is attached to the building, how it looks, what it’s made of, how it’s lit, and what general impression it leaves.
The even side of Tverskaya:

On top of it, analyzing old photographs of some of the buildings.
One of the crucial parameter for a sign is how high it’s placed on a facade. Equipping ourselves with a distance measuring tool and taking the measurements.
This phase brings us the realization that it’s virtually impossible to find a sign installed below 2,8 m (9,2 ft.) mark throughout the Moscow historic center. Many signs become visible only from across the street.

Cultural venues of the capital are almost exclusive suppliers of ugly-made signs, banners, and theater bills.
Offering a replacement for some of these venues’ banners.
Thinking up a bunch of ideas for Novy Arbat.
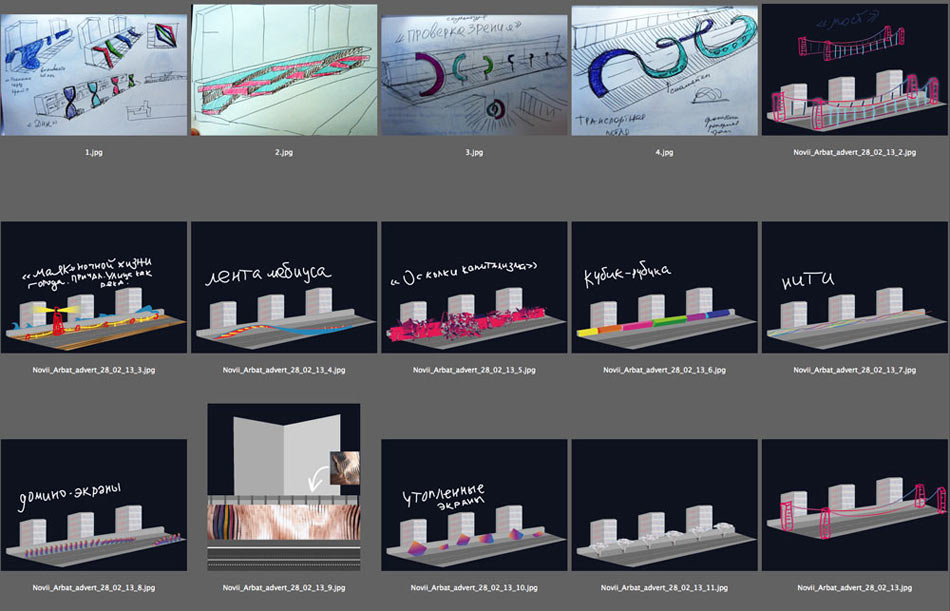
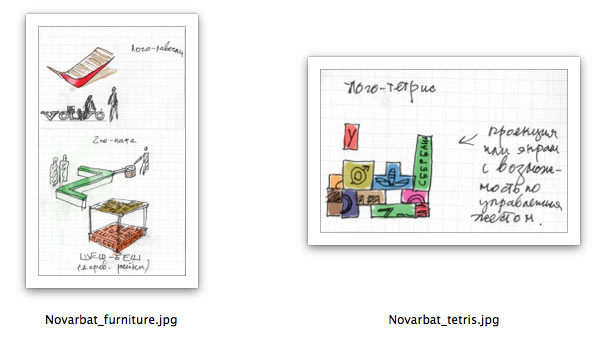
Presenting to the customer. Learning about numerous limitations that later prevent any of the ideas from being brought forward. Ending up with just the signs on Novy Arbat, but counterbalancing it with more freedom compared to the main streets and the historical sector.
Moving on to the opening part of the sign code. First approach.
Initially, typesetting it in A2 format.
It shows lack of legibility. Redoing the layout into A3. Auto format adjusting in InDesign fails sometimes.
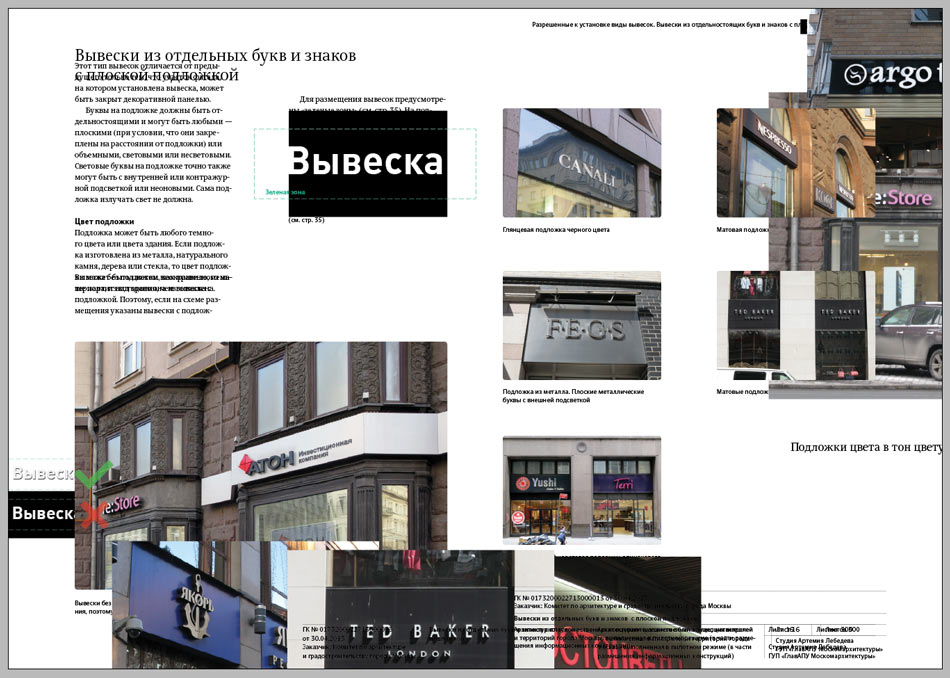
Increasing the type size, retypesetting the code once more, adding the cross mark to the bad guys.
Now it’s all clear and can be read even from a small screen.
Putting the materials together and sending it to the customer.
