Receiving the description of the project from the client. Getting acquainted with the current issues and plans for the future, going over blueprints and documentation. Making a visit to the complex.
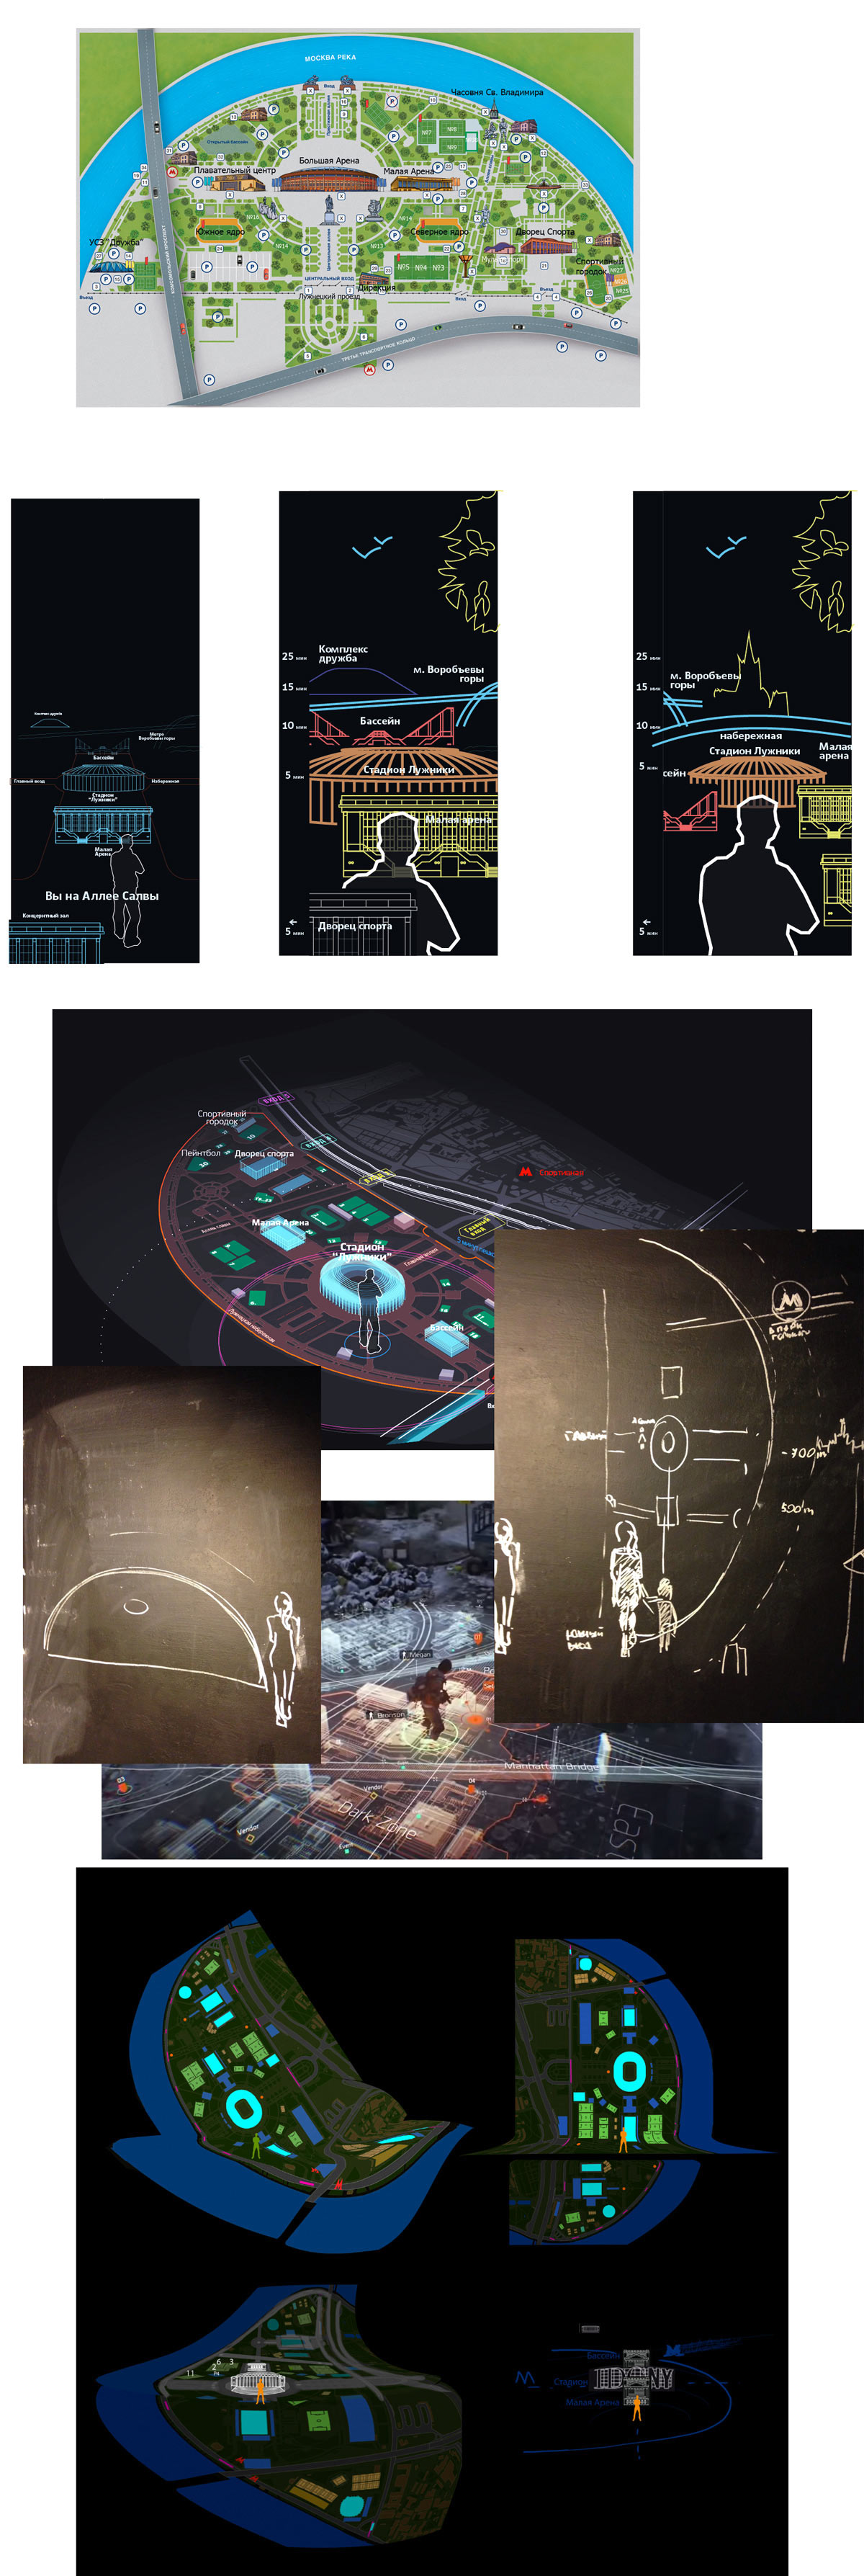
Drawing the first conclusions. This is not a traditional park. It contains dozens of fields of various purpose, each with its own number, conditions of use, etc.
The whole territory is covered with trees and fences which makes it hard to see far even in the winter. In the summer, signs located even at the slightest distance won’t be visible at all. The stadium is visible only from a very short distance.
The stadium itself is a super centerpiece, yet it completely disappears if you move 500–700 meters away. Other notable landmarks include the Lenin statue, the torch at the end of Alley of Glory, athlete sculptures on the same alley, a fountain and the river overpass.
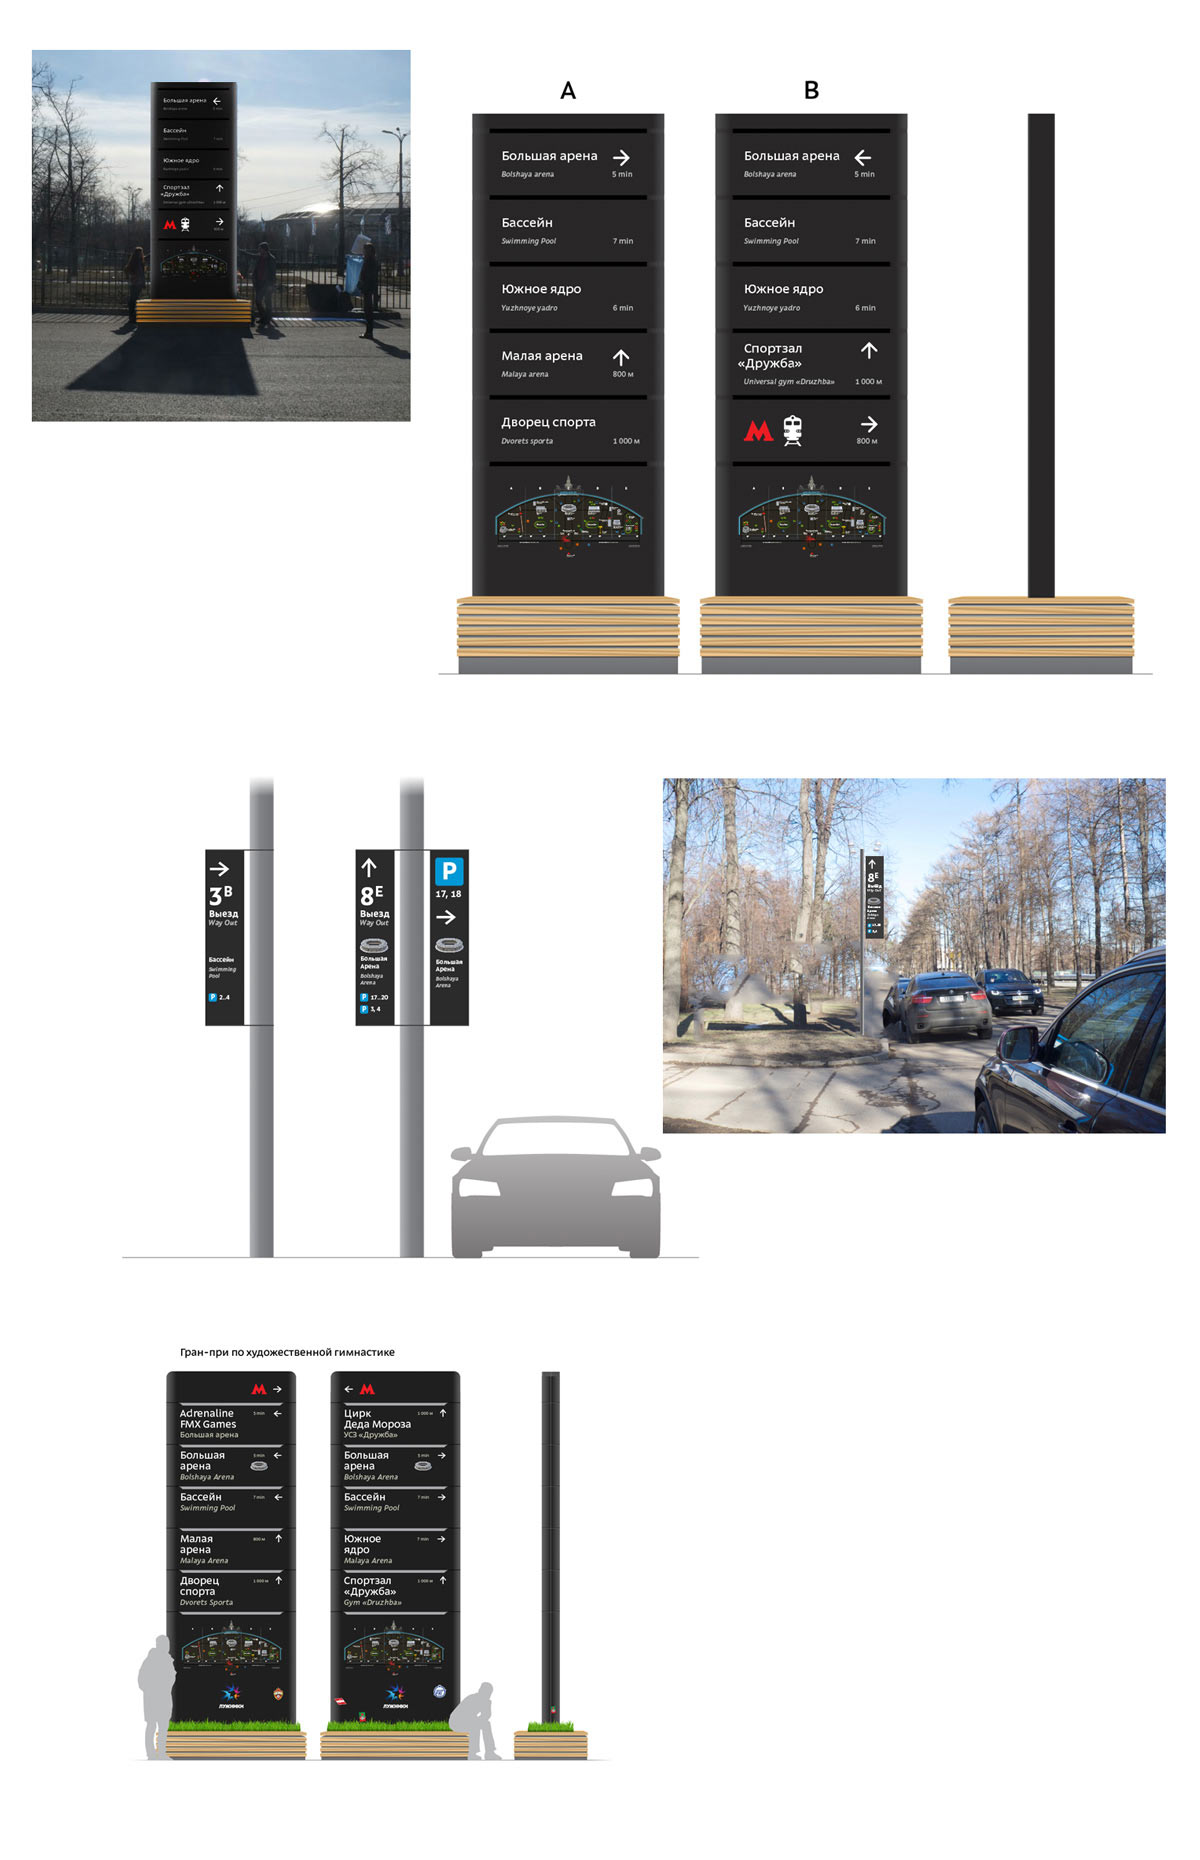
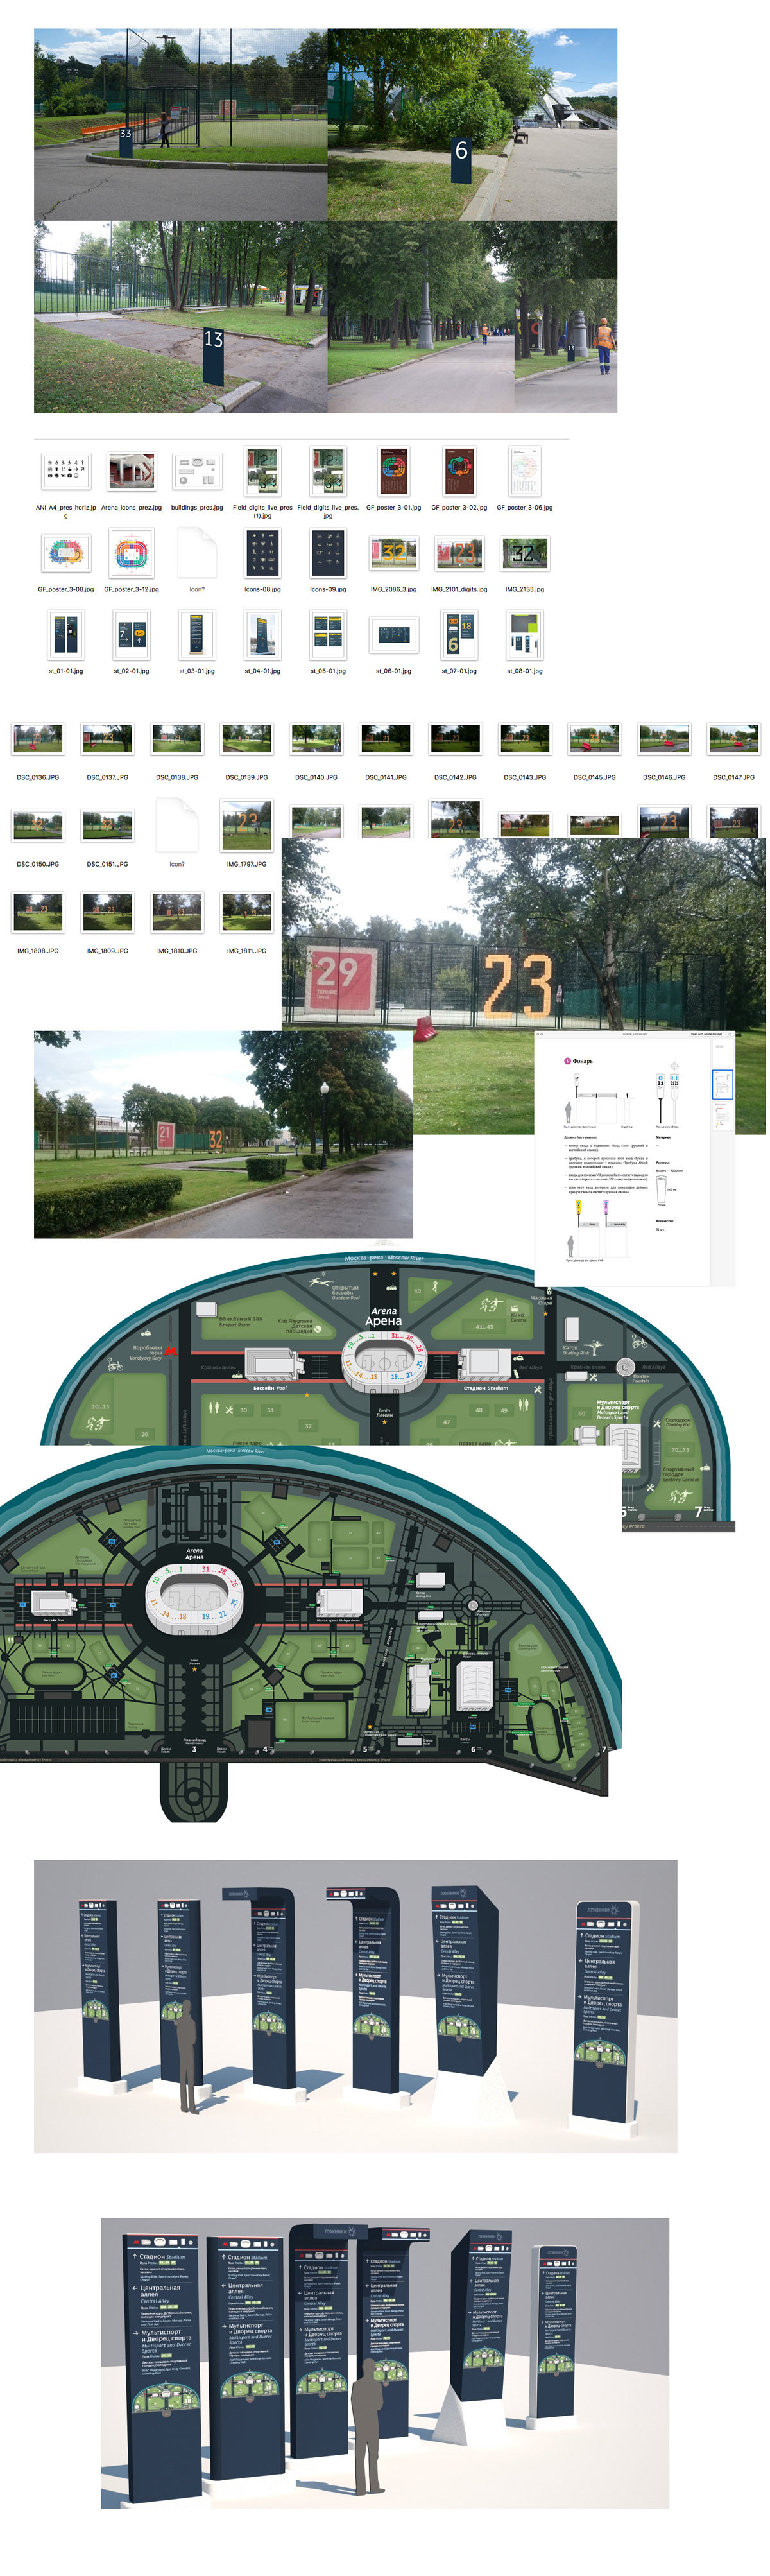
There is also an abundance of parking lots. All of them are numbered but there is not enough signs leading to them. Many of them are next to certain fields.
The stadium is located in the center; the waterfront and the Metro bridge dominate the peripheral area; the rest is hidden in thick woods.
Having long conversations with experts to understand the target audience, user needs and scenarios. Getting the existing map of the territory and drawing first pictures to warm up.
Great, we’ve warmed up. Starting to work on the scenario. We need to systematize our observations, knowledge and client wishes. And then turn it into a coherent story.

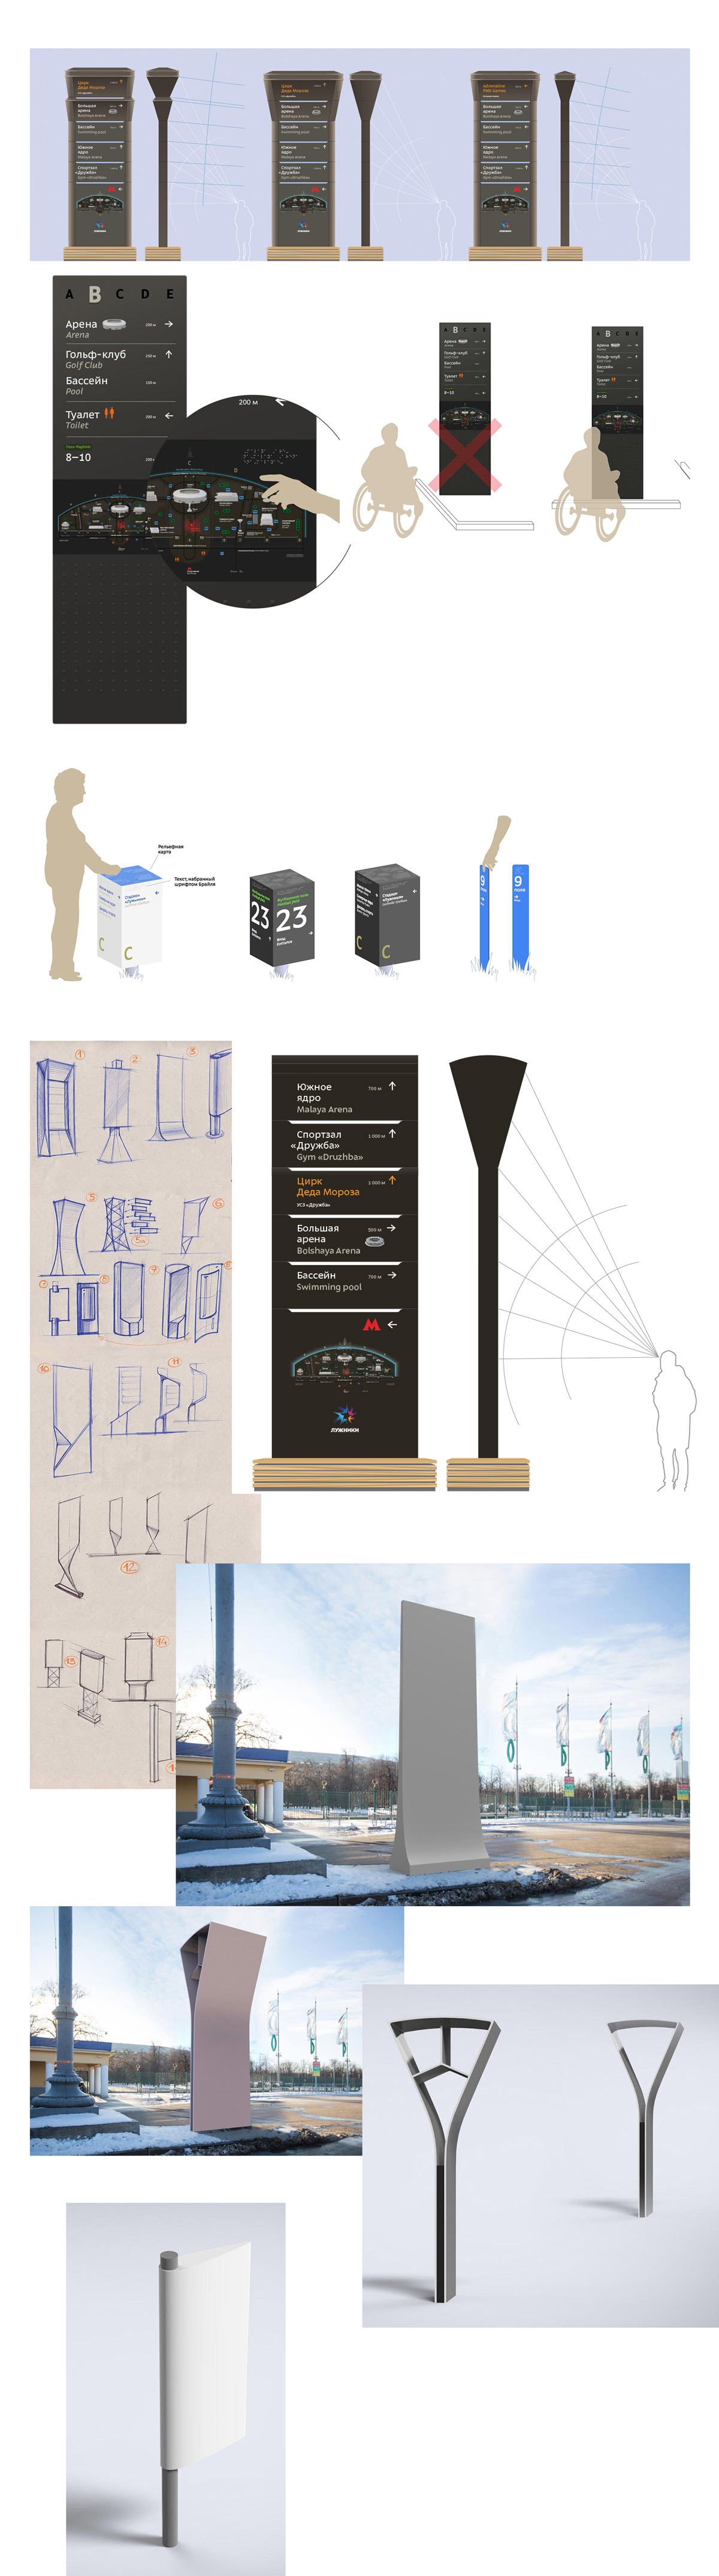
Moving on. The choice of media should correspond with the use scenarios of regular and handicapped visitors. We also need to keep in mind accessibility and visibility in poor weather.
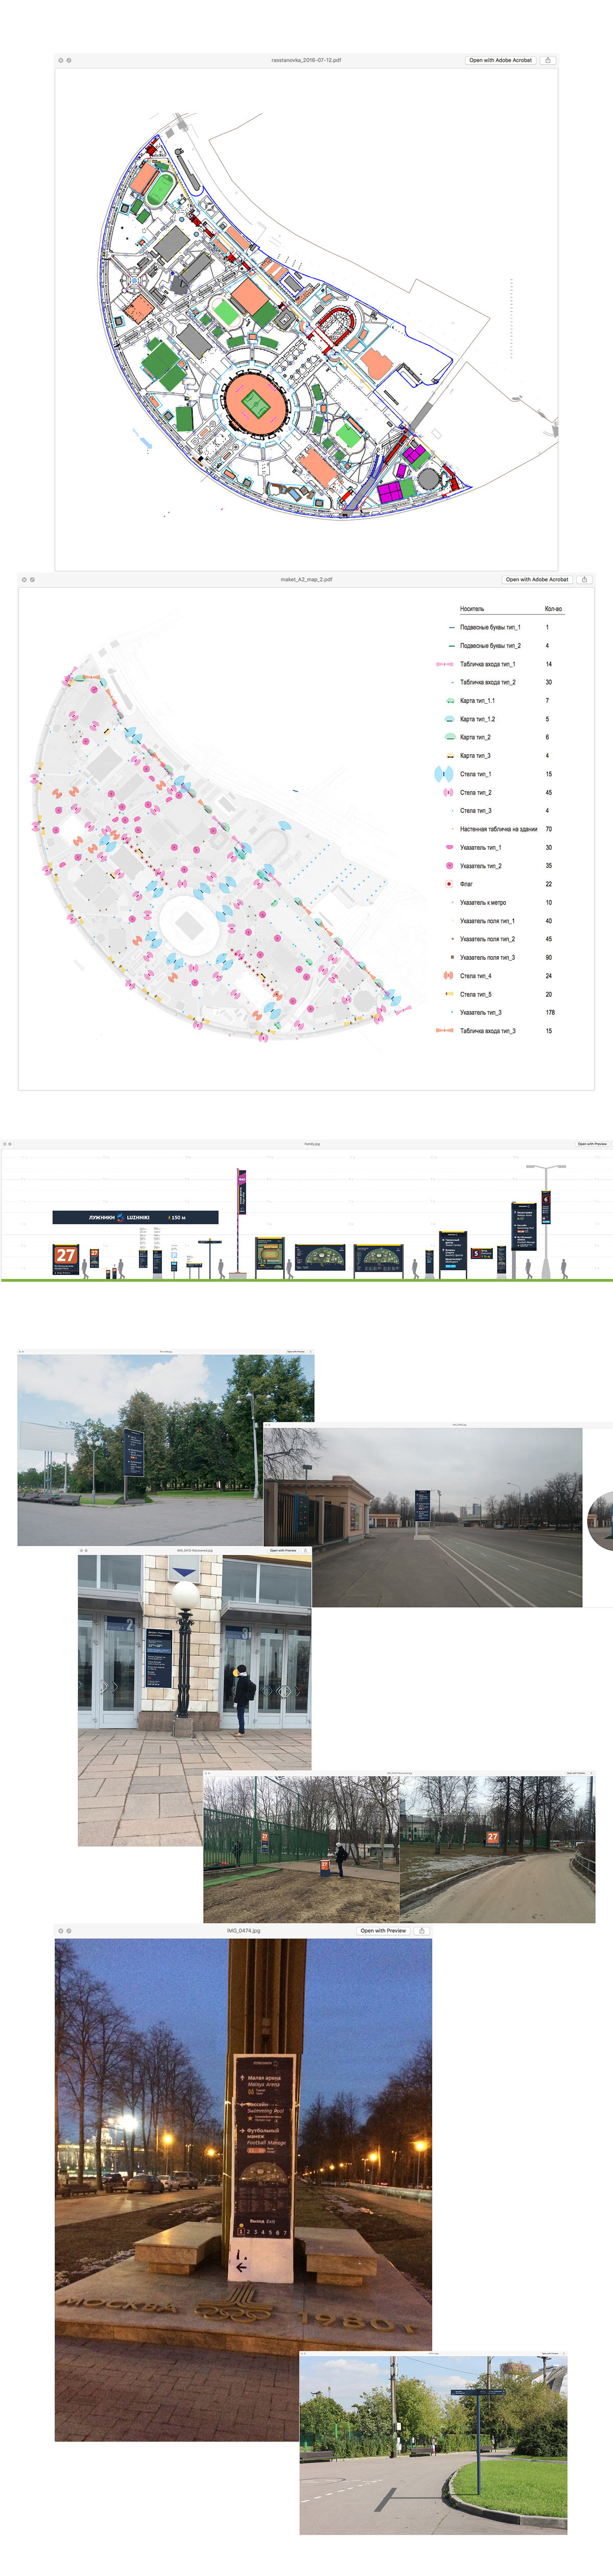
Receiving the plan of the territory and going out to take lots of pictures. As the project progresses, the plan will be modified, references will be updated and the territory itself will change.

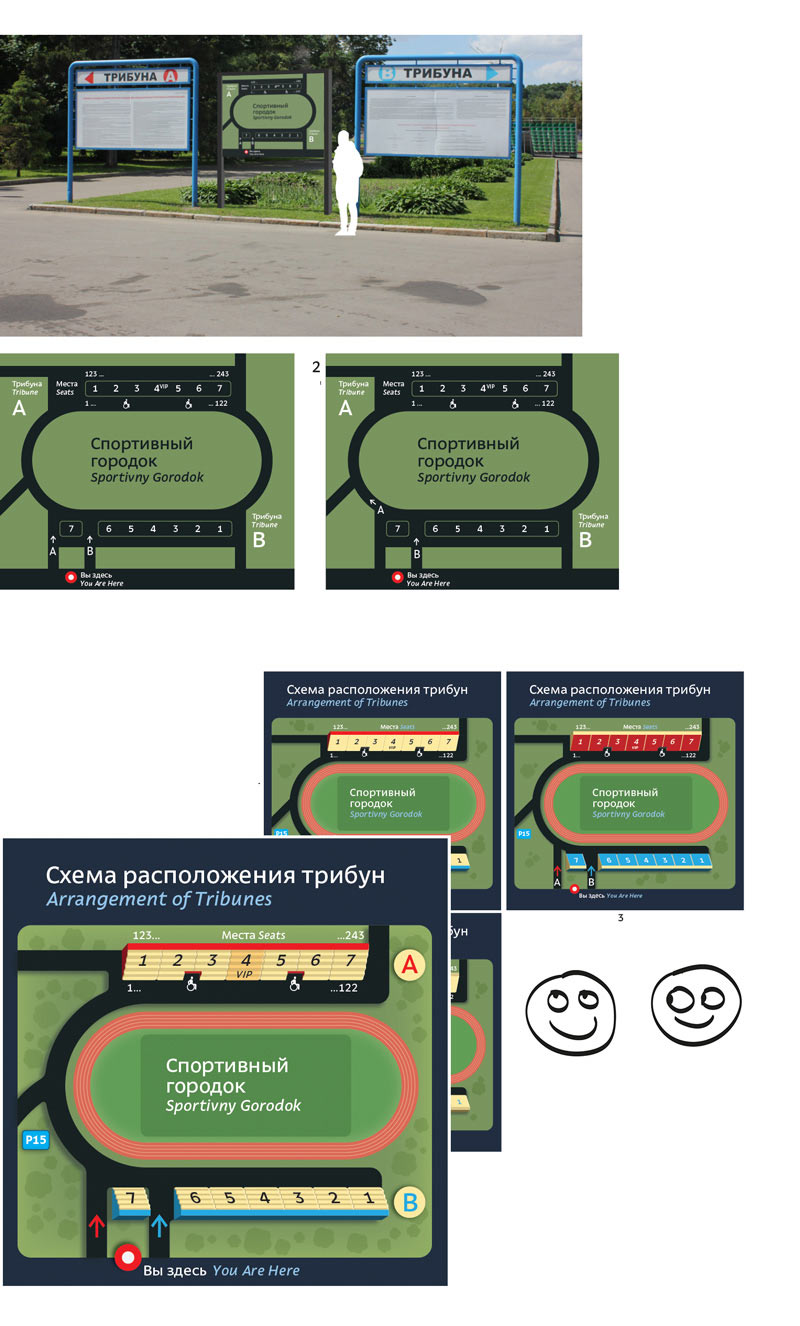
Sketching the future map. Suggesting hypotheses that will need to be tested in real life. For example, how viable are numbers on fences assembled from segments.
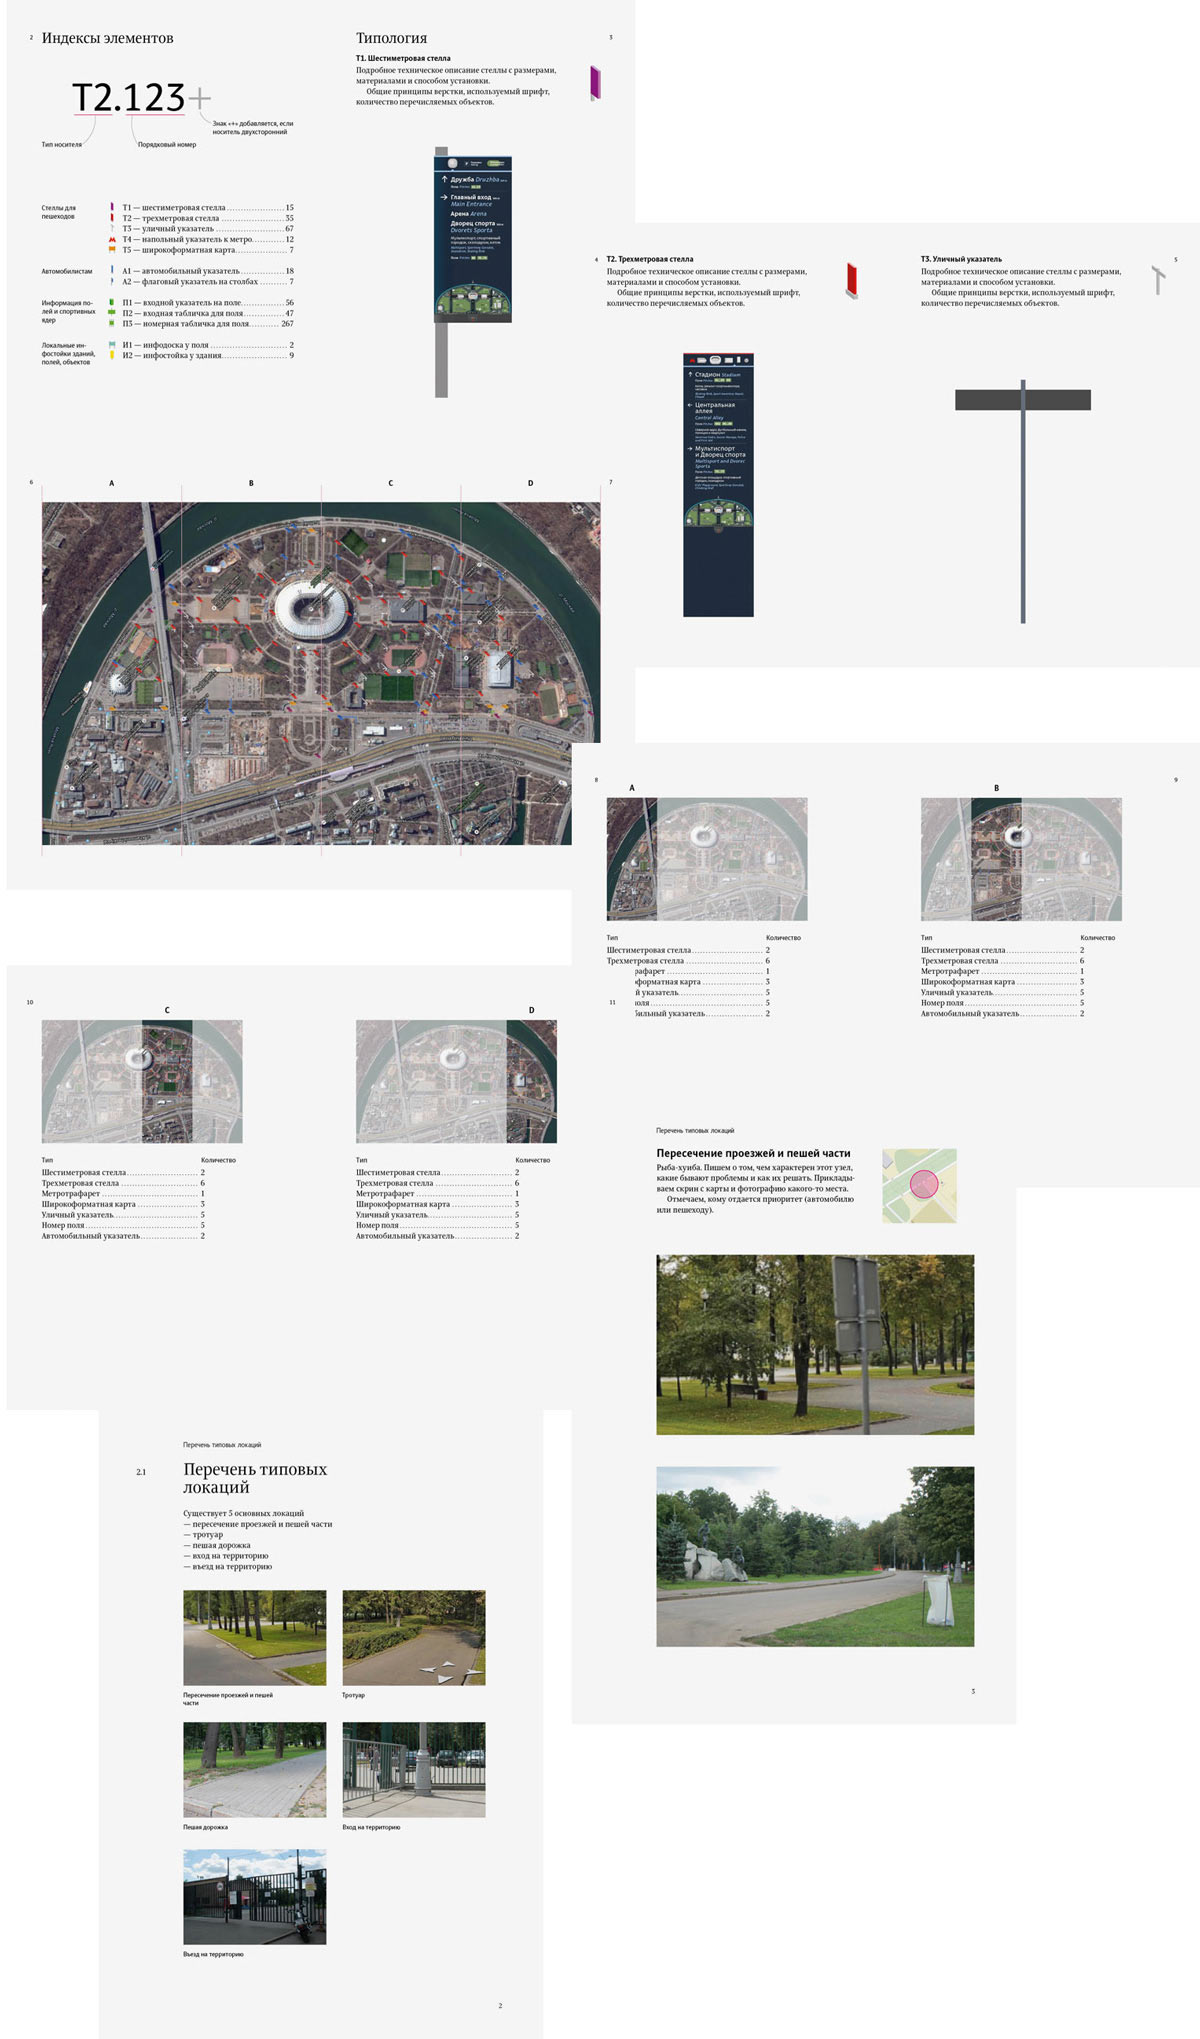
At a certain point there is so much information that it becomes obvious we need to organize it all in a single document. It’s also good for introducing new project members to the thought process. If something changes on one sign, it can potentially influence dozens others.
Gradually, the big picture starts to appear. Problems of individual media, layouts and designs start to become apparent. Clear rules and principles that can be used to typeset any media are born.
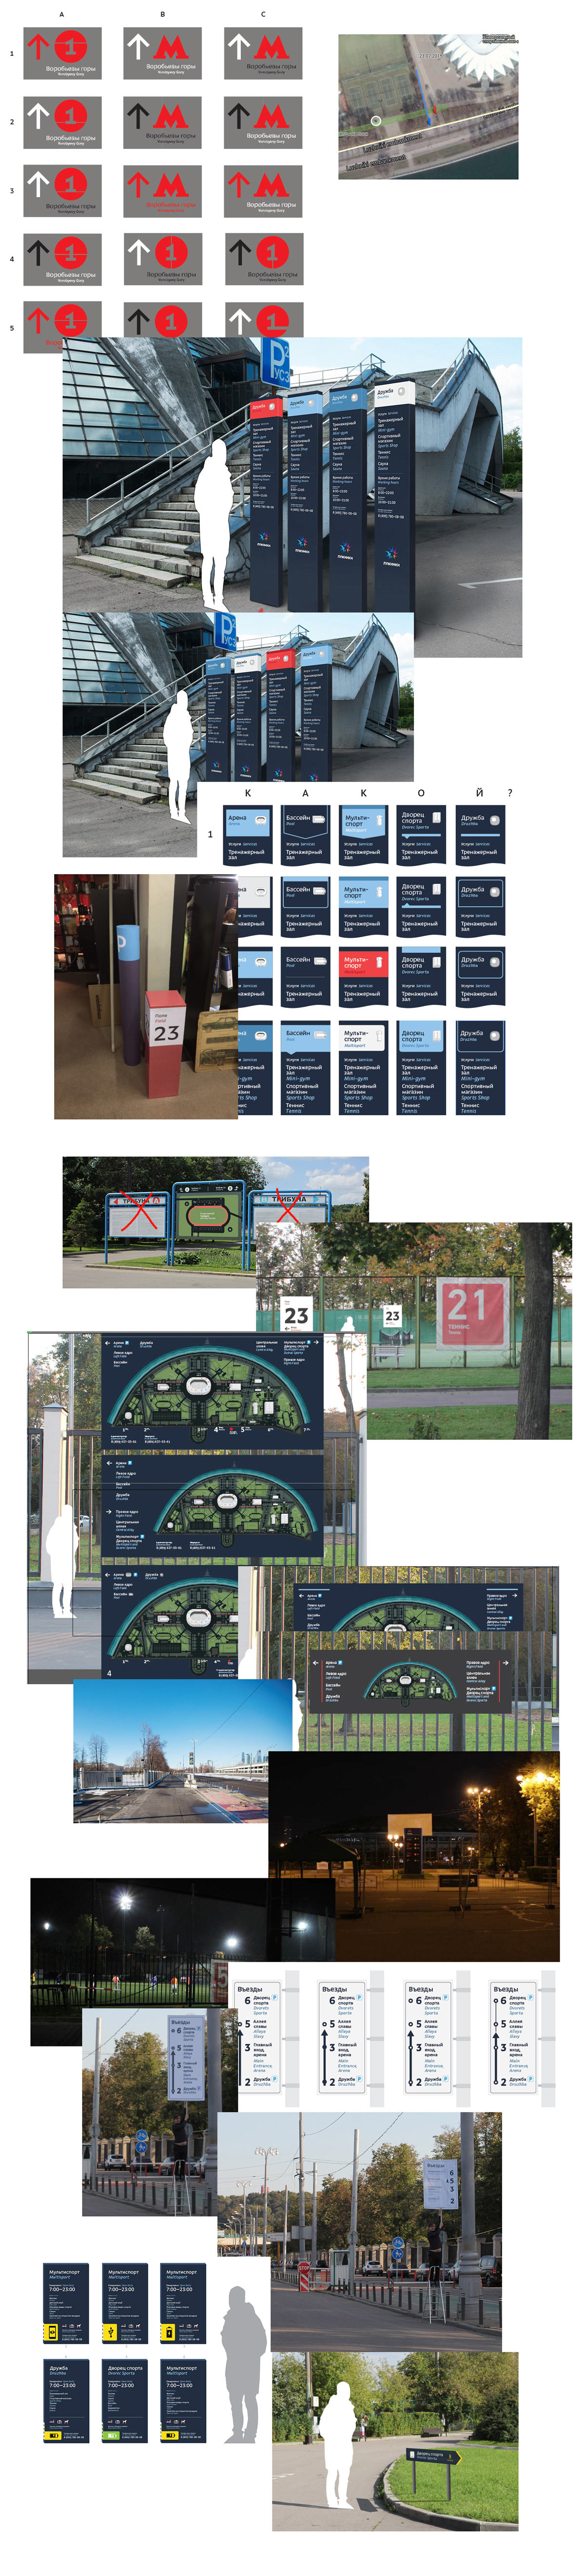
The map survives a dozen of surgical changes before taking the final shape. The main question is how to make understanding of such vast territory easier. Key buildings will become primary landmarks, seconded by fields and grounds.

Starting to work on the separate map of sports grounds that will be designed according to the approved style rules.
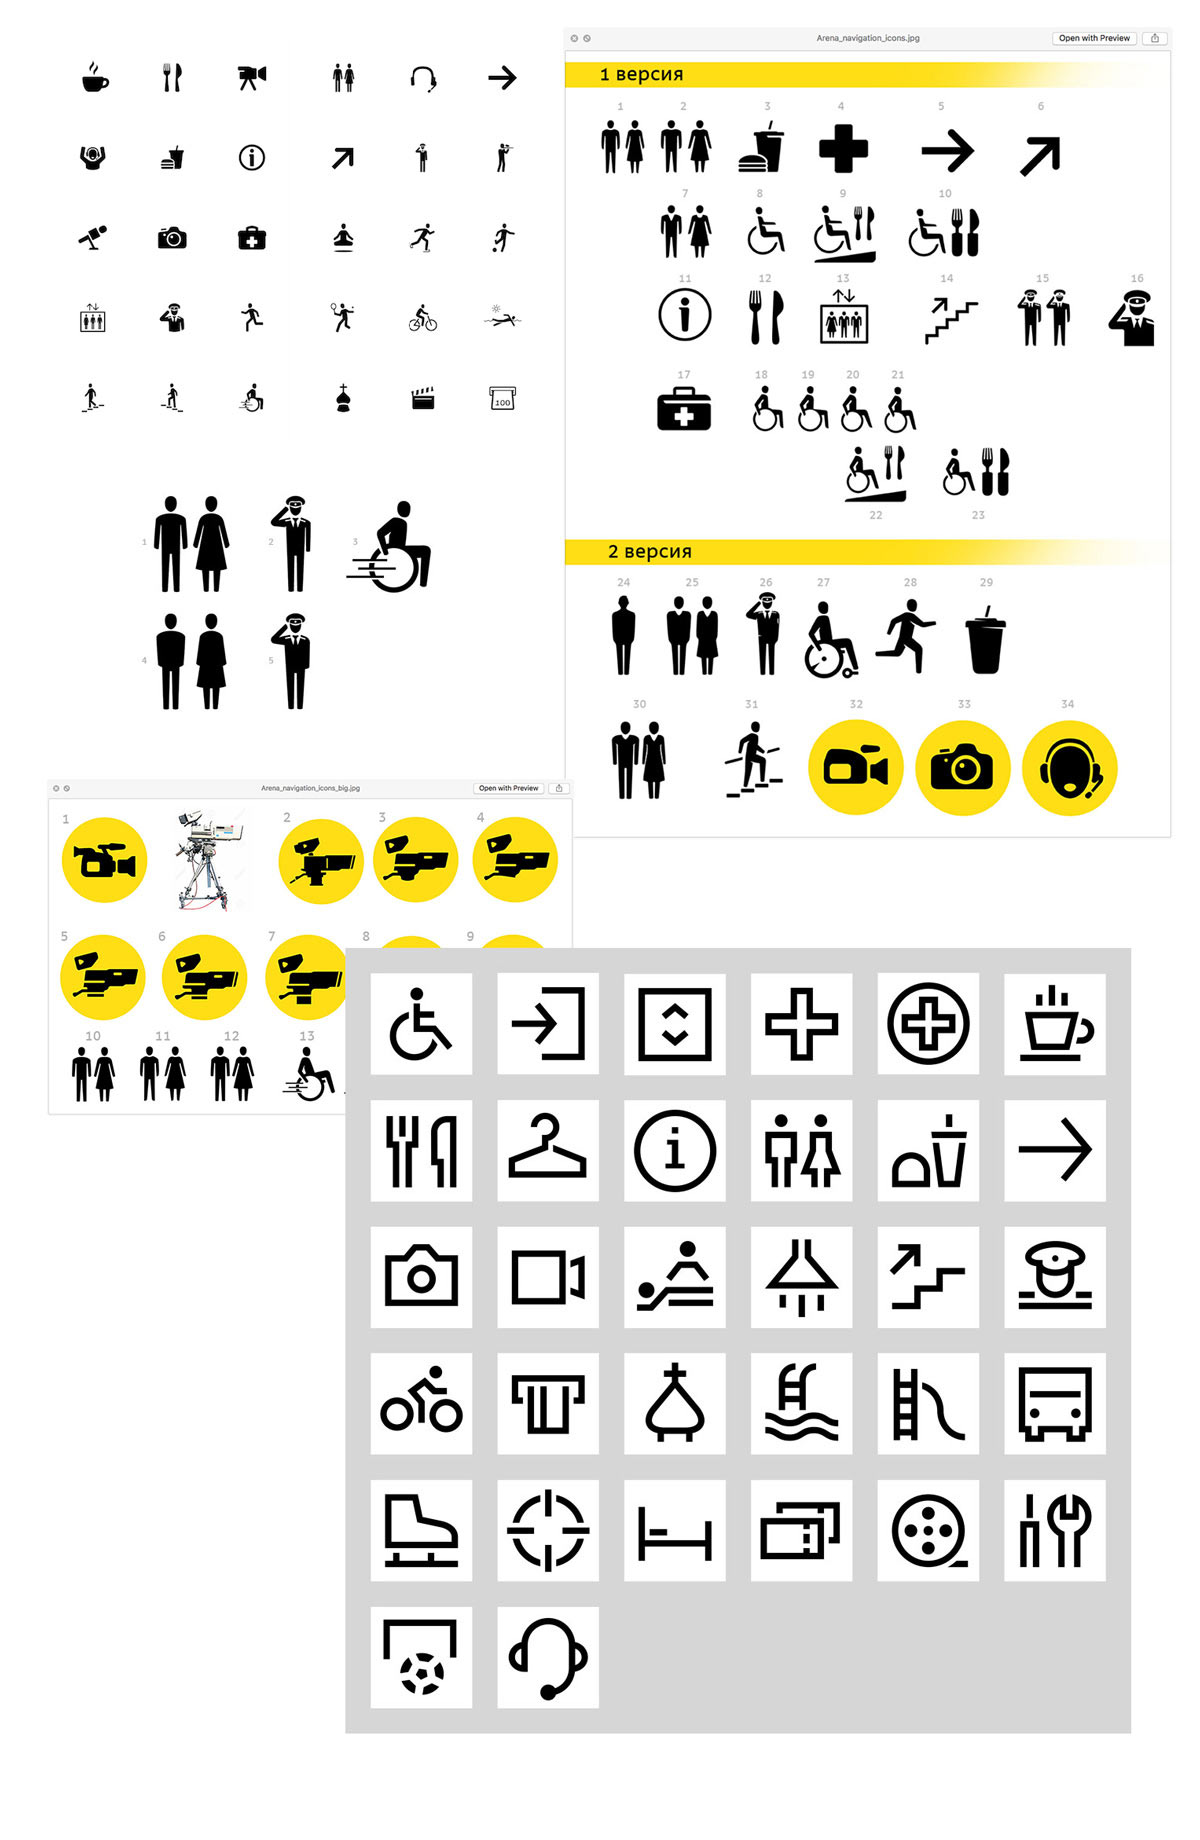
Searching for the style of the pictograms. Deciding to go with a geometric design as it doesn’t interfere with other graphic elements.
Information planning helps all project members understand each media type, its purpose, place in hierarchy and location. Creating a map showing the direction of sign placement. Gathering all media into a family and taking lots of reference photos.
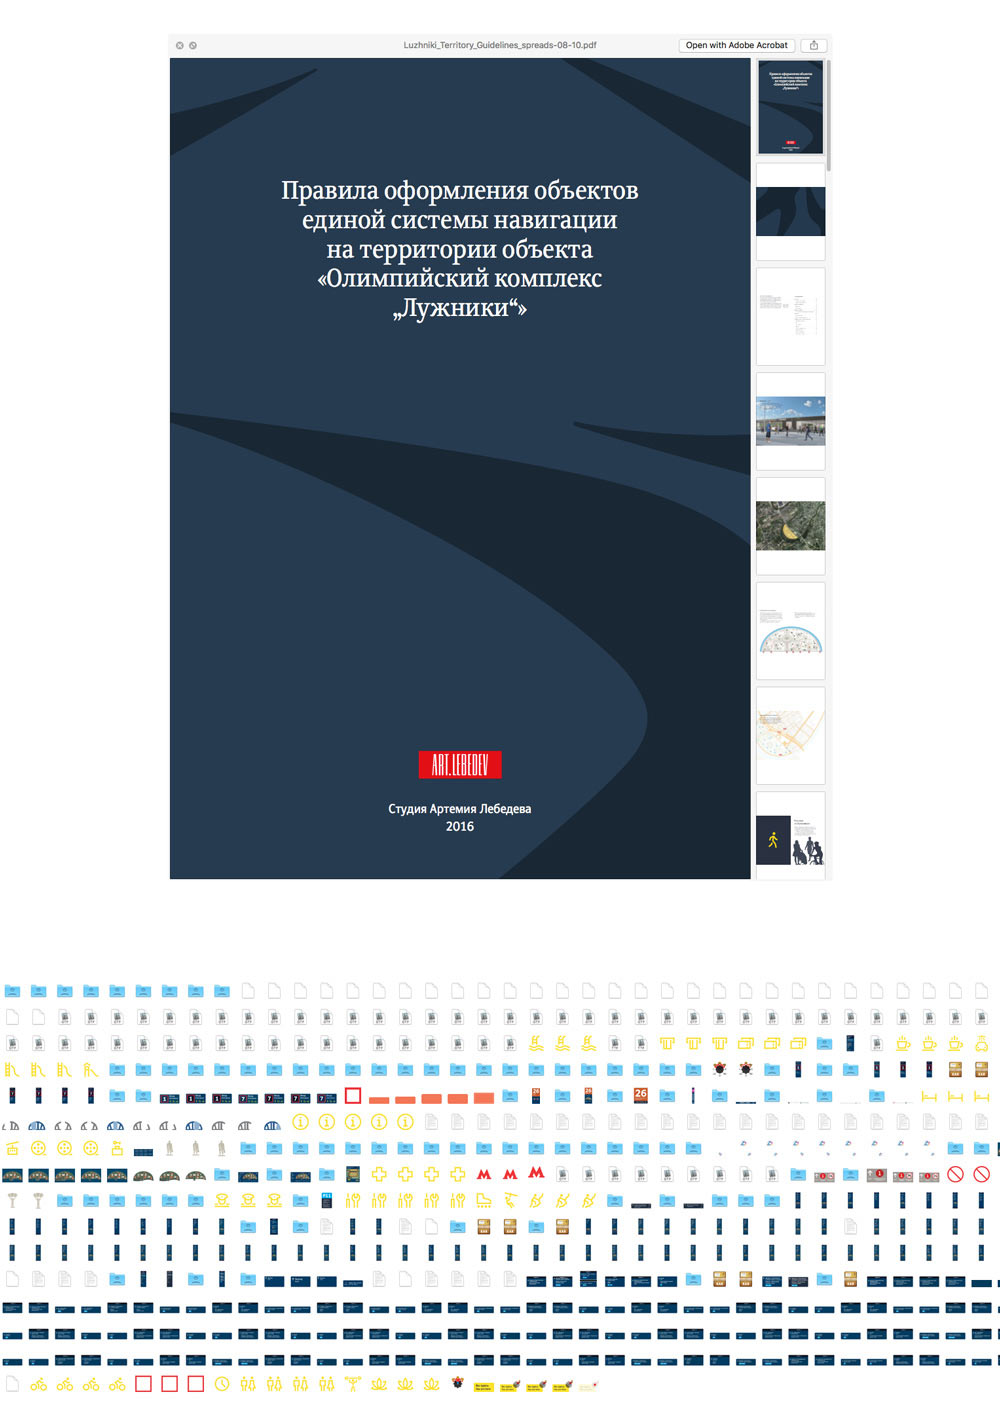
Assembling a detailed guide and sending the mock-ups for printing.